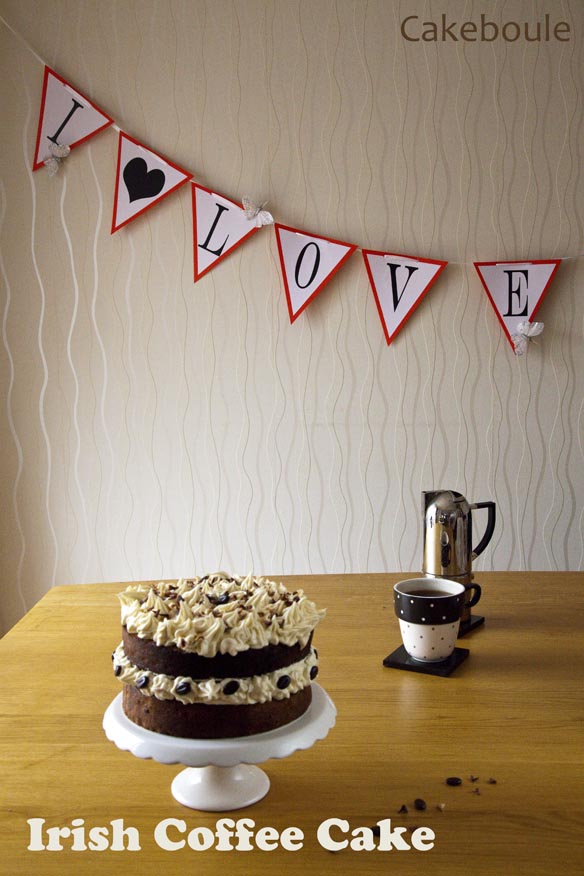
Irish Coffee Cake


Irish Coffee Cake 1

As I sat drinking a break time coffee wishing it was an Irish version, I realised that within my daylight hours I resided in a regimented World punctuated by bells, demands and deadlines. On top of that I’ve two self-inflicted days of fasting followed by five days of visiting the ‘Land of eat whatever I fancy’. Life felt too controlled, I longed to be free even if just for 10 minutes so I hatched a cunning lunch time plan that involved:

  1. Desertion
  2. Crime
  3. Smuggling contraband

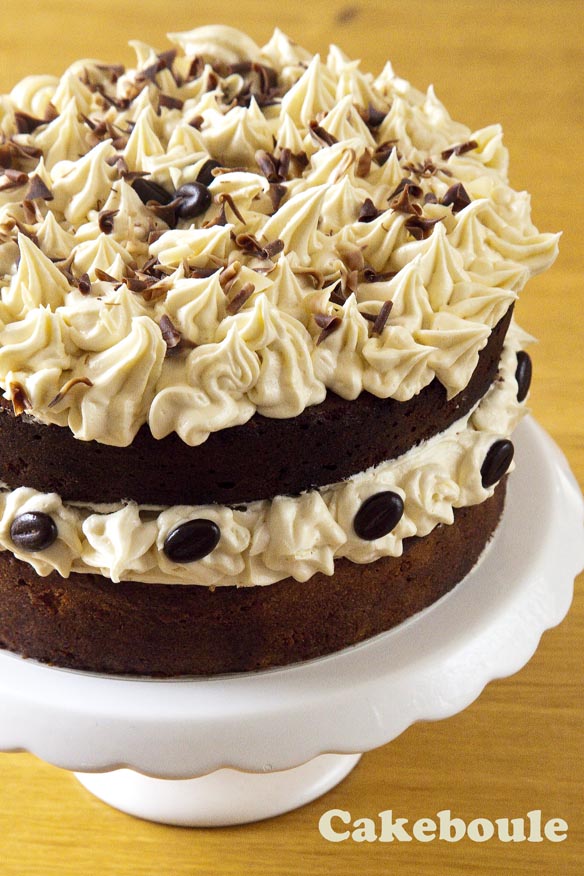
Irish Coffee Cake 4

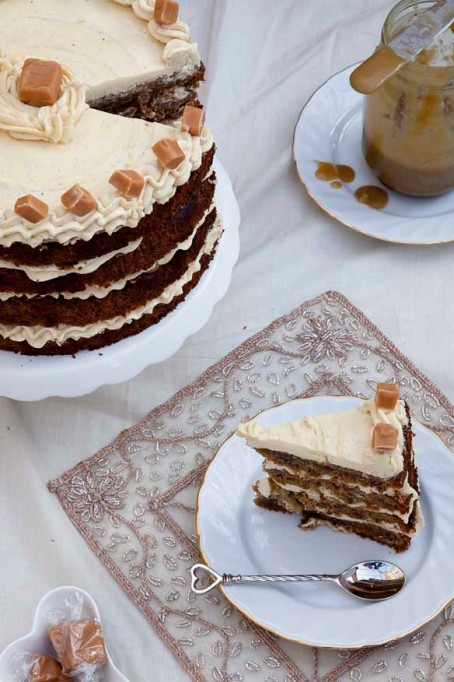
That does sound grand, but you’ll be glad to know that the contraband was in the form of Irish coffee cake which is the most acceptable way to bring alcohol into the workplace (ooh I’m so naughty).

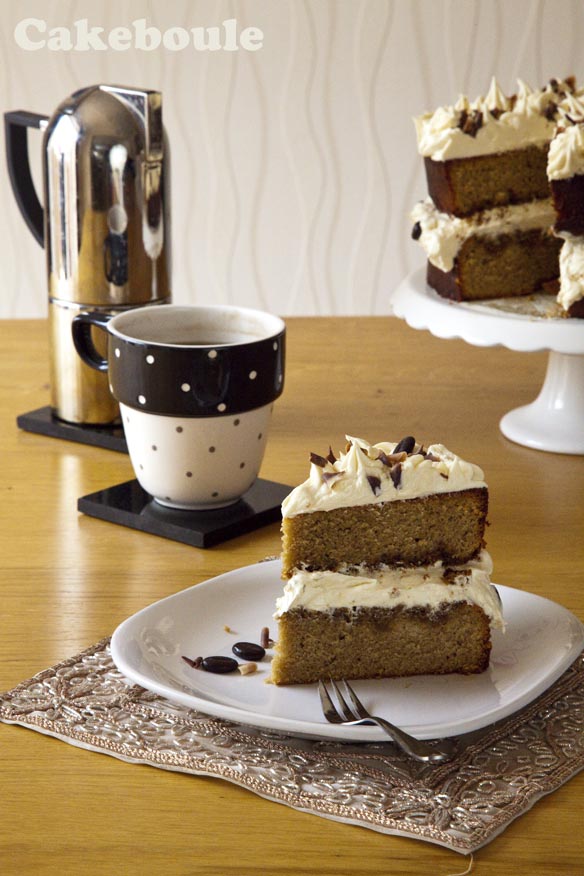
I tortured myself by making this cake on a fasting day; there was no licking of fingers, bowls or sneaky tasting therefore its success remained a mystery until the next day (I know I’m so hard-core in the self-torture department). When I took these pictures I had to wrap the cake slice up and yes that was very hard, I may have licked my computer screen just a little bit but don’t tell anyone.

Irish Coffee Cake 5

As the following lunch time at work arrived I threw off my goody two shoes veil to become a wicked woman about to take a walk on the dark side. I deserted my post, stole out of the confines and told myself I could just keep on walking if I didn’t feel any better after five minutes. Trees whispered, birds darted past and teenager’s feet stampeded for cover as I inadvertently walked past their secret cigarette lair all of which made me smile.

Irish Coffee Cake 2

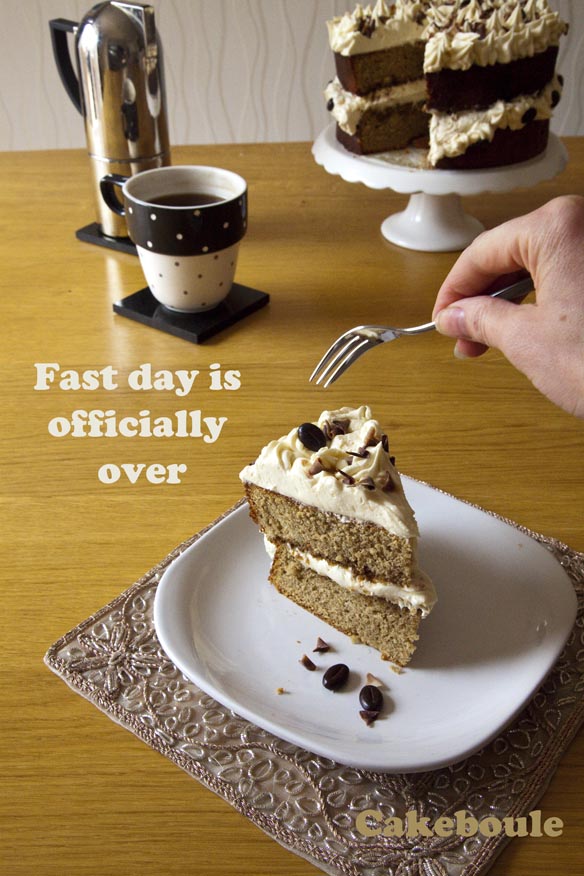
I felt so much better that I turned back towards the hallowed halls. Feeling stronger I dared myself to commit a detention nominated crime by entering a clearly marked exit door and skipped up the one way only stairs. There was one mission left to complete as I crept back into my office trying to hide the flush of fresh air which had reddened my face. I pulled out the contraband, my hands shook slightly as I opened the foil hiding a cake cocktail* of rich coffee with Baileys white chocolate buttercream. The time was now, fast day was over and there was only two more minutes of peace before the bells tolled so I took a big bite and realised there is truth within the words ‘naughty but nice’. The cake tasted exactly as I imagined it, I felt like I’d been transported to a glitzy restaurant where I indulged in an Irish coffee over lazy chatter.

It’s the little things in life that matter, you’ll never say on your death-bed ‘I’m so glad I spent all those hours at work’ instead why not take just 10 minutes for yourself and be a little bit naughty next lunch time. Your work will be better due to lower stress levels which results in an increase in effectiveness and cake always boosts happiness so what’s to lose?

*always eat cake responsibly

Traditionally, Irish coffee consists of hot coffee, Irish whiskey, and sugar stirred and topped with thick cream I have altered this idea to fit my cake vision (fresh cream wasn’t that practical for transporting) but feel free to adapt it anyway you wish.

Irish Coffee Cake 3

Irish Coffee Cake

Coffee Cake Ingredients

400g Salted Butter (room temperature)
400g Caster sugar
400g Self raising flour
8 eggs
5 tbsp espresso ground coffee (instant) mixed with 3 tbsp of boiling water

Instructions for Coffee Cake

1. Pre heat the oven to 160 / 140 fan or Gas 3
2. Line two deep 20cm tins (do use the right size tins to avoid disaster)
3. Beat the butter and sugar until fluffy (5 minutes as this is what makes the cake rise so beautifully to get the full big cake wow factor so not skimp this part. I also find that using very soft butter (but not liquid) helps the creaming process)
4. Add the eggs two at a time and sift quarter of the flour into the mixture and beat until combined
5. Repeat until all eggs and flour are used up
6. Add coffee extract and mix
7. Place the tins in the oven on the middle shelf for approx 50 minutes (all ovens vary so check your cake after 45 mins)
8. Cakes are ready when the skewer can be inserted into the cake and it come out clean.
9. Leave in the tin for 5-10 minutes before removing and placing on a wire rack to cool

White Chocolate and Baileys Buttercream Recipe

250g Salted Butter (room temperature)
500g Icing sugar
250g White chocolate melted
125ml Baileys (or cheaper alternative!)

White Chocolate and Baileys Buttercream Instructions

1. Beat together the butter and icing sugar until light and fluffy
2. Melt the chocolate ( I do mine in 10 second stints in the microwave)
3. Let the melted chocolate cool slightly (10 mins)
4. Pour the chocolate into the buttercream mixture in small quantities beating as you do until all the chocolate has been incorporated.
5. Add the baileys and beat to combine one last time

Assembly of the Cake

1. Level the cake that will be the bottom layer
2. Smother the bottom layer of cake in buttercream and add the top layer of cake
3. Smother the top of the cake in buttercream, make spiking patterns with a palette knife
4. Cover with grated chocolate

      5. Eat and enjoy your naughty contraband

Rolo Cupcake Challenge


I’ve been playing ‘hide and seek’ with cupcakes and it’s great fun! For the game to work I baked chocolate fudge cupcakes baked with rolo inside adorned with lashings of caramel buttercream.

Rolo Chocolate Cupcake

The Rolo hidden inside was what I hoped would make them a hide and seek cupcake. Although I froze the Rolos for 24 hours before hand in the hope they would remain somehow intact inside the cupcake sadly they didn’t but who cares when your welcomed by an explosion of moist fudgy chocolate cake.

Rolo Chocolate Cupcake

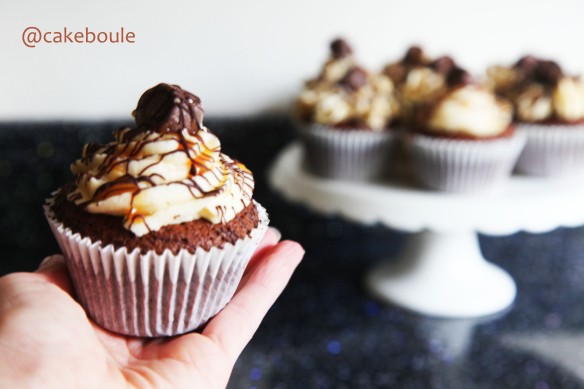
Homemade caramel was added to the buttercream and then drizzled with chocolate and caramel sauce and of course a Rolo completed the ensemble.

Rolo Chocolate Cupcake

Then the fun began! Yes fun! I had to write it twice to remind myself as life rang me the other day:

“Excuse me I’m looking for fun.”

Err, I don’t know where she’s gone?” I replied whilst looking up at the ceiling wondering if she was perhaps hanging off there with the remnants of mis-tossed pancake. “Perhaps she’s gone out with childhood wonder and laughter to play.”

“Hmmmm,” Life replied. “When she gets back get her to give me a call”

“Oh, OK.” I sang before a forceful slam reverberated in my ear drum which signalled the end of the conversation.

It was then I realised fun, wonder and laughter must have got bored waiting and gone off exploring without me. After sulking for a few days I had an ephinay of sorts. I could find fun again, yes it might take some work but I was sure I could track them all back down eventually. I set myself a challenge for three weeks as I believe things should and do always come in threes. This challenge would be based on me, us and them. For me: I wanted fun back even more than ‘twihards’ want Edward to show up in their living rooms so they can breathe ‘bite me you sexy beast’.

So I set about wondering and came up with this:

  1. Could I bake a Rolo inside a cupcake and it still be whole?
  2. Is it possible to play a game involving cupcakes?
  3. Could I find fun, bring her back and share her with my Husband and teenage son?

The answer was no, yes, yes in that order. The hide and seek cupcake game is easy with two variations:

  1. Hide cupcakes around the house whichever are not found are yours so hide well and give them a time limit to find them. Hmm about 10 seconds seems fair.
  2. Set a 007 challenge to overcome household obstacles in a race against the clock to find the cupcake in 70 seconds and return back to the starting point and sing the 007 theme tune. If you haven’t seen the coke zero version of 007 challenge you must watch it for inspiration! Think locked doors, chairs, discarded toys, rogue shoes and people getting in your way so pretty much like a normal day but with cake.

They both moaned initially when they realised they had to play a game to get their cupcake but when the countdown started they couldn’t stop their little faces lighting up. You see there is nothing loved more by men than a challenge which involving man V food.

From this challenge I learnt that fun is still out there and although admitedly she just pops in every now and then I aim that one day she might stay a bit longer until the day she moves right back. When you have fun you might notice that the other people in your life seem happier too and when you share the fun you get to witness that sparkle appear back in their eyes that you forgot existed. I’m not quite at the end of my three week challenge but it makes me wonder what else can I do for 21 days?

Try it out yourself: give yourself permission to go and play ‘hide and seek’ cupcakes and find out that fun might just be waiting patiently for you to invite her back in.

Ingredients for Chocolate Fudge Rolo Cupcakes

130g room temperature butter
3 fl oz / 95 ml of boiling water
3 tsps strong coffee granules
75g Self raising flour
75g plain flour
30g cocoa powder
¼ tsp bicarbonate of soda
300g caster sugar
2 eggs (room temperature)
5 tbsp sunflower oil

70ml sour cream

Chocolate Fudge Rolo Cake Instructions

  1. I froze my rolos for 24 hours (but up to you if you wish)
  2. Preheat the oven
  3. Line a muffin tin with liners (my mix made 13 cakes so I left one to bake later)
  4. Mix coffee with boiling water and add to a pan with butter and chocolate
  5. Heat the mixture gently to melt
  6. Sift all dry ingreadients into your mixer bowl
  7. In a bowl combine and mix eggs, oil and courcream
  8. Add both the egg and chocolate mixture to the dry ingreadients
  9. Mix on low (2 for Kitchen aid) until combined
  10. Add approx 2 tbsp of mixture (I use a cookie scoop)
  11. Add one rolo in the centre of each and top with further tbsp. to cover the rolo
  12. Bake in the oven for 20-25 mins until the top springs back when touched or cake tester is clean
  13. Leave to cool in the tin

Caramel Buttercream Ingredients

125g caster sugar
4 tbsp of water
80ml double cream
½ tsp of salt (optional but does bring out the flavour)
1 tsp of vanilla essence
160g butter
200g icing sugar
2-3 tbsp of milk (if needed to make the buttercream lighter for piping)

Caramel Buttercream Instructions

  1. Heat the sugar and water in a pan until the sugar has disoloved
  2. Continue cooking until it turns a golden colour and thickens slightly
  3. Remove from heat and add cream be aware it may splutter so be careful
  4. Stir and leave to cool
  5. Cream butter and icing sugar for 5-6 mins (Kitchenaid gradually increase to speed 6 once combined)
  6. Add caramel and beat until combined (reserve some caramel to drizzle over your cupcakes)

To Assemble

Pipe or cover your cupcakes with lashing of caramel buttercream, drizzle melted chocolate and caramel over the top and adorn with a Rolo. Then go and hide them, trash the house and set the timer 🙂

Chocolate Orange Marble Cake


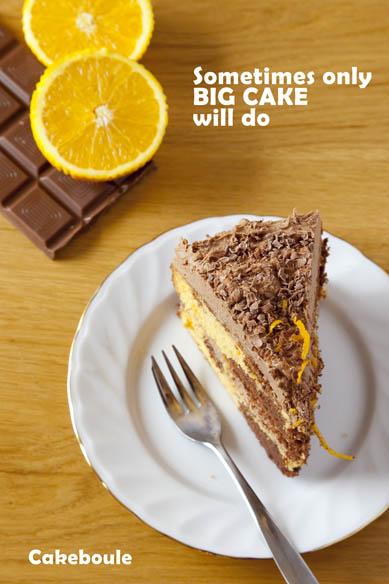
Sometimes you want cake and you want it right now! Yes a great big wedge of cake on your plate with a fork in your hand ready to devour it.  I adore all the beautiful mini treats and cakes like Sarah from Maison Cupcakes makes there are those times where large is the only thing that will feed your craving. This cake was for one of those times.

Chocolate Orange Marble Cake

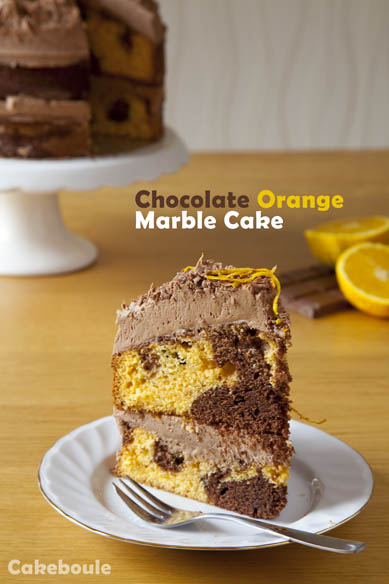
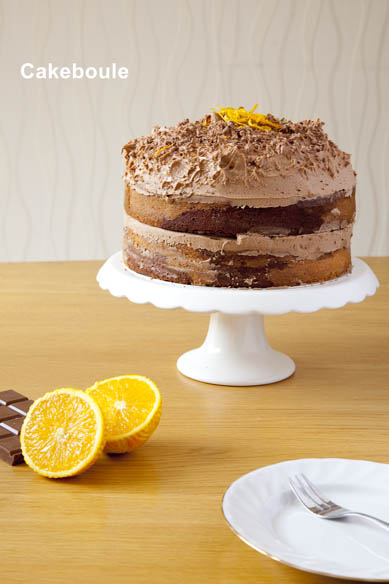
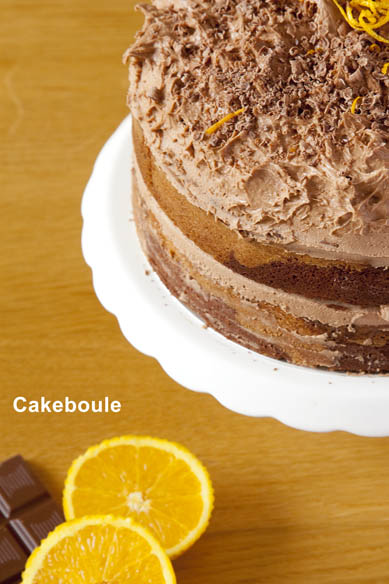
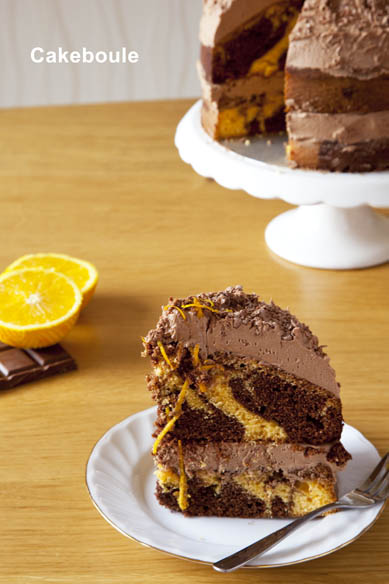
Beautiful swirls of chocolate and orange cake smothered in a chocolate orange buttercream and topped with grated chocolate orange and the best bit is it is messy so perfect for finger licking.

Chocolate Orange Cake

This is pay-day cake 6 on the list do stop by my recipe page to see the others – as always think large as there are no small pay-day cakes in my collection.

Chocolate Orange Marble Cake

To all my followers I wanted to let you know the Cakeboule is going offline for the Summer to recharge the baking batteries. So I’ll leave you with this massive slice of cake and as Arnie says ‘I’ll be back’.

Chocolate Orange Marble Cake

Have a great Summer everyone and I hope the sun shines wherever you are. Go and make happy memories as that is what I intend to do. Ta Ta For Now.

Chocolate Orange Marble Cake

Chocolate Orange Marble Cake Ingredients

400g soft butter
400g caster sugar
400g self raising flour
8 eggs (must be fresh)
50g cocoa powder
1 tbsp milk
1.5 tsp orange extract
2 oranges (grated rind only)

Chocolate Orange Marble Cake Instructions

1. Preheat the oven to 160 / 140 fan or Gas 3
2. Line two deep 20cm tins (do use the right size tins to avoid disaster)
3. Beat the butter and sugar until fluffy (5 minutes as this is what makes the cake rise so beautifully to get the full big cake wow factor so not skimp this part. I also find that using very soft butter (but not liquid) helps the creaming process)
4. Add the eggs two at a time and sift quarter of the flour into the mixture and beat until combined
5. Repeat until all eggs and flour are used up
6. Split the mixture into two bowls equally (I weigh mine to be sure)
7. Add 50g of cocoa and 1 tbsp of milk to one portion and mix to combine
8. Add orange extract and rind to the other portion and mix to combine – I also added a small bit of orange colouring to make the orange colour stand out more but this optional)
9. Take two big spoons and alternate dollops of chocolate and orange mixture into both tins trying to make sure you have equals amounts (you can weigh your portions to be sure if you wish)
10. Use a knife or skewer and run it through the mixture to create swirly patterns  do not over do this or you will not end up with the big swirls but a combined mess!
11. Place the tins in the oven on the middle shelf for approx 50 minutes (all ovens vary so check your cake after 45 mins)
12. Cakes are ready when the skewer can be inserted into the cake and it come out clean.

Chocolate Orange Buttercream

250g soft butter
500g icing sugar
100g melted plain chocolate
1.5 tsp orange extract

Instructions

1. Beat together the butter and icing sugar until light and fluffy
2. Melt the chocolate
3. Let the melted chocolate cool slightly (10 mins)
4. Pour the chocolate into the buttercream mixture in small quantities beating as you do until all the chocolate has been incorporated.
5. Add the orange extract and beat to combine one last time

Assembly of the Cake

1. Level the cake that will be the bottom layer
2. Smother in buttercream and add the top layer
3. Smother the top in buttercream and make spiking patterns with a pallete knife
4. Cover with grated chocolate orange

Devour! See you soon 🙂

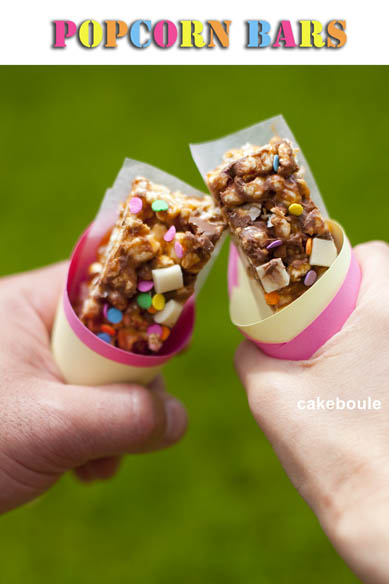
Gooey Popcorn Bars (Gluten Free)


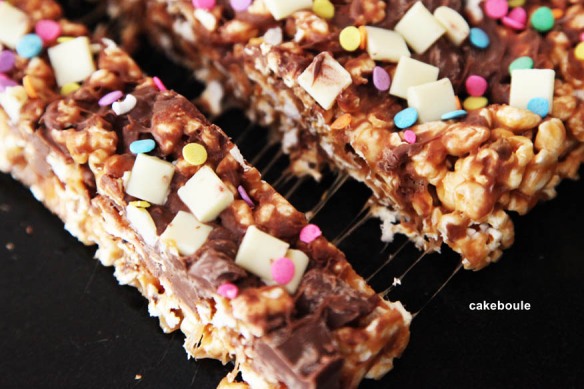
Say sod it and call a movie night with a gooey, toffee, marshmallow and chocolate covered popcorn bar in hand.  Seek pleasure watching the silky caramel strands form as you pull the bars apart. This is a quick tray bake but with no baking (bonus!) but guaranteed to brighten up the dull and miserable summer we are having and great for big kids parties.

Popcorn Bars

I have never made popcorn before and I was more than a little bit excited when I saw fluffy white clouds pinging around my saucepan. Truthfully I was that excited I had to call the entire family to watch a miracle in the pan. If you have never made popcorn before then you truly have not lived.

Popcorn Bars

This recipe is an adaptation of my toffee crispie treats. After spending days discussing films set in New York with a friend I am now eager to sit down with one of these next week watching chick flicks to my hearts content so go on let it rain see if I care.

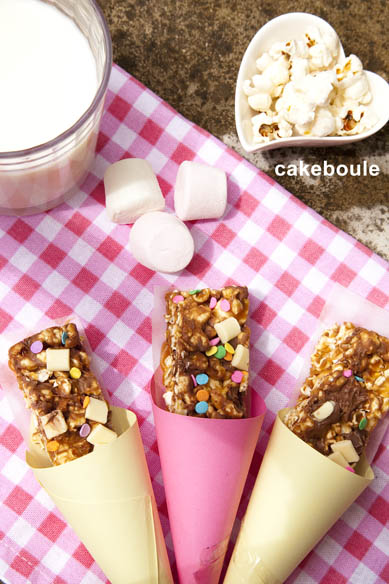
Popcorn bars

Of course you can top them with anything you like as this is an easily adapted recipe. I like the idea of twix or malteaser topppings or give it blast with some popping candy a la Heston style.

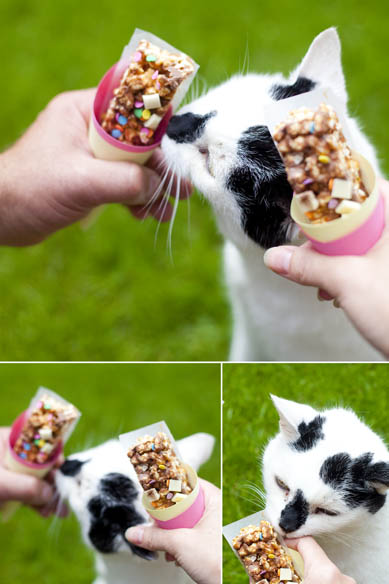
Popcorn BarsThe cat loved them too as he sauntered into the photograph, sniffed and then bit my finger!

Popcorn Bars

Enjoy!

Ingredients

250g toffees (Sainsbury’s Basics)
50g butter (room temperature)
3 tbsp of milk
1 tbsp of golden syrup
115g marshmallows
80g popped popcorn

Instructions

1. Brush your a 20cm square tin (or other suitable) with baking spray or oil and wipe with a kitchen towel to make sure it is not too oily.
2. Add toffee, golden syrup, butter and milk into a saucepan and heat gently.  Stir the mixture as it heats until all the ingredients have melted.
3. Add marshmallows and stir until they have melted.
4. Add the popcorn to the pan and make sure it is well coated with the toffee mixture
5. Pour quickly into prepared tin and flatten it down well with the back of a wet wooden spoon.  Add whatever toppings you fancy by pushing them down gently into the mixture so they set into to it.
6. Leave to set (about an hour) and cut into sizes required and eat (one is not enough) they will keep for about 5 days if they get that long in an air tight container. Do not place in the fridge or the pocorn will go soft.

Up next – Pay Day Cake 6 time!!!! (see previous here)

I am entering this into the Teatime treat competition hosted by the talented Karen from Lavender and Lovage and the theme this month is cake stall cakes and I think this will fit quite nicely.

Take a break from the grey and bake


2012 is officially the colour of Grey. Floods and continual grey skies create the perfect reading opportunity for stuck indoors women in their millions to one by one drop like flies and seek comfort in the arms of the infamous Mr Grey. I can’t go anywhere without hearing constantly  ‘I’m spending the night with Christian’, ‘I got the last copy whoop whoop’ and my personal favourite ‘I wrestled the woman in Tesco’s for it and won’    Honestly all this grey has turned my female social media friends into whipping, drooling and silk scarf frenzied sex kittens.  As with all good things Ladies you have to take a break some time or bits start to fall off so walk away from Grey and Greyer, give your racing hearts and imaginations a rest. If you really have a need to tie yourself to things that’s fine just tie yourself to the food mixer or oven door and get it over with. You all have to eat sometime so join me in my top ten round-up of bakes over the year and I hear the naughty chocolate fudge sauce is good if that’s your sort of thing.

Number One – Strawberry Pimms Cake Pop Truffles

Pimms Cake Pops / Truffles

Pimms Cake Pops / Truffles

This is where it all began and I really enjoyed making these and I think at the time that was probably because at the beginning it did not matter if the cake I baked was wonky or imperfect as it got smooshed up with various fillings to create a mouthful of heaven. If you roll cake balls in meringue before dipping them in chocolate you have an Eton mess variation and perfect for when you need something ball shaped that isn’t salty.

Two – The mis-piped naughty meringue snowmen

My piping disaster (keep on reading to see more!)

See these were a bit of a baking disaster and most of you who have spoken to me over the year will have chuckled at these.  I was not the best at piping back then and figured that the little snowmen rather naughty looking tails would go down in the oven.  Hmmm I guess I was wrong with that one however they will star on this year’s Christmas cards!

Three – Pay Day Cakes  ‘The Macchiato’

The ‘Pay Day Cake’ idea began in March with the premise that you do not scrimp on ingredients but bake a cake that has four layers in a celebration for each week worked. This one is the Machiatto based on the coffee, vanilla and caramel drink at Starbucks. After this followed Sticky Toffee Pudding Cake, The Turkish Temptress and White Chocolate Mousse cake with a secret berry blast that will keep your admirers wondering how you did it? The final cake so far is triple chocolate mousse cake with chocolate covered strawberries – do I pick the longest names or what? What next a fifty shades of grey cake how would that work?

Sticky Toffee Cake

 FourVanilla Essence (DIY)

Homemade Vanilla Essence

A great gift to you or a baking friend – why not make a few at the same time.

This has to be on the list as it is the one ingredient I use in all of my bakes – simple to make, full of flavour and saves £££ and if you add lemonade to a shot of it you have a vanilla vodka spritzer – love the dual purpose nature! Comes with a humourous tale of baking meltdowns.

FiveMojito inspired Polenta Cake

Mojito polenta cake

Polenta cake – this is a dairy and gluten-free option you know you will be safe most places you need to take cake. Moist, tangy, easy to make and very portable with no fussy icing to worry about – bake it and job done and if you like it try the lemon and berry version.

SixJammie Dodger CheesecakesJammie Dodger Cheesecake

Perfect little pick me up with a creamy cheesecake, jamminess and biscuit all rolled into one. You would think a soft biscuit base wouldn’t work but it really does and cute too.  Comes with a tale about synchronicity.

Seven – Raspberry Bakewell Cake

Raspberry Bakewell Cake

Another dairy and gluten free cake (but you would never know) that is just as good as a Bakewell tart but far less hassle. I have a love of simple loaf cakes and my top tip is buy cake liners for your tins to save time from fiddly lining with baking paper. Why not try out Left over Banana, honeycomb and chocolate or Lemon and Blueberry.

EightNaughty Chocolate Fudge Sauce

Just perfect for pouring over ice-cream sundaes, traybakes, puddings or whatever else takes your fancy but I don’t want to know about it thank you very much. Keeps in a jar in the fridge and then just heat and pour over your choosen dessert or body parts includes cute labels as well so you can give it as a gift but please don’t tie the labels to body parts as that would just be wrong.

Nine – Palmiers, Berries and Macaron Ice-Cream

Juicy berry Palmiers with ice-cream oozing with berries and crushed macarons which is the perfect use for them if they have gone hideously wrong as mine do. Accompanied by a funny story of blackberry picking disasters and walking like John Wayne but without needing Mr Grey to do that for me.

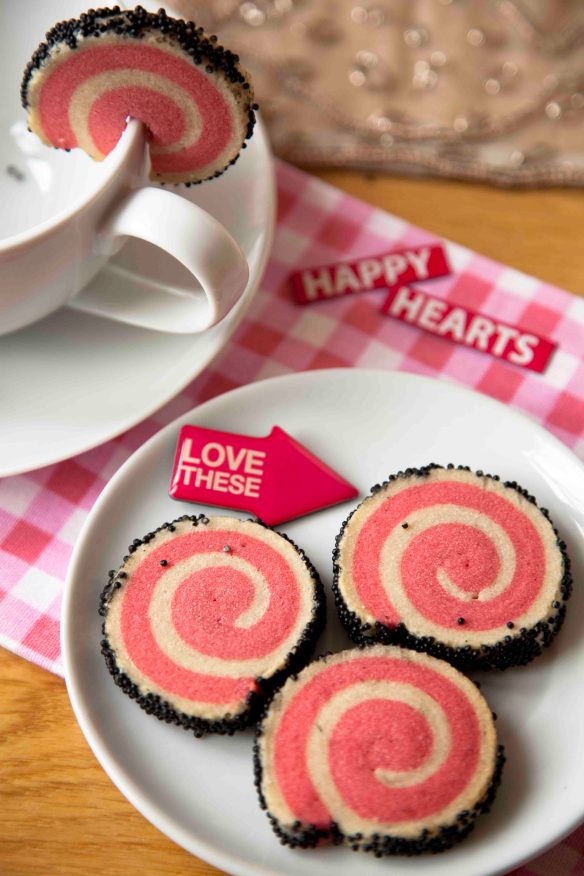
TenSprinkle Spiral Cookies

Made for Valentines day with love and such fun to hang on the side of cups (if you cleverly cut them as soon as you take them out of the oven before they begin to harden. Any colour or flavour would work with these and they freeze well so you can make ahead and bake when needed. I keep a frozen cookie roll in my freezer which also serves as a back up weapon to ward off any intruders. Please don’t get any ideas of putting cookie rolls anywhere they shouldn’t go as that would be a hard one to explain at the NHS walk in centre.

Hope you enjoyed my round-up and here’s to more bakes ahead. As for Mr Gey I’m avoiding you for the moment as my kitchen is my own version of a ‘red room of pain’ where I’m often found weeping in dispair, involunatrily tied up in piping bags or yelling with sheer baked ecstacy all without having read the trilogy.  Apparently there is expected to be a 50 shades baby boom which will lead to some interesting questions for those parents in the next decade.  I can imagine their conversations now, ‘Mum, how was I concieved?’ and the reply ‘Well Your Dad tied me to the Kitchenaid and I spanked him with the beater attachment whilst balancing a cupcake on my head’ oh dear Mr Grey what you got us into?

Thanks to all who have supported me, commented, followed and the extra pounds my close friends and family have endured so far in my little journey. What was your favourite?

Love to all x Up next gooey popcorn bars traybake

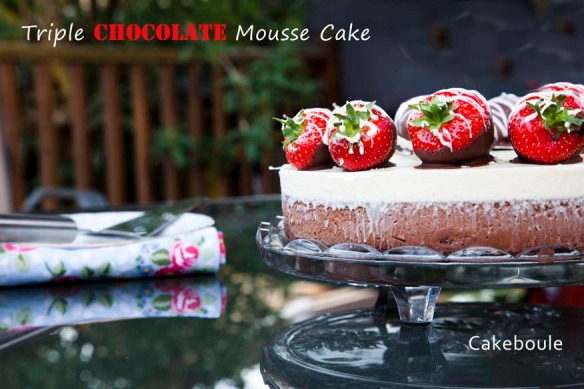
Triple Chocolate Mousse Cake with Chocolate Covered Strawberries


Triple Chocolate Mousse Cake

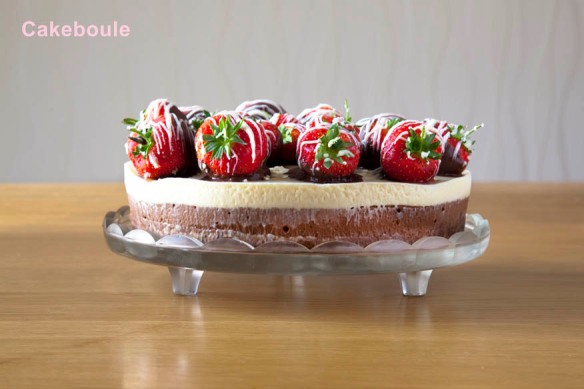
Introducing Pay Day Cake 5 the triple chocolate mousse cake lovingly covered with chocolate covered strawberries.  This is probably not an eat in ‘best company’ cake as I find its destruction is accompanied by a loud drawn out satisfied sigh which you won’t realise you’ve made until you feel the heat of others eyes boring into you from all directions (they’re just jealous). Chocloate covered strawberriesIf you are kind enough to make this triple chocolate mousse cake for a special occasion you will find there are few people who can resist the sweet aroma of this celebration cake. Triple Chocolate Mousse Cake

A garden decorated with sparkly disco balls, candles and freshly made  pink lemonade jar cocktails greeted my Best Friend for her Birthday.  I am now known as the ‘Jar Lady’ which is a step up from the cat lady but only slightly. We had a great evening full of laughs, food and an impromptu random birthday dance that even the village people would have been proud of.

Triple CHoclate Mousse

As it turned dark I choose a song on my MP3 player but it randomly played its own choice of ‘It’s a beautiful day’ by U2 which I didn’t even know I had but it summed up the evening.  This was topped off with fairly lights that are not designed to twinkle but decided they would for ‘one night only’ in time with the beat for the entire song now how bizarre is that! I have no idea why these odd things keep happening but whoever is watching over me (maybe it’s the man in the photo that was taken of me on my recent holiday post) they obviously saw me having the time of my life and decided to add a bit of magic to an evening with friends that I will truly never forget.

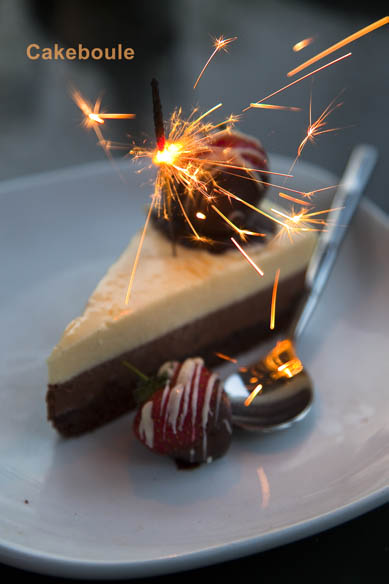
You see the more you watch and pay attention to the World the more messages it gives you. Like it’s OK to have forgotten the candles when you find sparklers in the drawer you forgot you had but they were so much better.

Triple Chocolate Mousse

The laws of synchronicity are at work right now as somehow it decided you would stumble upon my little post which means you were destined to be here.  No matter how many years later you find this post share a little bit of mousse magic by passing it on to everyone you know and keep the Universe happy.

P.s the moment I pressed save my computer shut it self down of its own accord – this was to tell me to shut up I think – look Frugal Feeding I made it under 500 words whoo hoo albeit without the recipe 🙂

Day 1 – Bake the Cake layer (as in previous mousse cake post this is the second half of the layer)

Ingredients for Base Genesoise Cake Layer
75g plain flour
50g cocoa (good quality) or replace 50g flour for a plain base.
4 eggs at room temperature
125g caster sugar
30g melted butter (left to cool)

Instructions
1. Grease and lightly flour a 20cm round tin
2. Melt the butter in a pan and leave to cool
3. Beat the eggs and suga at a medium speed for 12 minutes until when you lift the whisk attachment out of the mixture falls in ribbons and pools on top of the mixture without disappearing straight away.
4. Sieve the flour and cocoa over the mixture
5. Fold in gently until combined
6. Drizzle in the butter and fold in – do not over fold or the cake will become tough – so when you think it is is nearly there and there are no huge lumps be brave and put it in the oven.
7. Bake in the oven on the middle shelf for 30 minutes
8. Leave to cool for 10 minutes before removing from tin and placing on a wire rack
9. Add 2 tablespoons of raspberry liqueur (Chrombards, Framboise) to 2 tablespoons of caster sugar – heat gently until the sugar is dissolved. Brush liberally over the cake to moisten it. If you prefer you can use a simple sugar syrup which is equal parts sugar to water and you can add a flavouring or substitute with another spirit.
10. Divide the cake into two layers using a long serrated knife.
11. Wrap the cakes in greaseproof paper once cool and wrap in foil. Either store in an airtight container until you need it or put it in the freezer.

Day 2 – Chocolate Mousse (based on Michael Roux – Desserts)

Ingredients
150g chocolate finely chopped
2 sheets leaf gelatin
50ml milk
1 1/2 tsp of liquid glucose
2 egg yolks
150ml whipping cream
30g icing sugar

Instructions

1. Set a bowl over a saucepan which is filled to one-third with water. To the bowl add the chopped white chocolate. Using a low heat wait until the chocolate is half melted and remove from the heat. The chocolate will melt by itself and this reduces the risk of it burning.
2. Soak the gelatin in cold water for 5 minutes. (optional)
3. Heat the milk in small saucepan until boiling point and then remove from the heat.
Squeeze out the water from the gelatin and add it to the milk. Stir gently until the gelatin has dissolved (optional)
4. In another bowl add the egg yolks, liquid glucose and 3 tbsp of warm water. Mix together until combined.
5. Whip the cream and icing sugar in another bowl until the cream leaves ribbon trails when you take the whisk out of the mixture.
6. Pour the hot milk over the white chocolate and gently mix with a whisk until there are no lumps and is it a smooth consistency.
7. Add the egg mixture to the chocolate and mix gently until combined.
8. Using a spatula fold in the cream gently until fully combined.

Assembly (phase 1)

1. Get your original tin that you baked your cake in – place the cake in the bottom (tip: use the bottom layer of the cake as the top layer will be smaller as cakes shrink as they cook). You can use the bottom layer for another cake.
2. Pour the mousse into the tin.
3. Place the tin in the freezer overnight for best results.

Day 3 – White Chocolate Mousse (based on Michael Roux – Desserts)

As above but replace the dark chocolate with white.
Take the cake from the freezer and pour white mousse mixture onto the cake and return to the freezer overnight or leave in the fridge overnight to set if serving the next day. The cake will last for at least one month in the freezer.

Day 4 – Strawberries & Eating!

1. Make Chocolate covered strawberries by melting 100g of chocolate in a bowl and dip the strawberries liberally into it.  Let the chocolate drip off the excess before placing on a sheet of greaseproof paper to set.  Melt some white chocolate (approx 50g) and drizzle over the top on the strawberries once set.  Either do this with the back of a spoon or  used a mini squeeze bottle.

2. To remove the mousse cake from the tin use a hair dryer or blowtorch to gently heat the tin so that it removes easily. Add the strawberries on top when you are ready to serve or the juices will escape and bleed into the cake.  Slice into portions with a warm knife (cleaning after each slice).

Enjoy!

Tales, Gales and Triple Chocolate Mocha Brownies from a VW Camper


I’m finally back safely inside four walls from a wet and windy week in Devon in our newly restored 1979 Moonraker VW Campervan. This has been my childhood dream which has taken my husband nearly two years of really hard work to make it reality. Join me in my little journey with some funny moments through instagram as well as a quick recipe for triple chocate mocha brownies which I just had to bake when I was finally reunited with my oven (see if you too are a baking addict here).

Triple Chocolate Mocha Brownies

Many of you have met May (the VW Camper) before but here she is:

VW Camper 1979

May’s first trip

The week before the holiday welcomed glorious sunshine which was hotter than anywhere in Europe ensuring that Britain was finally baring its brigade of white legs. Of course in true British style a double bank holiday to celebrate the Queens Diamond Jubilee and a coinciding half term from school meant that the weather was always destined to take a turn for the worst.

1979 VW Moonraker

Even the rice pops matched!

The first disaster was the brand new fridge (but brought a year ago) which stopped working the night before and filled the van with nasty gases meaning my military precision meal plan was out the window and I was forced to live camping life on the edge (well with ice blocks anyway).

Instagram image

We finally set off and crawled our way to Devon with my Husband’s best bromance friend (I’ll call him Ronald) following behind in his ‘Herbie’ style Beetle which caused a lot of amusement in the Services.  The duo had planned secret signals to communicate with each other on the way down in SAS style (aka Sad and Stupid!).

VW Campervan Herbie Beetle

The troublesome duo

After a 5 hour stop start journey we found another member of the VW family next to us and luckily we got the tent up just before…

Raining

But even with the rain my newly purchased rainbow bunting seemed to make it all a little bit brighter (how stupid was I?)

Rainbow Bunting

A wet campsite

The Twilight Zone

Ron has to lose some weight so as well as starving him for the week (I don’t make as much food as he gets at home) we were making him go for walks too. I like to think of it as VW inspired weight loss holiday camp (people pay loads of money for those don’t they?).  We came across a set of ‘slippery when wet’ steps (220 of them) on our hike wn I suddenly had the urge to stop and turn around. My husband took a photo of me and when we looked back at the photograph there was a rather spooky ‘thing’ standing next to me.  At first I thought it was a mirror image of me but from looking at the actual picture it isn’t.  It does look rather like a man stood next to me and there was nobody there at the time.  This image is only one taken of my computer screen but you get the idea!.  Whatever it is the trail goes right in front of me and certainly makes me wonder what’s out there?

Spooky image

What is it it?????

The ‘Wee Wee’ shuffle

After all the rain I was soaked through and in need of a shower so I plodded off. One of the things I hate about camping is the journey to the toilet block. When you are at home you will never need to get up in the night to go to the loo yet when camping it will be a nightly adventure of dodging guy ropes, muddy puddles and twisting your ankle in rabbit holes to get there. The added joy is that when you are doing this your bladder is fit to burst and the urgency is making you do the ‘wee wee’ shuffle walk all the way there which in reality is speed walking but with a swagger on. Luckily it’s dark and you just have to pray nobody sees you.

wee wee walk

Wet, Wet, Wet

The other joyous thing about camping is the showers and after a day of being wet right through I decided that I would warm up and get some dry clothes. The showering part is alright it ‘s the apres shower that sucks. The clothes that normally I do not have a problem getting on shrink and gain a unique ‘cling-on’ style quality. Every inch of fabric has to be pulled and coerced onto my skin in way that is similar to getting a wet suit on. The challenge of the campsite showers game is you have to do it without getting one inch of your clothes in the grass ridden muddy puddles that form in this unique environment. So there I was feeling a bit warmer, ready to put on my dry pair of smalls when they decided they would do a triple somersault out of my hands. Crying ‘Nooooooo’ I scrambled after them whilst witnessing in horror their second by second descent towards the muddy depths of camping puddle hell. My feet started slipping and sliding on the floor as I overstretched and eventually I came to a crash on my knees half in and half out of the shower curtain to the amusement of my fellow female campers.  There was an awkward few second stillness in the room as they took in my rather crumpled state, a floating pair of underwear with tears forming in my eyes. It was then I got the campers nod that says ‘it’s OK we’ve all been there’ and then they duly carried on brushing their teeth probably thanking their lucky stars that their clothes were dry whilst I regained my composure and dignity.

The sun will come out tomorrow

Every Brit knows that a ray of sunshine means shorts even if it’s still freezing cold outside but who cares the sun is out! We had a picnic (shivering) on the beach and watched the air ambulance rescue some poor surfer and before leaving we found a nice little pub after many arguments and ordered coffees.  ‘That’s not ours is it?’ Ronald innocently asked as the barmaid gave him his coffee. Ronald had never had espresso before so it was quite a shock for him to see such a small cup – bless him. To make up for it he ordered cheesy chips and the rest of them had brownie sundaes whilst I enjoyed a beer in the sun and smirked over the whole mini coffee incident quietly.

San Miguel

What do you get when you cross Herbie, four people and a steep hill? The answer: you get a poor little car screaming her nuts and bolts off to try to get up the hill in first gear!  The big boys had their hands out the windows and were making whipping gestures as if Herbie were a horse. My Son and I furiously were rowing in the back seat to help gain speed and the family in the car behind us were doing pushing movements to try to and help us up the hill!  We screamed with laughter and when she (yes in times of equality this Herbie has had a sex change) finally made it to the top (although it would probably have been quicker to have walked) we got applause from the rather large queue of traffic behind and the car waiting to come down the hill.

Trying to get up the hill

Trying to get up the hill – you can do it Herbie

Always watch where you sit

The next rainy day we ventured to an outlet shopping village. Whilst sat in a coffee shop Ron who is proud of himself for ordering an extra large coffee to make up for his last error.  He looks across to see two not quite so attractive teenage girls walk in. He turns to my Son and says ‘There you go there’s some girls for you’ and laughs. I am shocked to learn hy Son is actually interested in girls (I know I shoudl know better) and my son turns to look his face is an absolute picture of horror which in turn makes the boys laugh. In life I do believe in karma so the next thing we knew there was a loud clatter. All we see is Ron’s head poking out between the two seats which he is now wedged between as his hearty laughter caused him to fall off his chair and the sign behind bent. I actually cried with laughter at this one.

Costa Coffee

Tantrums and Tiaras

By now with the continual rain everyone was forced to be with each other 24/7 which meant that quite frankly we were all starting to get on each others nerves. As much as you may love the people you are with there is a thing called personal space and you miss it when you don’t have any. I found I spent time sat in the loo just for a bit of respite and dryness. We knew the weather was going so I asked my husband if the wind speed was likely to be gale force (the campsite was quickly emptying – did they know something I didn’t) and he promised me it wasn’t and as a occasional windsurfing instructor I believed him.  First big rookie camper mistake – never believe a man when it comes to size or speed.

driftwood

We went for a quiet walk (well needed) with just the two of us and I got a feeling it was time to head back as we sat on the beach in a rare moment of sunshine.

and relax

and relax….

That night has to be the worst night ever in my camping history and I have already admitted firmly to being a fair weather camper. The tent swayed, buckled and the van rocked and trust me the old adage of ‘don’t come a knocking if the van is a rocking’ clearly doesn’t apply when you’re sat in a tent in the middle of nowhere with winds that were 5mph less than hurricane category (oh how he lied to me). The wind and rain was so loud the DVD the boys were trying to watch could not be heard. Incidently the DVD was ‘idiot abroad’ and I said to my Husband by making us stay he was making us do our own version but called ‘An idiot on a campsite’ which I think should be the next big reality show to hit our TV screens just think of all the things you would see like stupid people who stay in gale force winds and wee wee shufflers falling down holes.

Packing up

Ronald spent the evening laughing at me for being scared of the wind but by Friday morning good old Karma was back in force. Ronald proclaimed loudly and repeatedly that he had officially had enough and was going home, directly home without passing go. That night the wind had blown rain straight into his bedroom compartment throught the air vents, his air bed burst and he woke up doing breast-stroke in his tent and not being a great lover of exercise at the best of times this was the straw that broke the camels back. After many arguments, a full on diva style strop (my husband) and weather searches on the internet we finally gave up and packed up our gear.

Hours of washing later and the next day being warm and sunny (ironic huh) my Son and I sat and played scrabble but from the words you see I must have been traumatised by it all! My husband who is obviously not traumatised by it sodded off in the van to spend yet another day in a field at with VW’s at a show but he got a sunnier day (git). Would I do it again? Yes sadly I would and I am already planning next years trip but perhaps Spain would be kinder to us weather wise.

Scrabble

ChocaMocha Brownies
As we had brownie sundaes on holiday I just had to bake some when I got home – a perfect holiday memory and the coffee addition well thats there to always remind me of that moment in Costa (tee hee). There won’t be posh pictures this time as quite frankly sometimes life is too short but trust me they hit the spot.

85g butter
100g plain chocolate
175g dark muscavado sugar
2 eggs (room temp)
1 tbs instant coffee mixed wtih 1 tsp of boiling water
85g plain flour
1/2 tsp baking powder
50g white chocolate chips (or chocolate chopped into small pieces)
50g milk chocolate chips (or chocolate chopped into small pieces)

Triple Chocolate Mocha BrowniesInstructions

1. Preheat oven to 180C / 160 Fan / Gas 4
2. Put the chocolate and butter in a small saucepan and melt .  Stir and leave to cool.
3. Put the sugar and eggs into a bowl and beat until light and fluffy.  Fold in the choclate mixture and then sift the flour and baking powder over. Fold in carefully (lightly). add the chopped chocolate and pour into a 18cm tin round or square.
4. Bake for 25-30 mins (depends on how you like your brownies – if you like really gooey you may even fnd it is 20 mins)
5. Leave in the tin to cool and then cut into squares. Job done, sit back and dry off if you have just got back from camping like me. If you have a 20cm tin it will still work but bake for 20 -25 mins and it will be a little bit flatter.  Always tastes the same.

Enjoy x

I am entering these brownies into We Should Cocoa ran by Chocolate Teapot and Chocolate Log Blog as this month it is coffee! This month is hosted by Laura who runs the Kitchen Maid blog.

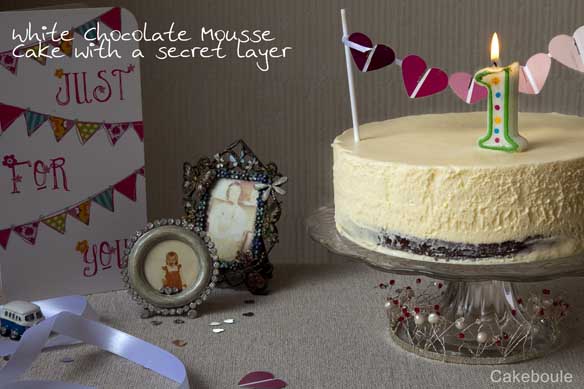
White chocolate mousse cake with a raspberry blast secret centre


White Chocolate Raspberry Mousse Cake

Yes I made it to one whole year of blogging and here is the next pay day cake in celebration – number 4! (you can see the others on my recipe page) Well in reality 6 months half-hearted and 6 months full blogging and what a difference a year makes. This time last year I began by making cake truffles for my friends Birthday and look what I have made 1 year on. Here is the link to my very first post – be nice! I have tried to avoid baking a cake for my blog birthday but I gave in. It had to be something new to me and this is how the white chocolate mousse cake with a hidden raspberry blast was born. The candle on the top was the one I saved from my son’s first birthday cake (ahhhhh). This cake is perfect for the up and coming Jubilee celebrations.

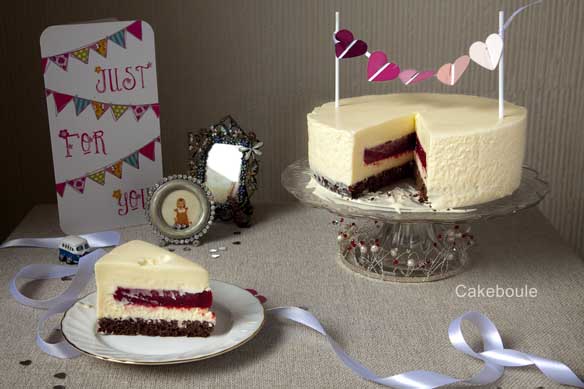
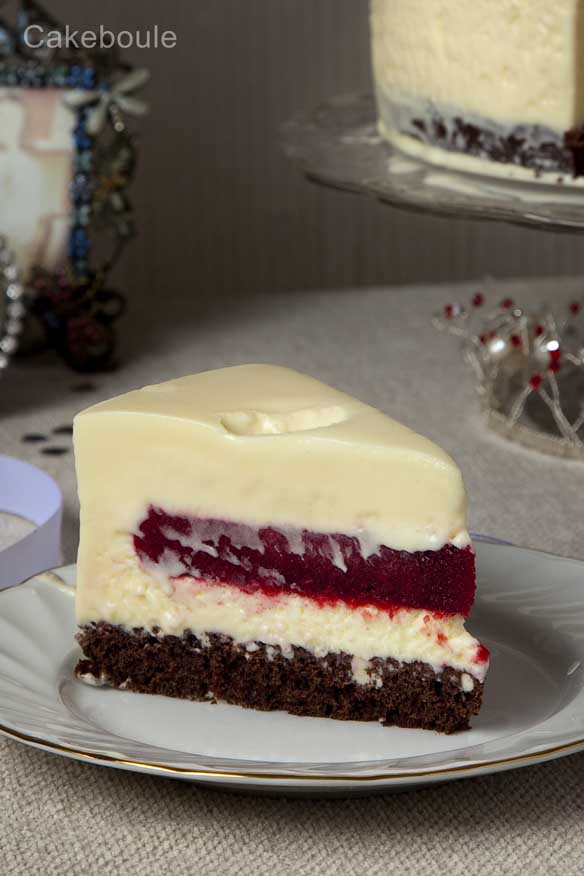
The combination works so well together with the hidden layer of tart and icy raspberries, velvety smooth white chocolate mousse and dark chocolate sponge laced with black raspberry liquor.

Raspberyy Mousse Cake

You see despite its splendor this cake was not actually supposed to be like this I could lie to you but I won’t. The moment I had completed the white chocolate mousse layer I knew that it was not going to work as I had not used enough gelatine in it to allow the mousse to stand proudly on the plate as I had imagined. Not one to beaten I sat for hours pondering how I could rescue it and finally stumbled across a recipe for a frozen mousse cake. Yes! I cried to myself as I realised all I had to do was freeze the cake and serve it partially frozen. The result is a cross between mousse and ice-cream and it works beautifully and you get to keep and enjoy it longer.

White chocolate raspberry mousse cake

You see as I said in my earlier post synchronicity and the universe just work to create what is needed not necessarily what you though you wanted. The little girl in the picture above would have opted for the melting version as she loved ice-cream. That little girl is me and as you can see (see the 1st picture above ) my mouth is always open. When I slid this cake out of the tin I am pretty sure my mouth did the same excited gape.

White chocolate raspberry mousse cake

Compared to other things I have baked this is not too hard and the trick is to do it in stages gradually so it does not feel like a chore. The beauty being that you can make this over the jubilee weekend but is also perfect for any celebration where time before may be short. If you want to serve this as a mousse cake that does not freeze but stands proudly then I have added the optional gelatin requirements for each section. However I like it just as it is and I’ve learnt from it and you can see what else I created with mousse magic very soon!

Have Camper will travel

So I am off on the maiden voyage in May our 1979 Moonraker VW campervan for the half term week. Sadly the weather is not going to be as glorious as we have just had think 2 degrees overnight – brrrrr.

VW Campervan Moonraker 1979

Sneak Preview!

Day 1 – Bake the Cake layer

Ingredients for Base Genesoise Cake Layer
75g plain flour
50g cocoa (good quality)
4 eggs at room temperature
125g caster sugar
30g melted butter (left to cool)

Instructions
1. Grease and lightly flour a 20cm round tin
2. Melt the butter in a pan and leave to cool
3. Beat the eggs and sagur at a medium speed for 12 minutes until when you lift the whisk attachment out of the mixture falls in ribbons and pools on top of the mixture without disappearing straight away.
4. Sieve the flour and cocoa over the mixture
5. Fold in gently until combined
6. Drizzle in the butter and fold in – do not over fold or the cake will become tough – so when you think it is is nearly there and there are no huge lumps be brave and put it in the oven.
7. Bake in the oven on the middle shelf for 30 minutes
8. Leave to cool for 10 minutes before removing from tin and placing on a wire rack
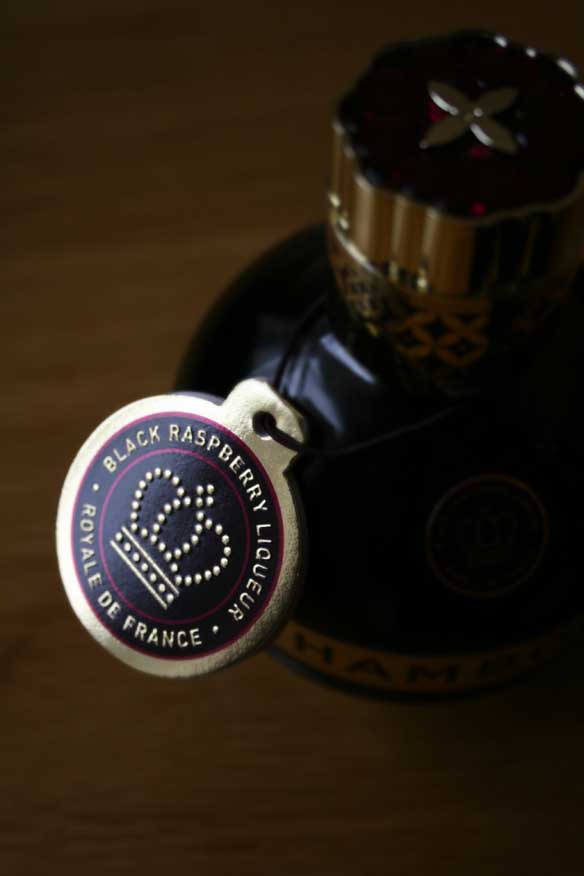
9. Add 2 tablespoons of raspberry liqueur ( Chombards, Framboise) to 2 tablespoons of caster sugar – heat gently until the sugar is dissolved. Brush liberally over the cake to moisten it. If you prefer you can use a simple sugar syrup which is equal parts sugar to water and you can adda flavouring or substitute with another spirit.
10. Divide the cake into two layers using a long serrated knife.
11. Wrap the cakes in greaseproof paper once cool and wrap in foil. Either store in an airtight container until you need it or put it in the freezer.

Day 1 – Make the hidden raspberry layer

Ingredients for the Hidden Raspberry Layer
400g raspberries (I used frozen – defrost overnight before you need to use them)
2 sheets gelatin (if wanting it to stay in shape on defrosting)
60g golden vanilla caster sugar
1 tablespoon of raspberry liqueur (optional)

Instructions

1. Line a 6 inch or 18cm baking tin with cling film – making sure you have enough to hang over the sides of the tin fully.
2. Place the raspberries in a food processor and puree.
3. Push the mixture through a fine sieve to prevent the pips from getting in the puree.
4. Soak the gelatin leaves in two separate bowls of cold water (enough to fully immerse each) for five minutes.
5. Put the puree into a small pan and heat gently to 35C (not boiling but warm to touch) and then add the gelatin and stir to dissolve.
6. Add the sugar and stir until it is dissolved.
7. Remove from the heat. Leave to cool for about 20 minutes.
8. Pour the mixture into the lined tin and place in the freezer until the mixture has set (approx 1 hour) then cover over with extra clingfilm and leave overnight or until you want use it.

Day 2 – White Chocolate Mousse (based on Michael Roux – Desserts)

Ingredients
450g White chocolate finely chopped
6 sheets leaf gelatin
150ml milk
4 1/2 tsp of liquid glucose
6 egg yolks
450ml whipping cream
90g icing sugar

Instructions (if not using gelatin then remove these steps)

1. Set a bowl over a saucepan which is filled to one-third with water. To the bowl add the chopped white chocolate. Using a low heat wait until the chocolate is half melted and remove from the heat. The chocolate will melt by itself and this reduces the risk of it burning.
2. Soak the gelatin in cold water for 5 minutes. (optional)
3. Heat the milk in small saucepan until boiling point and then remove from the heat.
Squeeze out the water from the gelatin and add it to the milk. Stir gently until the gelatin has dissolved (optional)
4. In another bowl add the egg yolks, liquid glucose and 3 tbsp of warm water. Mix together until combined.
5. Whip the cream and icing sugar in another bowl until the cream leaves ribbon trails when you take the whisk out of the mixture.
6. Pour the hot milk over the white chocolate and gently mix with a whisk until there are no lumps and is it a smooth consistency.
7. Add the egg mixture to the chocolate and mix gently until combined.
8. Using a spatula fold in the cream gently until fully combined.

Day 2 – Assembly

1. Get your original tin that you baked your cake in – place the cake in the bottom (tip: use the bottom layer of the cake as the top layer will be smaller as cakes shrink as they cook). You can use the bottom layer for another cake.
2. Pour the mousse into the tin.
3. Remove the raspberry layer from the freezer and push down into the mouse mixture until it is about half way down. Place the tin in the freezer overnight for best results.

Day 3 – Eating!

1. To remove the mousse cake from the tin use a hair dryer or blowtorch to gently heat the tin so that it removes easily. You can then either slice into portions with a warm knife (cleaning after each slice) or place in a box for eating later and keep it in the freezer. The cake will keep frozen for at least one month.

Make Some Cake Bunting

To make youself some bunting to go on the top I used paint sample cards from Dulux and used a heart punch but you could also cut out bunting style triangles. I then stapled them onto ribbon and tied them to two lollie sticks. This is also far cheaper than ones you see on various websites. If making for the jubille then choose red, white, and blue colour cards.

Enjoy!

I’m entering this cake as I feel the flags say Jubilee celebrations to me and as you have an extra bank holiday you could make this cake over the weekend and enjoy it on the Monday or Tuesday. The competition is a Blogging Jubilee Baking Competition being run the fabulous Homemade By Fleur. If nothing else you should look at Fleur’s blog as I recently dreamt that we went shopping together (not that we have ever met but I have seen her on TV) and she gave me a signed copy of her new cookbook (not that she has one yet – this is dream after all) so as I said to her – it’s a sign! She is very talented and has had the pleasure of baking with Eric Lanlard in a baking competition that she rightly won . As you know I truly believe in signs so you must see Fleur’s rather stunning new website and check her out before she is famous. This competition has a prize that is sponsored by Appliances online. Wish me luck!

Up next: a drink recipe that will make you fall in love with summer.

Turkish Delight Layer Cake (Gluten Free)


A 60th Birthday is the excuse for this month’s pay day cake and this is the 3rd so far in my pay day cake quest.  If you missed the espresso hit ‘Macchiato’ and the moist gluten free ‘Sticky toffee pudding’ layer cake then do take a look.  This cake is for a man who is enchanted by the lure of eastern promise. So it had to be a turkish delight and chocolate cake just like his favourite bar.  I know this is not going to be everyone’s favourite but you can always choose not to use the rose in the buttercream and have a chocolate and vanilla layer cake instead.

Turkisjh Delight Layer Cake

So I set to work with my usual staple of four layers of cake – this time using a moist and dark chocolate cake.  This cake never fails me and I do believe if it is not broke don’t fix it. Ganache however is a whole new ball game for me and it was most defiantly a challenge.

Turkish Delight Layer Cake

A vibrant pink rose flavoured buttercream sandwiched the layers together.  Rich dark ganache held it all snuggly together and turkish delight adorned the top of the cake like glistening jewels.  Ok, I admit I did get glitter happy but it is a birthday cake and all birthday cakes deserve a bit of sparkle I think.  I think Edmund from the ‘Lion, the Witch and the Wardrobe’ would have worn this cake as a crown if the White Witch would have given it to him.

Luckily I did not have to belly dance or go as a sultry lady to give him the cake (phew!).  Like magic the cake vanished so quickly his wife had to rescue a piece for him and hide at the back of the fridge. I let out a huge sigh of relief that not only had I made it, got there in one piece and was devoured.

Rich dark chocolate cake
150g dark chocolate chopped into tiny pieces
200ml milk
450g light brown sugar
150g salted butter at room temperature
4 eggs at room temperature
300g plain flour
3 tsp cocoa powder
1 tsp baking powder
1 tsp bicarbonate of soda

To make gluten-free – substitute the flour for gluten-free plain flour – no need to add xanthum gum as this cake is very moist and does not need it. I have baked this chocolate cake gluten-free on a number of occasions and find it works very well.  I am going to try this with with spelt flour next time.  To find out more about gluten-free baking see my top tips here.

Instructions
1. Preheat the oven to 160 C / 140 fan  / Gas 3
2. Line 2 x 20cm cake tins with greaseproof paper
3. Chop up the chocolate into small chunks and place the chocolate, milk and half the sugar into a saucepan
4. Heat until the chocolate is fully melted and remove from the heat
5. Beat the butter and remaining sugar until light and fluffy ( about five minutes)
6. Add the eggs one at a time (adda spoonful of flour if the mixture curdles)
7. Sift the cocoa , flour , baking powder and bicarb into the mixture
8. Mix on a low-speed until fully combined
9. Pour into the tins and bake on the middle shelf for approx 40 minutes
10. Remove from the oven and leave to cool in the tin.

Rose Buttercream
200g softened butter
200g icing sugar
Few drops (to taste) of rose extract – be sparing it is powerful stuff
Drops of pink food colour (optional)

Instructions

1. Beat the butter and icing sugar together until light and fluffy
2. Add the milk (or for richness use condensed milk)
3. Add a few drops of pink food colouring (optional)
4. Add a few drops of rose extract (use sparingly, mix and taste after each drop I would suggest until you get it how you like it)

Ganache
400g dark chocolate (70% cocoa)
400g single cream
Few drops of glucose (optional but makes the chocolate nice and shiny)

Instructions
1. Chop the chocolate into very small chunks
2. Put the cream into a saucepan and bring slowly to the boil and remove from the heat
3. Pour the cream over the chocolate (or add the chocolate to the pan) and let it have about a minute before stirring it to melt the chocolate
4. Set aside to cool

To Assemble the Cake

Cut each cake into two even layers (I use a tape measure to make sure each layer is evenly sized. I don’t have a cake stand that rotates but I do use a revolving cheese board stand but you could also uses a lazy Susan to do the job. Add a dollop of buttercream to the centre of your stand and add your first layer of cake and press down – this will keep your cake in place while you work.

Assembly
1. Spread buttercream across the bottom layer .
2. Add the next cake layer carefully and repeat until all layers are done
3. Do not refrigerate cake as this will cause the ganache to go off too quickly.
4. Using a large palette knife – spread the chocolate ganche around the cake and top with turkish delight. Ganache I found to be a bit more tricky than buttercream (see below)

Chocolate Ganache
One minute it was too warm so was slipping off the cake in gloops of molten chocolate goo. The next minute it seemed to be staying put, spreading well and it was beautiful and glossy.  Then I turned by back for less than a minute and when I returned the ganache had started to harden and that was it – time up!  Luckily for me I still had a bit of ganache left over which I warmed for a few seconds in the microwave just to gloss over any areas I was not happy with.  I think I need a bit more practise with this!

Enjoy!

Up Next: Jammie Dodger Cheesecakes.

Hot Chocolate Fudge Sauce (Gluten Free)


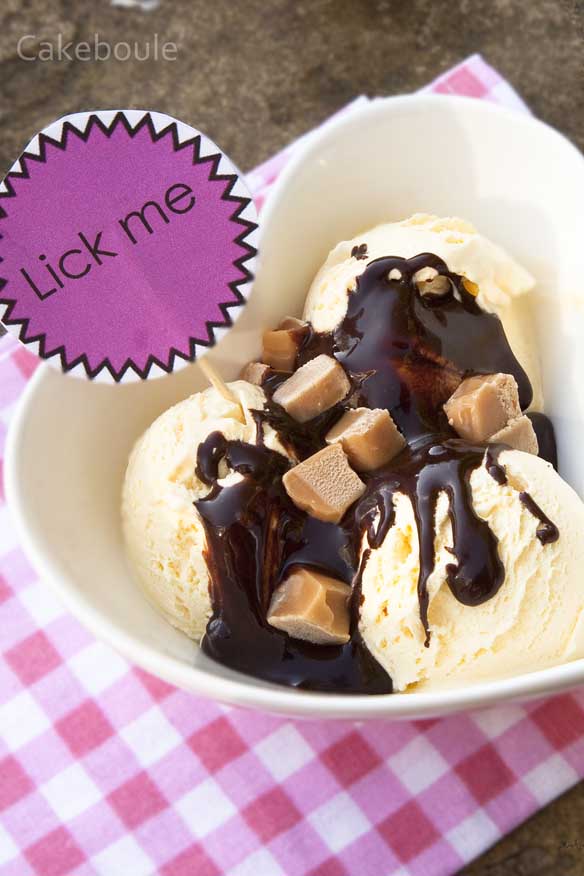
So Easter is over and no longer will we have to endure cute bunnies and eggs taking over the blog World.   If you want to use up your left over Easter eggs then try this  recipe for naughty hot chocolate fudge sauce which is perfect accompaniment to an ice-cream sundae and you can use up any left over easter eggs either in the sauce of by scattering them on top.

This sauce so my family tells me is rich, fudgy and as my son says ‘delish’.  It only took 20 minutes to make and would make a great gift coupled with a small bag of chocolate or fudge to give the gift of a Sundae.  A number of friends have told me I should go on Dragon’s Den with this recipe or sell it to Ann Summers for lickable body paint but I think not.  Of course what you do with the sauce in your own home is up to you.

You are probably wondering why I have not tried any of this sundae if it is so delicious?  Well,  milk and I do not see eye to eye.  In a chemical warfare battle between my stomach and ice-cream – the frozen stuff wins and it is just not worth it.  It was so hard to take these photographs and not lick the spoon or the bowl as I love ice-cream but it would have reaped its revenge on me.  Luckily I enjoyed watching my boys and the surrogate one (Ron) lick their spoons with glee so that made up for it.

The sauce will keep in the fridge for a few weeks (or more) if you use a sealed jar (e.g Kilner or Mason). To use the sauce just scoop the sauce you need into a bowl and heat in a pan or in the microwave for about 30 seconds on medium until it comes back to pouring consistency. I have included the jar label files (scroll down) so you can decorate your jars and make them look all pretty. Just print them out and glue them on I only used a glue stick as they are not going to stay on very long. I have included photoshop editing compatibility on the pdf for those who wish to edit and change the wording or colours – my gift to you.

You could also use the sauce on a cake between the layers for a chocolate fudge experience and heat it up and serve it with ice cream mmmmm.

The Geeky Hunt

I set my family an Easter Egg hunt where for each egg found they were given a binary number as I still on a binary kick (read chocolate & binary – trust me it is the best learning combination).  I can’t say they were initially thrilled at the idea as it required effort but no pain no gain I say and after all Mummy had been to Hotel Chocolat and therefore extra effort to gain these gifts were required.  Once they had worked out the decimal from the binary code (one per egg found)  they had to match the number to the letter in the alphabet (e.g 1 = A, 2 = B) then they had to put the letters in the right order to find out the location of their egg.  Ha ha I loved watching them try to figure it out 🙂 and I am so doing it again next year.

Ingredients (Hot Chocolate Fudge Sauce adapted from BBC Good Food)

To make this gluten or wheat free – use Green and Blacks Cocoa or Nestle – or check the manufacturers label. For more tips see my post – 7 tips for gluten free baking.
200g granulated sugar
140g vanilla sugar or use caster sugar and 1 tsp vanilla extract or 1 vanilla pod (seeds)
85g dark muscavado sugar
1/2 tsp espresso powder
100g cocoa (I use green and blacks)
30g cornflour
1 tin (410g) of evaporated milk
250ml water
50g butter cut into small cubes
2 tsp of vanilla extract (add at the end of cooking)

Instructions
1. Place all the ingredients into a large pan over a medium heat and stir constantly until you reach boiling point (approx 10 – 15 mins).
2. Continue cooking for a further 5 mins and the sauce will begin to thicken. Depending on how you like your sauce (thick or slightly runny) take it off the heat when you are happy with the pouring consistency. Add the vanilla essence.
3. If you are not using the sauce straight away you can pour into sterilised jars and add pretty labels.

The PDF labels (I have not done this before so please do not yell at me if this does not work!) I believe all you need to do is click on the link to open the file and then right click to save it (you will need a pdf reader).

PrintablesSml