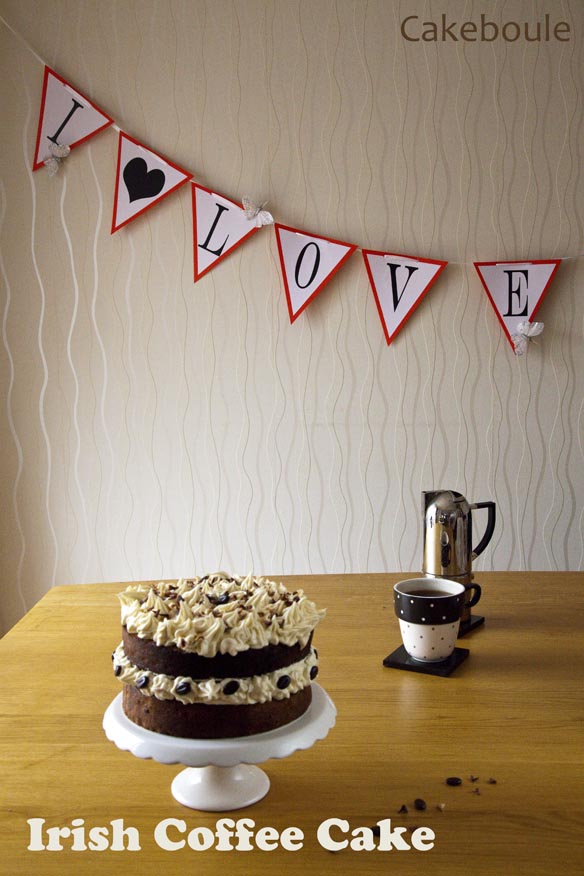
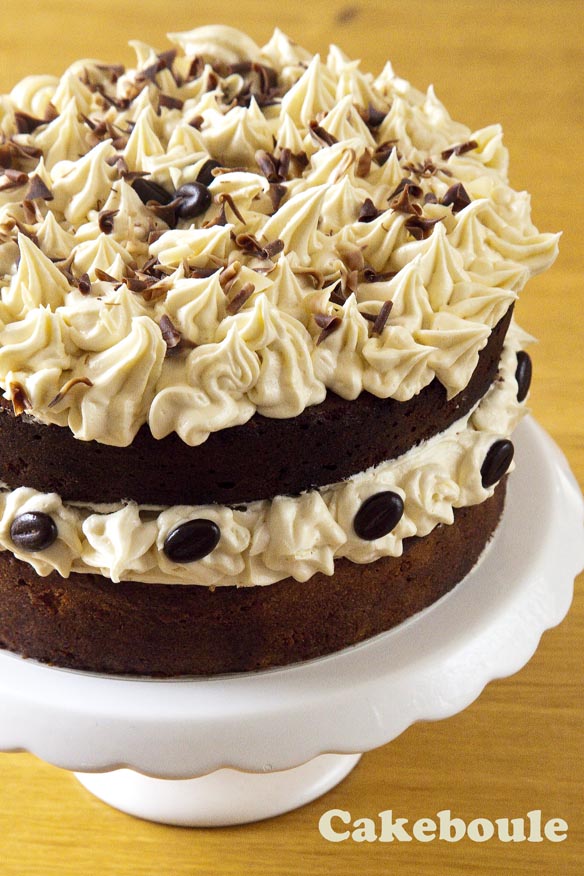
Irish Coffee Cake


Irish Coffee Cake 1

As I sat drinking a break time coffee wishing it was an Irish version, I realised that within my daylight hours I resided in a regimented World punctuated by bells, demands and deadlines. On top of that I’ve two self-inflicted days of fasting followed by five days of visiting the ‘Land of eat whatever I fancy’. Life felt too controlled, I longed to be free even if just for 10 minutes so I hatched a cunning lunch time plan that involved:

  1. Desertion
  2. Crime
  3. Smuggling contraband

Irish Coffee Cake 4

That does sound grand, but you’ll be glad to know that the contraband was in the form of Irish coffee cake which is the most acceptable way to bring alcohol into the workplace (ooh I’m so naughty).

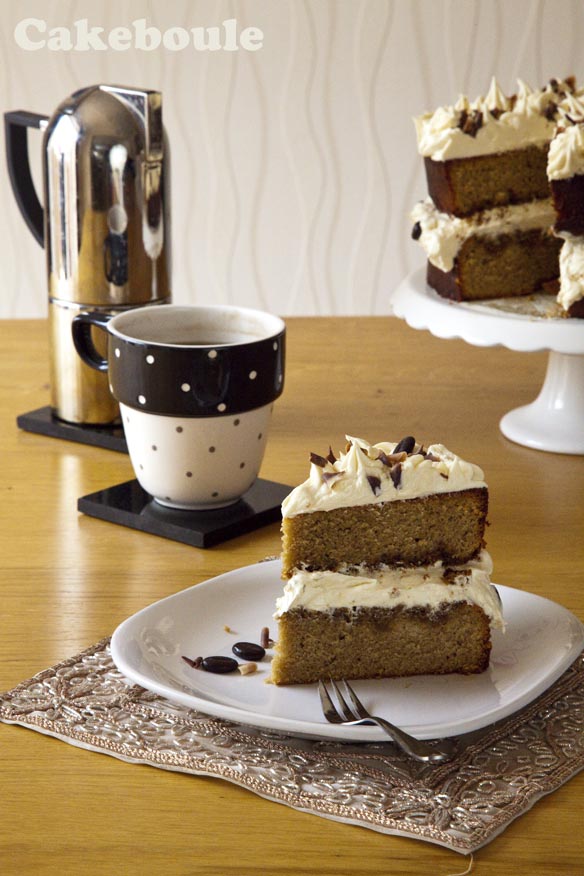
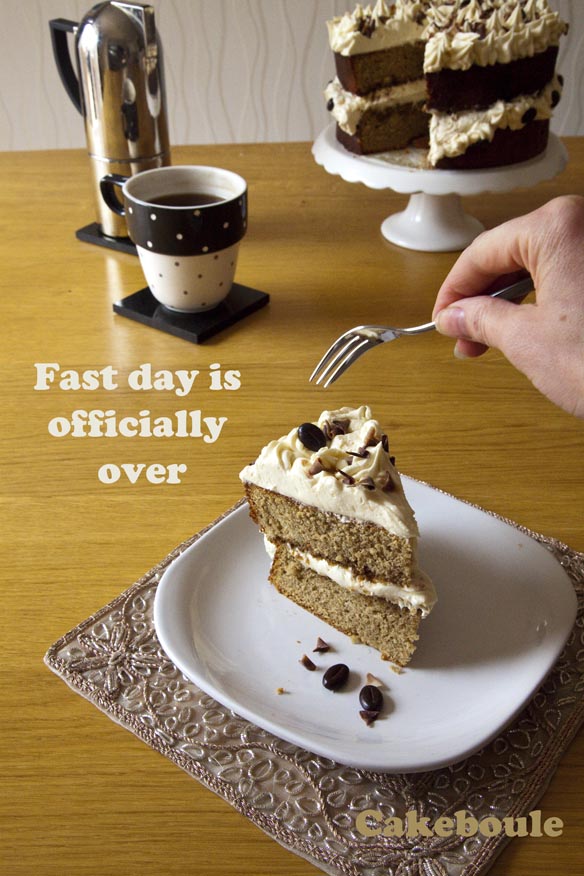
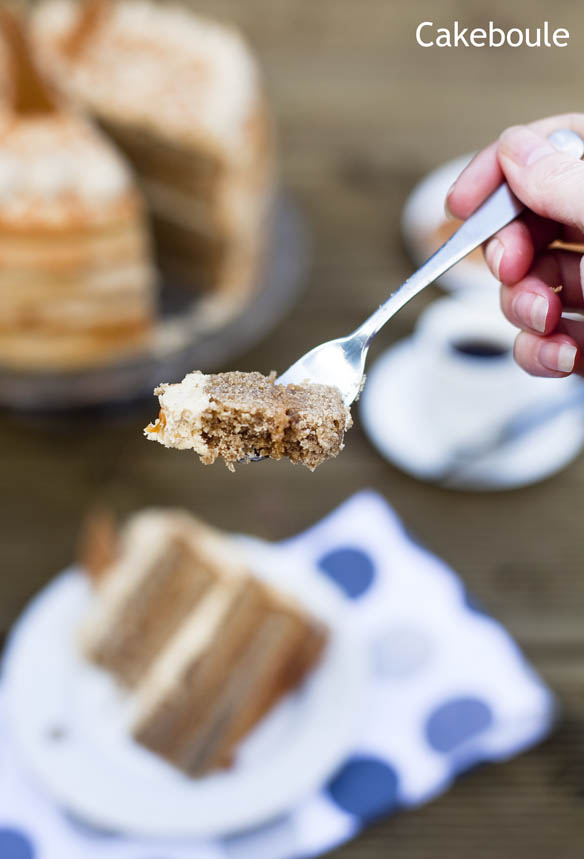
I tortured myself by making this cake on a fasting day; there was no licking of fingers, bowls or sneaky tasting therefore its success remained a mystery until the next day (I know I’m so hard-core in the self-torture department). When I took these pictures I had to wrap the cake slice up and yes that was very hard, I may have licked my computer screen just a little bit but don’t tell anyone.

Irish Coffee Cake 5

As the following lunch time at work arrived I threw off my goody two shoes veil to become a wicked woman about to take a walk on the dark side. I deserted my post, stole out of the confines and told myself I could just keep on walking if I didn’t feel any better after five minutes. Trees whispered, birds darted past and teenager’s feet stampeded for cover as I inadvertently walked past their secret cigarette lair all of which made me smile.

Irish Coffee Cake 2

I felt so much better that I turned back towards the hallowed halls. Feeling stronger I dared myself to commit a detention nominated crime by entering a clearly marked exit door and skipped up the one way only stairs. There was one mission left to complete as I crept back into my office trying to hide the flush of fresh air which had reddened my face. I pulled out the contraband, my hands shook slightly as I opened the foil hiding a cake cocktail* of rich coffee with Baileys white chocolate buttercream. The time was now, fast day was over and there was only two more minutes of peace before the bells tolled so I took a big bite and realised there is truth within the words ‘naughty but nice’. The cake tasted exactly as I imagined it, I felt like I’d been transported to a glitzy restaurant where I indulged in an Irish coffee over lazy chatter.

It’s the little things in life that matter, you’ll never say on your death-bed ‘I’m so glad I spent all those hours at work’ instead why not take just 10 minutes for yourself and be a little bit naughty next lunch time. Your work will be better due to lower stress levels which results in an increase in effectiveness and cake always boosts happiness so what’s to lose?

*always eat cake responsibly

Traditionally, Irish coffee consists of hot coffee, Irish whiskey, and sugar stirred and topped with thick cream I have altered this idea to fit my cake vision (fresh cream wasn’t that practical for transporting) but feel free to adapt it anyway you wish.

Irish Coffee Cake 3

Irish Coffee Cake

Coffee Cake Ingredients

400g Salted Butter (room temperature)
400g Caster sugar
400g Self raising flour
8 eggs
5 tbsp espresso ground coffee (instant) mixed with 3 tbsp of boiling water

Instructions for Coffee Cake

1. Pre heat the oven to 160 / 140 fan or Gas 3
2. Line two deep 20cm tins (do use the right size tins to avoid disaster)
3. Beat the butter and sugar until fluffy (5 minutes as this is what makes the cake rise so beautifully to get the full big cake wow factor so not skimp this part. I also find that using very soft butter (but not liquid) helps the creaming process)
4. Add the eggs two at a time and sift quarter of the flour into the mixture and beat until combined
5. Repeat until all eggs and flour are used up
6. Add coffee extract and mix
7. Place the tins in the oven on the middle shelf for approx 50 minutes (all ovens vary so check your cake after 45 mins)
8. Cakes are ready when the skewer can be inserted into the cake and it come out clean.
9. Leave in the tin for 5-10 minutes before removing and placing on a wire rack to cool

White Chocolate and Baileys Buttercream Recipe

250g Salted Butter (room temperature)
500g Icing sugar
250g White chocolate melted
125ml Baileys (or cheaper alternative!)

White Chocolate and Baileys Buttercream Instructions

1. Beat together the butter and icing sugar until light and fluffy
2. Melt the chocolate ( I do mine in 10 second stints in the microwave)
3. Let the melted chocolate cool slightly (10 mins)
4. Pour the chocolate into the buttercream mixture in small quantities beating as you do until all the chocolate has been incorporated.
5. Add the baileys and beat to combine one last time

Assembly of the Cake

1. Level the cake that will be the bottom layer
2. Smother the bottom layer of cake in buttercream and add the top layer of cake
3. Smother the top of the cake in buttercream, make spiking patterns with a palette knife
4. Cover with grated chocolate

      5. Eat and enjoy your naughty contraband

Sticky Toffee Pudding Layer Cake (Gluten Free)


This is my second pay day cake as the first was the ‘Macchiatto’ espresso, vanilla and caramel layer cake and this month I wanted to create a sticky toffee pudding cake that was moist, not covered in sickly buttercream but smooth and silky in the mouth.  It was not easy to photogrpah this cake and it may look a lttle dark but I assure you it is not burnt just crammed full of dark rich dates.Sticky Toffee Pudding Cake by Cakeboule

My pay day cake idea revolves around creating a reward to celebrate the fact that I’ve been paid and made it to the end of another month as we should all be thankful if we have jobs these days. However I believe there is always an excuse that can be made for making or eating cake so that it does not need to be kept solely for Birthday celebrations, here are a few examples:

1. I love you cake (aka its all for me)
2. It’s Friday, Monday cake etc whatever day you want to celebrate
3. ‘I saved a fortune by getting all this in the sale’ cake (honest)
4. I put up with your snoring so I deserve cake
5. There is a celebration most days on google with a funky graphic so if you are really desperate use that as your excuse!

Sticky Toffee Pudding Cake by Cakeboule

You don’t have to go the full monty and make a four tiered layer cake as I do this to me as each layer represents a week worked. If you wanted to you could half the recipe and bake it a 20cm tin, cut in half and smother the middle it in sticky toffee sauce. Or you could heat it up, drizzle with more sauce and serve with ice cream for a delicious pudding. The bonus of a cake version is that is portable so you can have a sticky toffee hit where ever you go.

Sticky Toffee Pudding Cake by Cakeboule

This produces a dense moist cake but it is not overly sweet like you might expect as it uses a swiss meringue buttercream flavoured with the sticky toffee sauce. Unlike a normal buttercream (butter and icing sugar) swiss meringue buttercream is not as sweet so will need flavouring. The buttercream is a bit fiddly but not as bad to make as I thought it would be and the reward is a very smooth silky buttercream that knocks the socks off any other I have tried.

Sticky Toffee Cake

To Make this Gluten Free
I have made this gluten free a few times before with great success.  Simply substitute the self raising flour (see below) with gluten free self raising flour (I use Doves Farm). As this is a very moist cake it works well as a gluten free cake and needs no further moisture or xanthum gum. For more gluten free info – ready my 7 tips for gluten free baking here.

Ingredients (cake)
450g dates, pitted and chopped (soaked in 300ml water with 4 green tea bags or use ordinary tea bags)
2 tsp vanilla extract ( use my own version so I know it has no nasty stuff in it)
2 tsp mixed spice
360g self-raising flour
2 tsp bicarbonate of soda
230g unsalted butter, softened
350g light muscovado sugar
4 eggs, lightly beaten

Instructions for the Cake
1. Preheat oven to 180°C/fan oven 160°C/350°F/Gas mark 4.
2. Line 2 x 20cm round loose bottomed tin with greaseproof paper.
3. Using scissors cut up the dates into small pieces.
4. Put the dates and water into a large saucepan.
5. Bring dates and water to the boil and continue to cook uncovered for 8 minutes until dates have softened
6. Remove from heat, fish out the teabags – remember count them in and out as you don’t want to forget one – it’s just like being on a school trip.
7. Stir in the bicarbonate of soda – this may make the mixture froth so be careful.
8. Leave the date mixture cool on the side – although if you are impatient (like me) the cake will still work but it will melt the butter so it won’t be as fluffy and cake like.
9. Cream together the butter and sugar until smooth, pale and airy.
10.Beat in the eggs and add to the butter and sugar mixture. Add vanilla extract.
11. To the mixture in the flour and the e mixture (cooled).
12. Pour (as this is quite a liquid mixture) into the prepared baking tins and level the surface.
13. Cover the cake with foil
14. Bake for approximately approx 30 mins and then remove the foil ( to prevent burning) and bake for approx 10 minutes more. It is ready when the top is golden and the cake has begun to shrink away for the sides. It will still have a little bit of a wobble as the mixture is moist.
15. Leave to cool in the tin and transfer to a wire rack.
16. I always leave cakes that are being layered overnight in an airtight container wrapped in greaseproof paper so that they do not crumble when you cut them.

Ingredients for Sticky Toffee Sauce
120g light brown sugar
120g salted butter (but unsalted works just as well)
100ml cream (I used Elmlea half fat)

Instructions for the Sauce
1. Melt the butter and sugar in a saucepan over a low heat until the sugar has dissolved whilst stirring so the sugar does not burn. To check the sugar has dissoleved you can put a very small amount on your fingers and rub them together it should not feel gritty but be careful as it will be hot.
2. Stir in the cream and heat until gently bubbling – stir continually. Remove from heat and leave to cool.

Tip – You can always double the recipe and put it into an airtight jar and store in the fridge for toffee fudge sundaes in the next week – yum!

Swiss Meringue Buttercream (Adapted from Sweetapolita)
If you have never done swiss meringues before I urge you to read Sweetapolita’s article – swiss meringue buttercream demystified – it is a god send and made me feel far more confident that was until it curdled – but I have included how I fixed this later on in this article!

Ingredients
120g egg whites (I used liquid egg whites which you can buy in a carton from the Supermarket as they are pasturised)
200g granulated sugar
340g butter (soft but still cool)
1 tsp vanilla extract
1 Vanilla bean (seeds only)

Special equipment
Double boiler, baine marie / porriger pan or use a bowl over a saucepan – make sure this clean by wiping it with a lemon or vinegar
Sugar or jam thermometer

1. Beat your butter using a hand whisk and transfer to a seprate bowl for later.
2. Add about 1/2 inch of water in the bottom of the pan / bowl and add the egg whites and sugar to the pan / bowl
3. Whisk gently over a low heat until the egg whites reach 140C and then remove from the heat
4. Pour egg whites into mixer bowl and whisk on medium speed for five minutes. Continue on high until stiff peaks form. Keep whisking until the bottom of the bowl is no longer warm – this is really important as you do not want to melt the butter when you add it (this takes about 8 – 10 mins)
5. Add the butter one tablespoon at a time whilst still mixing and watch it until it has combined – continue in this way until all the butter has been added. If you mixture is soupy you did not wait long enough for the egg whites to cool – put the mixture back it the fridge and then try again in 15-20 mins. Is it curdled and yukkly? See below…
6. The mixture will come together to become light and fluffy – add the sticky toffee topping to your own taste – add a tablespoon of sauce (one at a time) whilst still mixing. Any left over sauce can be used over ice-creams for sundaes!

Dillema – The Swiss Meringue Buttercream Curdle (How to recuse it)
Yes I hit this problem and I kept mixing the buttercream like Sweetapolita tells you to do and have faith that all will be fine. After five minutes faith was leaving me, I tried putting it in the fridge, praying, beating it on high, low but none if it changed the fact that the SMB looked disgusting!

However I did find something that works on this site – take 1/4 of the mixture out and pour into a microwavable bowl – heat for 15 seconds and then stir it to get a smooth consistency before pouring it back into your mixture. Whisk again on a low-speed. This worked and I was so pleased to have saved the buttercream.

Toffee Swiss Meringue Buttercream

To Assemble the Cake

Cut each cake into two even layers (I use a tape measure to make sure each layer is evenly sized. I don’t have a cake stand that rotates but I do use a revolving cheese board stand but you could also uses a lazy susan to do the job. Add a dollop of buttercream to the centre of your stand and add your first layer of cake and press down – this will keep your cake in place while you work.

Assembly

1. Put half the SM buttercream into a large piping / pastry bag and use a large star open tip nozzle
2. Use a palette knife to spread out the sticky toffee sauce onto your first layer. Make sure you don’t go right to the edge or the sticky toffee sauce is likely to ooze down the sides of your cake.
3. Spread SM buttercream across the top of the sticky toffee sauce – again keep in from the edge
4. Pipe around the edge of your layer using and up and down (think waves at the sea) motion until you have gone round the entire cake
5. Add the next layer carefully so as not to squash the piping
6. Repeat until all layers are done
7. Cut up fudge pieces and add to the top if you wish

Sticy Toffee Pudding Cake

Important Storage Notes
This cake should be stored at room temperature which is fine if you used the pasturised egg whites. After a couple of days it will need to go back in the fridge if there is any left. However if you are putting in the fridge you will need to get the cake out and let it come back fully to room temperature or the icing will taste disgusting!

Coffee, Vanilla Latte and Caramel Layer Cake – The Machiatto


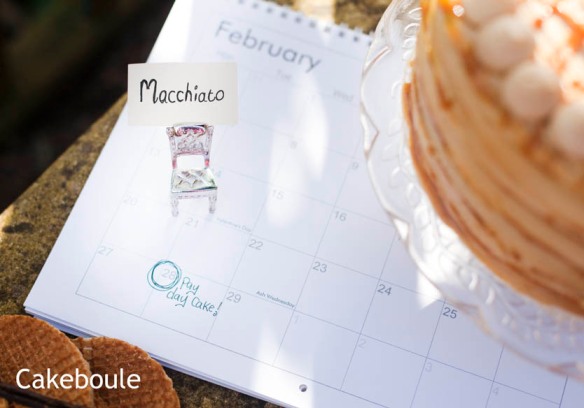
This is my pay day cake – the cake that rewards me for making it to the end of the month and indulges me with my own piece of cake land heaven (sigh).

Coffee Vanilla Caramel Macchiato Cake

In honour of feeling knackered this month I wanted to create a ‘Macchiato’ which is a coffee drink found in Starbucks consisting of espresso, milk. froth and drizzled with caramel. So I set out to recreate this in cake form that will last longer then a coffee (well maybe?) but will still give a coffee buzz and a sugar rush. It had to be big and as I enjoyed making my Tiffany inspired chamapgne layer cake earlier in the year I knew I wanted to make another one.

Coffee Vanilla Caramel Macchiato Cake

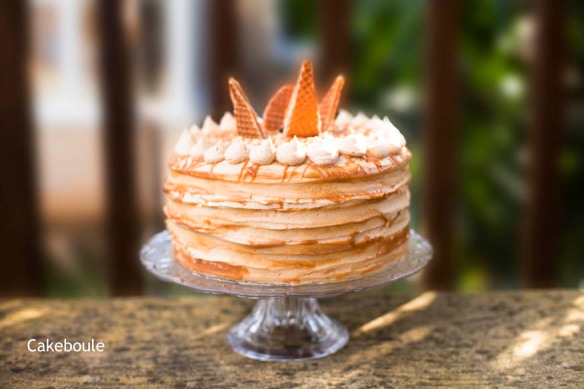
Inside this layer cake there are four layers of espresso flavoured coffee cake one layer earnt for each week worked.  I think a pay day cake should be desirable and luxurious with no saving pennies or calorie counting allowed as it is a once a month treat.

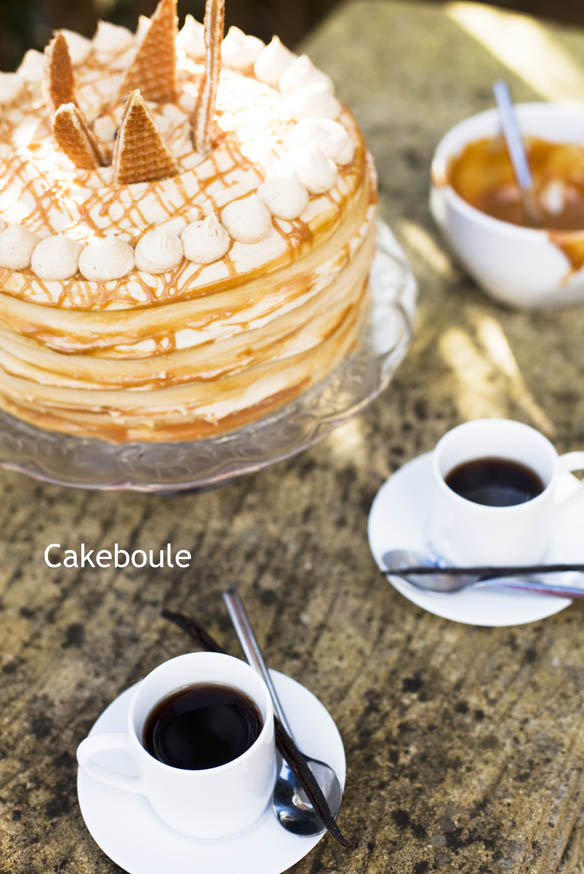
Coffee Vanilla Caramel Macchiato CakeEach coffee liquor soaked layer has lashings of rich dulce du leche caramel and vanilla bean latte buttercream.  The entire cake is bathed with swirling layers of buttercream and edged delicatley with dulce du leche caramel.

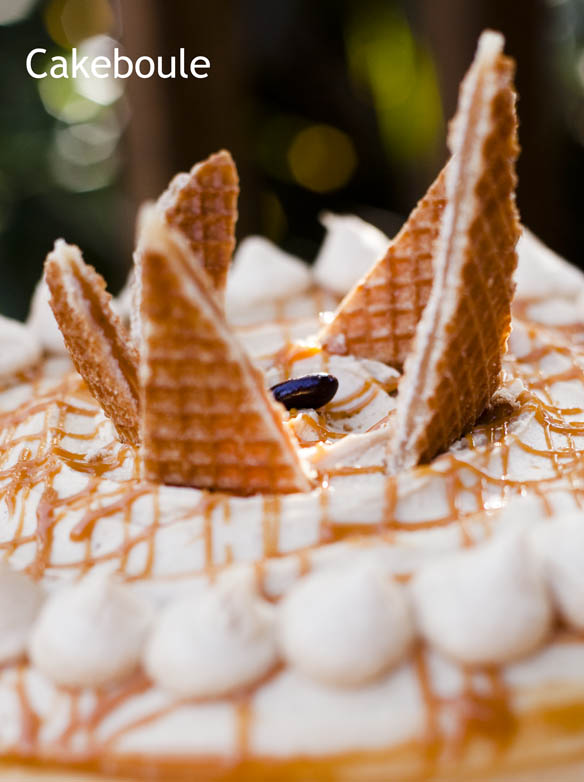
Of course the best thing about going out to Starbucks is usually a toss up between the silky caramel drizzle or the little caramel wafers on top of your cup that go all gooey with the heat.

To make the experience as close as possible my ‘Macchiato’ layer cake has these butter toffee wafers too, after all this is pay day cake and I want to have it all for a moment before going back to basics next week.

Coffee Vanilla Caramel Macchiato Cake

I like this idea so much I think I will make myself a pay day cake each month.  Want a bite? Go on…

Macchiato Coffee Vanilla Caramel Cake

Ingredients for Coffee Cake

400g Butter (room temperature)
400g Caster sugar
400g Self raising flour / cake flour
8 Eggs (room temperature)
2 tsp Homemade vanilla extract (or use good quality)
4 tsp of Espresso instant powder (or to your own taste)
Water to make up 50ml of coffee
1 tin of dulce du leach / caramel (this will be used for the filling later – I use Nestle)

Preheat the oven to 150 / 315F / Gas 2-3 or 140 fan

  1. Grease and line two 8inch / 20cm deep cake tins (I use silverwood)
  2. Combine the butter and sugar in a bowl and beat until fluffy and pale in colour (about 5 mins)
  3. Add two eggs and mix until combined
  4. Add half the flour and mix until combined
  5. Repeat with the remaining eggs and flour
  6. Make up the espresso with 4tsp of coffee added with enough water to make 50 ml
  7. Add vanilla extract and mix for the least time until the flavours are mixed in
  8. Pour the batter evenly into two tins (you can weigh the mixture)
  9. Place in the middle of the oven and bake for approx 50 mins or until cake is springy to the touch and a cake tester / skewer comes out clean.
  10. Leave in the tin to cool

Layering the Cakes

  1. Once cool – cut the top edge off each cake to make it level
  2. Measure the height of your cakes to work out equal layers
  3. Slice each cake in half horizontally to make four layers  ( I use a serrated knife to do this – I go around the sides of the cake first before then taking the knife across the remaining middle section to get a clean layer – see the video on the tiffany inspired champagne layer cake for this)

Ingredients for Coffee Sugar Syrup
45ml coffee liquor (or use espresso mix again)
3 tbsp of homemade vanilla sugar (or you can use any type of brown sugar)

Heat the coffee liquor and sugar in a small pan until the sugar has dissolved
Brush the mixture evenly onto each cake layer

Vanilla Bean Latte Buttercream
400g softened butter
800g icing sugar
6 tbs milk
4tsp instant espresso powder
2 vanilla beans (seeds scraped out)
2 tsp homemade vanilla essence (or other good quality)

  1. Cream the butter and  milk until light and fluffy
  2. Add the icing sugar and continue beating until it is well combined and light and fluffy in texture
  3. Add the espresso powder to the 2 tsp of vanilla extract and pour into the buttercream mixture
  4. Add the beans / seeds from 2 vanilla pods and add to the buttercream mixture
  5. Mix for the final time until all flavouring is well combined
  6. Use straight away or if putting it in the fridge remember to allow at least an hour for it to come fully back to room temperature so it is soft enough to pipe

To Assemble the Cake

Add a dollop of buttercream to the centre of your cake stand and then add your first layer of cake and press down – this will keep your cake in place.

Layer your cake in this order

1st layer – caramel
2nd layer – buttercream
3rd layer – caramel

  1. Use a palette knife to spread out the fillings and make sure you don’t go right to the edge or the caramel is likely to ooze down the sides of your cake.
  2. Add a very thin coating layer of buttercream using a palette knife all over your cake (don’t worry what it looks like) and place in the fridge for 30 mins so the buttercream can firm up.  This will stop crumbs getting into your icing.
  3. After 30 mins use a large palette knife to ice your cake all the way round (again the video on the tiffany layer cake is very good at showing you this).  Iit is much easier if you have a cake turntable – I do not have one but I do have a lazy susan (revolving circle wooden board) so I used that and it worked perfectly!
  4. To get the same effect with the buttercream as I did you need a small palette knife placed flat on the side of the cake at the bottom.  Hold the palette knife and move the cake round on the turntable until you reach the top.  It is like running your finger round and round your cake.
  5. I then used a palette knife loaded with dulce du leche and went round the same pattern gently to add a touch of caramel to the layers.
  6. Make a criss cross on the top of the cake with caramel (just like they do in Starbuck) and pipe buttercream on the top in what ever formation you like – top with a butter toffee wafer and get ready to eat.

This cake will last well in an airtight container for a few days.  I also entered into the fantastic Alphabake Challenge for March and this month’s letter is M.  The challenge in kindly hosted by The More than Occasional Baker and this months host Caroline Makes.

Enjoy! x