Pink Lemonade Recipe (from scratch)


I predict Summer will arrive in the UK with a bang in September when all the kids are back at School and you know my predicton will be right.  Celebrate with pre-prepared vivid hot pink lemonade a natural beauty with no nasty additives.

Pink Lemonade

This drink slaps you across the chops with refreshing fruitiness reminscent of sucking on a lemon and strawberry sherbert sweet.  You can’t not smile and go ‘ahhhhh’ when you have a glass of this whatever the weather.  The concentrate freezes well so you can enjoy that sunshine in September!

Pink Lemonade

I don’t posses ice cubes trays so I used a heart shaped silicon mould which was just perfect! All I need to do in future is add an iced pink raspberry concentrate heart to glass of lemonade and watch it turn pink. Yes that is just my sort of evening as why watch paint dry when you can watch a bright pink ice cube melt!

Pink Lemonade

The Story (optional reading) I watched the Smurf movie for the first time this week which was not exactly my choice of film but hey ho. It reminded me of a big cuddly Smurf I had when I was little. The smurf with no name was as big as me and I have no idea where he came from but he must have been deemed precious as I wasn’t allowed to play with him (sobs). Poor Smurf was held captive in a cupboard in my bedroom to keep for best.  At night I would creep across my bedroom floor very quiet, unlock the door of the forbidden cupboard and just sit there and staring at him not daring to touch. Years later when I deicded enough was enough Smurf needed rescuing from his wooden cave. I bravely opened the forbidden wardrobe but he had mysteriously vanished and I guess as I was a bit old for him by then so he must have been given away. SO sadly I never did get to play with him (sniffle) I know get the violins out right! (it’s OK Dad I’m not completly unhinged becuase of it only slightly but you knew that already)

The moral here?
1. ‘Never keep things for best as they will be out of fashion by the time you use them’.
2. Never buy things that do not fit as that never ends well
3. Live each day as if it’s your last and just once eat your microwave / take out / cheese on toast off a posh plate and enjoy the thrill of breaking the rules you rebel.

Personal note to self ‘take own advice and don’t leave the pink lemonade concentrate in the freezer for years because you love it so much that you never get to enjoy it”.  So this week live a little, raise a glass to life even if life often rains on your parade. For me I’m British and very adept at coping with lifes torrential downpours and severe gales from my recent camping trip in my VW – thanks to all those who commented I am glad to be a source of your amusement 🙂

Back to Pink Lemonade – Finding a recipe for pink lemonade concentrate online was fruiteless (pardon the pun) as nobody seemed to have a standard recipe so I figured I would follow suit and make my own as I went along. Even if it’s not sunny when I post this get ahead of the game; make this, freeze it and savour your own perfect glass of sunshine just waiting to be poured when the Sun finally makes its entrance. I guess you want to know how to make it because you know you will it’s just too hard to resist. Ok come on follow me…

Pink Lemonade

This also makes a great cocktail – 1 shot of limoncello, 1 shot of vodka, pink lemonade concentrate, top with lemonade or sparkling water and add plenty of ice – mmmm.

Ingredients

200g raspberries
200g strawberries
300ml water
300g golden caster sugar
1 vanilla bean / pod
6-8 lemons (mine were tiny!) juice and grated rind

Pink lemonade

Instructions

1. In a pan add sugar, vanilla bean (I used one from my vanilla sugar so it was already used) and the grated rind.
2. Bring the mixture to a boil and then take off the heat and leave to infuse until cool (or however long you want to wait).
3. In a blender (or with a blender attachment) blend the raspberries and strawberries until smooth.
4. Pour the berry mixture into a sieve to remove the pips.
5. Strain the sugar syrp to remove the lemon rind. Pour the berry and sugar syrup mixture into a jug.
6. Squeeze the lemons and add the juice to the pink lemonade mixture and stir until combined.
7. Pour a portion into a glass like you would juice you add water too (to taste) and top with ice cubes, sparkling water or lemonade and add a sprig of fresh mint if you feel so inclined or basil and serve.

To Freeze
Pour the concentrate into ice cube trays or silicon moulds and freeze overnight. Depending on the size of the moulds you may need a few ice cubes to flavour a drink. I also plan to use some in a cake, jellies and jam once I have worked out how I am going to make it all. I admit it I am a little obsessed with the flavour I have to say but not that obsessed that I’d torture myself by making ice lollies with them as I know I can never get the damn things out of the mould.

Happy summer rainy days x

I am entering this into Botanical Baker’s Summertime Sipping competition where I’m sure you will find lots more ideas and yummy natural drinks I can’t wait to see what everyone else has been up to!

summertime sipping

Pink Lemonade

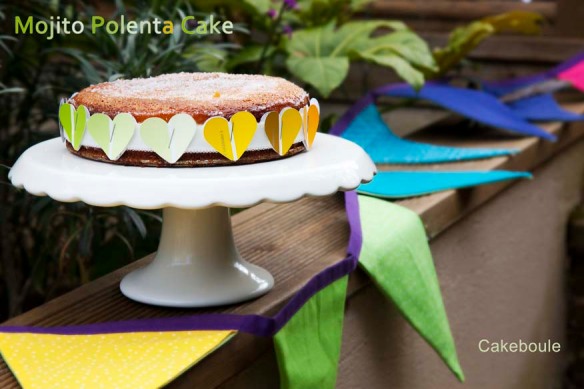
Mojito Inspired Polenta Cake (Gluten and Dairy Free)


Mojito Gluten and Dairy Free Polenta Cake

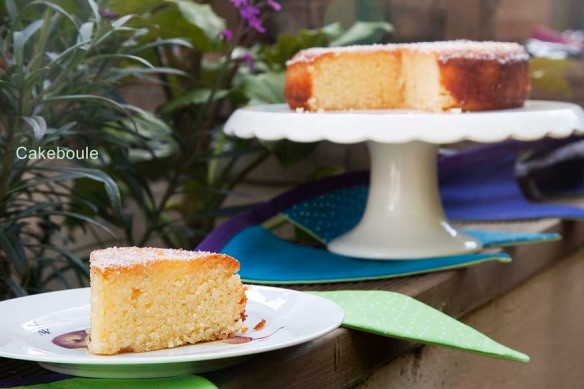
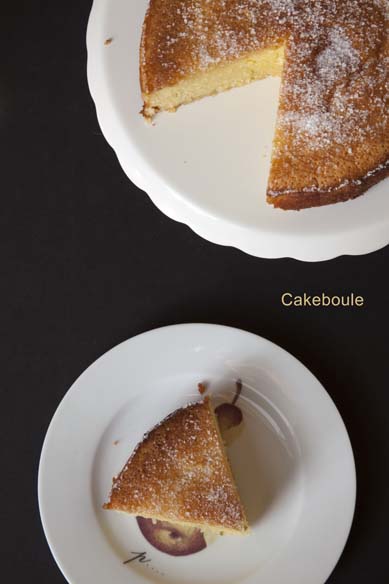
IWhen I baked the lemon and berry polenta cake I promised I would be back to bake another one and here I am. Once again this was not a planned cake but one that just sort of happened. You would never guess this cake is both gluten and dairy free as like my last post of Raspberry Bakewell cake as it is light and moist.

Mojito poelnta cake

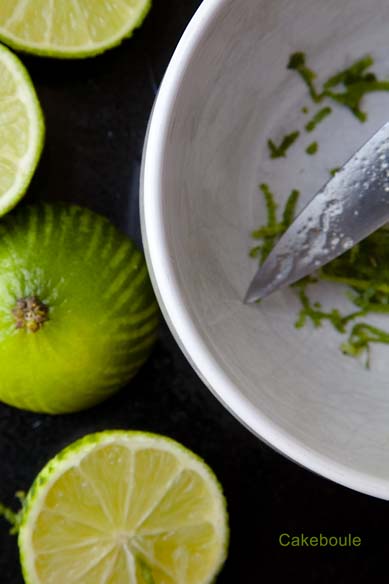
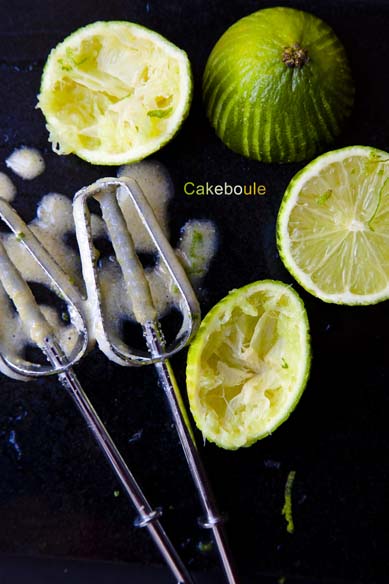
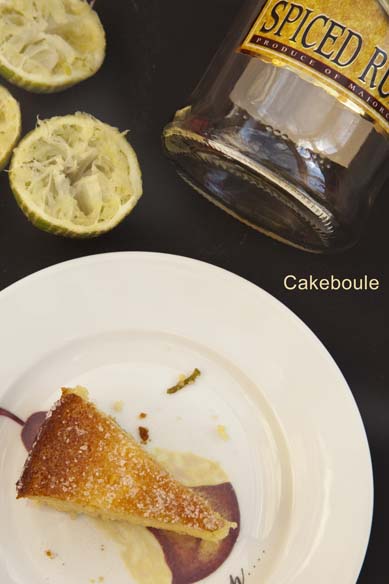
Juicy limes meet spiced rum in this gluten and dairy free cake and it’s all mine I tell you. Concoted with the last remenants of spiced rum so that my husband and I could not argue over who got the last tipple and some little limes I randomly ordered (as you do). I choose to miss out the mint in this cake as I’m not a big mint lover. I am sure someone somewhere will tell me that ‘technically it’s not a mojito cake then’. Fair enough, add a sprig of mint for decoration on the top and get over it I say as life is too short! This cake keeps beautifully and the depth of flavour increases over a few days as the rum truly soaks into the moist cake.

Mojito Polenta Cake
Life’s little coincidences

The voice of synchronicity is still going strong last weekend my Husband and my mobile phones both signalled a message at 08.30. Thinking that someone must have sent us both the same message I thought no more of it and went back to sleep. It turned out the messages were both from different people (who do not know each other) and one message was to sadly tell us of a death and the other a birth. A true reminder that life’s never-ending cycle is certainly evident. So I got up and baked this cake and pondered for a while.

Mojito polenta cake

Coincidence Number 2

Whilst still pondering I posted a picture of this cake using instagram. Later that day one of my followers on twitter spotted it and asked me kindly for the recipe for her next Clandestine Cake Club meeting. I thought she may live somewhere in the South so I asked where it was out of curiosity. It turned out that that we both live the same town. I mean what are the odds of that out of all the invisible people on twitter? She also kindly asked me if I would like to go and offered me a lift. So perhaps I am destined to actually go to a cake club after all?

Mojito polenta cake

Whatever conicidences happen ahead and I know they will I’d just like the universere to know that I’m ready, armed with cake and I have a 1950’s Kenwood stand mixer on stand by just waiting to soothe any trouble.

Mojito Polenta Cake

Recipe (adapted from Doves Farm)

120g sunflower oil
150g caster sugar
3 eggs (room temperature)
75g ground almonds
1/s tsp gluten-free baking powder
2 limes – grated rind and juice
75g Polenta (quick cook fine grain variety)
50g granulated sugar ( for the sugar syrup) and a tad more for sprinkling
40ml of spiced rum (20 ml for the cake and 20ml for the sugar syrup)

Instructions

1. Preheat oven to 170°C/Fan150°/325°F/Gas 3
2. Grease a 18cm/7”cake tin and line with baking parchment or greaseproof.
3. Beat oil, eggs and sugar together for 3 mins
4. Mix in the ground almonds and baking powder until fully combined.
5. Stir in all grated lime rind and juice of one lime – reserve the rest for the sugar syrup.
6. Add 20ml of spiced rum
7. Stir in the polenta.
8. Spoon mixture into cake tin.
9. Bake for approx 40/45 minutes on the middle shelf
10. Allow to cool in the tin.
11. Add the juice of the remaining lime into a saucepan with 50g sugar and 20ml of spiced rum.
12. Boil gently, stirring regularly, for 5 minutes to form a thick syrup.
13. Make holes in the cake with the cake tester or a skewer and pour syrup over the cake
14. Allow to cool before removing from the tin. Sprinkle the top of the cake with sugar and finish with a sprig of mint if you wish!

Storage

This cake is very moist and will last in an airtight container for up to 5 days. You might also like my Lemon and berry polenta cake. or wish to read more about gluten free baking.

Props: Rainbow bunting (Folksy £20), Cake stand – Wilkinsons £8 and heart band made with paint cards (free from DIY stores) punched with a heart shaped punch and stapled onto ribbon.

Enjoy!

Raspberry Bakewell Loaf Cake (Gluten and Dairy Free)


Raspberry Bakewell Cake

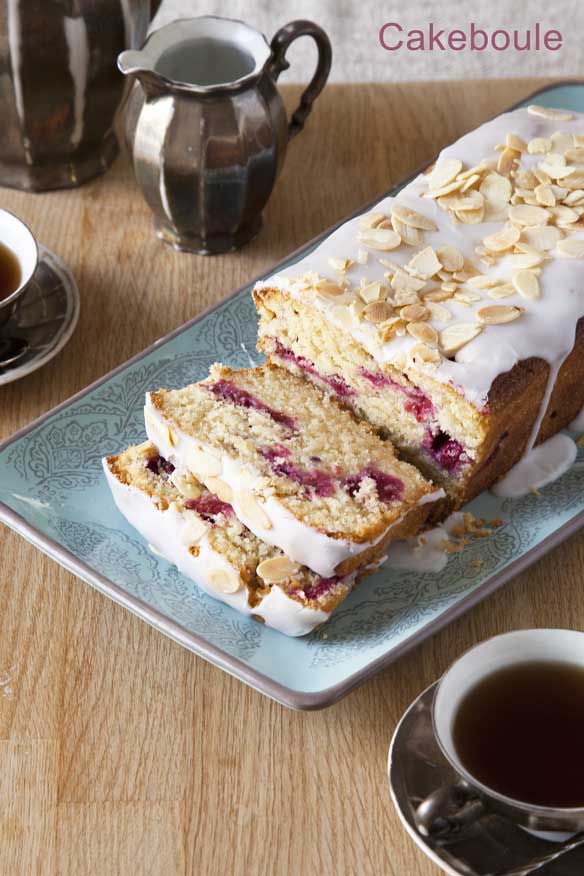
Finally I made myself a cake that is dairy free and gluten free who knows next time it will be cake without actually having cake in it? I have a guilty secret to share I am having a bit of a love affair with raspberries at the moment and I can’t wait until raspberries come into season but for now frozen will do.

Raspberries suit this moist cake beautifully and make me think of summer (sigh) oh how I miss it. It’s not right to still be wearing jumpers in May and with a looming maiden camping voyage in the ‘so nearly finished after two god damn years’ VW camper and when I look out the window at the rain and realise with dispair that it’s certainly not looking promising. At least the cake to take looks like a slice of summer.

Raspberry Bakewell Cake

When we brought the van to experience retro style family holidays I did not quite have in mind rain, men and smelly feet. I’ll admit being a fair weather camper and whilst some people stuck in a middle of a field somewhere may pine for the lack of television, toilets, proper showers or the internet but no not me I will pine for the loss of my oven. Although I did spot a mini electric one for £39 in Lakeleand that plugs in and sadly I am very tempted.

Coming on the trip is Ron and Ronald the comedy bromance duo (husband and his best friend) as well as my about to be teenage son leaving me as the only one with two ovaries in the camper and with the fact that I’m sat here having hot flushes they may be on their way out too. So many unimportant but nagging questions are running through my head like the torrential downpour drumming on the window as I speak ranging from:

1. Sod the food how much wine can I actually fit in the van for medicinal purposes?
2. Does Lakeland have a testosterone repellant I can spray around the van and on myself or do I have to have PMS / Pre-menopause hormones for a whole week to get any peace?
3.Will bunting actually make me feel more girly in a camping world that will involve stories of clutch repairs long winded attempts at humourous breakdown stories stuck on repeat.
4. If I put up sparkly lights, light scented candles, get out my sparkly rug will this constitute glamping or do need fluffy heeled slippers for that?
5. Will my husband actually read this post and then I will be in the proverbial dog house all week anyway?

Raspberry Bakewell Cake

This rainy cold spell is not doing my ass any favours either. It feels as if it is getting larger with each passing rainstorn. Comfort food is still the order of the day in fact I still want to cook soup for goodness sake! This cake was supposed to be frozen for the trip but instead it spoke lovingly to me. Quite literally my ass and brain simultaneously decided extra pounds were needed to be added to my curves in preparation for warmth needed on those cold camping nights. Oh well I can bake another one but just imagine if I had the mini oven I could just pop out a cheeky one there. Nope there is no hope for me.

Raspberry Bakewell Cake

Recipe adapted from BBC Good Food – I choose to do a loaf cake (2 pound) as I have just discovered the joy of paper liners for cake tins and they are the only size I have (yet). It was a choice of faffing around with lining a tin or just plonking a liner in. Yes you know which one won, however this cake will also fit a 20cm deep cake tin just fine.

See also my 7 top tips for gluten free baking

Ingredients
175g ground almonds
175g softened butter (or use dairy free substitute or use flavourless oil such as sunflower)
175g golden caster sugar
175g self raising flour (Gluten Free – Substitute with gluten free self raising flour – like Doves. Also add 1 tsp of xanthum gum to prevent cake from being too crumbly)
2 large eggs (rooom temperature)
1 tsp vanilla extract
200g raspberries

Instructions
1. Preheat oven to 180c / 160 fan / gas 4
2. Line a 2lb loaf tin
3. place all the ingredients in a food processor and mix until well combined
4. Put half the mixture into the lined tin and level it
5. Sprinkle over the raspberries and cover with the remaining half of the mixture and level with a spoon or spatula.
6. Place on the middle shelf of the oven and bake for 50 – 60 minutes, ovens do vary. You should check your cake at 45 mins to make sure it is not getting to brown on top – if it is you can cover it loosely with foil to prevent burning).
7. Test cake by inserting a skewer, if it is ready it should come out clean. Remove cake from the oven and leave to cool in the tin.

Almond Icing (optional)
140g icing sugar
1tsp almond extract or 1 tablespoon of amaretto if you are feeling naughty
2-3 tbsp of water

Instructions
1.Mix the extract and 2 tbsp of water into the mixture until combined. Keep adding water gradually until the icing is thick but not too runny. Drizzle over the top of the cake.
2. Toast the almonds in a pan with no oil on a low heat. After about 3 minutes the oil will begin to be released from the almonds and they will begin to brown. Keep moving the pan around to stop them from burning. When they reach a golden brown colour remove from the heat and leave to cool before sprinkling over the top of your cake.

Serve and enjoy x

Raspberry Bakewell

Jammie Dodger Cheesecakes


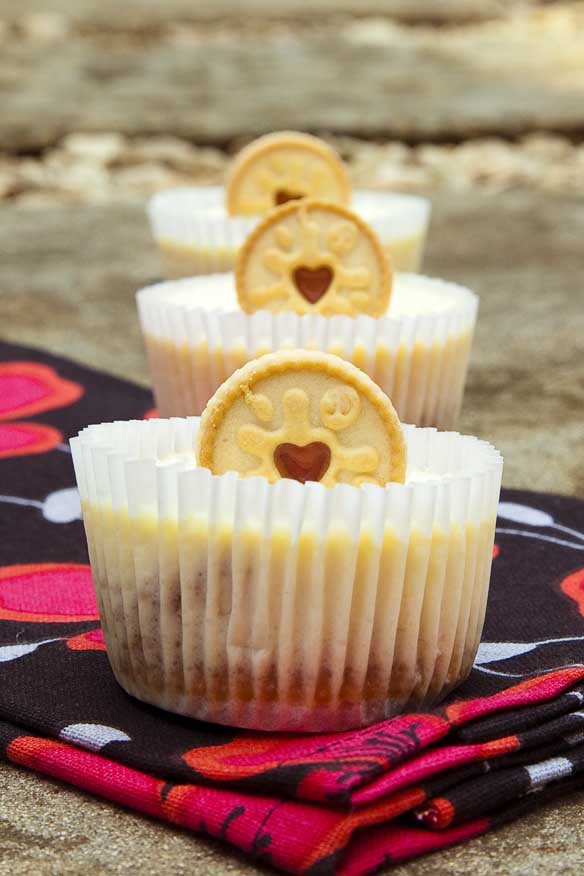
I have become rather interested in synchronicity lately after watching the program ‘Touch on’ on Sky 1. Synchronicity is a term used by Carl Jung to explain that the events that happen in our lives are not an accident or coincidence as everything happens for a reason. We have all had times when you go to ring or text someone and before you get to do it they ring or text you. The moment when you are in a real hurry and you drive into a car park and someone drives out just at the right time (OK that never happens to me) but those are very simple examples of synchronicity. I think the Jammie Dodger Cheesecakes I created are an example of synchronicity at work that day for me.

Jammie Dodger Cheesecakes

They began creation in my mind a few months ago when I spottted mini oreo cheesecake’s on the wonderful Grace’s Sweet Life but I never got around to making them. Not until this weekend when the order of the Cosmos (or whatever you believe in) decided that I was going to create them. Firstly the universe made sure Jammie dodgers were on offer so I had multiple packets as they are not a biscuit I buy as they are quite pricey. The cream cheese I had ordered for something else a long time ago which sat folornly waiting to be used decided it would leap out of the fridge at me. The raspberries ordered for a raspberry bakewell cake never arrived ( I was so gutted) so my baking plans for the weekend were ruined (or so I thought)

Jammie Dodger Cheesecakes

The roughly drafted recipe from months ago fell onto the kitchen floor and I realised that now was truly the time. I opened the dodgers with a sense of purpose and began to count the biscuits and this is where I hit my first problem. I assumed there would be 12 in a packet in my rough recipe (always the optimist) to find there was only 8! Dejected I took one dodger, hovered it by my mouth in a knee jerk must have comfort food type reaction. As I grumbled about it all being wrong – blah blah blah, my Son walks in. He hears me moaning and says ‘I’ll just work out the correct ratio for you Mum, give me a pen’. Umm did that really happen?

Jammie Dodger Cheesecake

I needed 92g of cream. Guess how much was left over after the turkish delight cake? Yes exactly 92g and for some unknown reason I did not throw it away although I would normally as I don’t eat cream unless it is in something. The scaled down cheesecake mixture by my Son could not have been more of a perfect fit if it tried. These were meant to happen and I am so glad they did as they are bliss.

Jammie Dodger Cheesecake

I love that you can see the splat on the dodger and the jammy heart through the paper which again is a miracle as I have baked these again and it didn’t happen (I think as I did not push them fully down into the tin in my haste). Thanks to synchronicity my family all raised their little Jammie Queen’s to the sky and admired the splat before sending them on their final journey. I don’t think I can even express how much I love it when baking and synchronicity come together.

Jammie Dodger Cheesecake

So whether you believe in synchronicity or not I feel it has a lot to play in my life and I am certainly looking out for the signs. They are there you see as when I was photographing these on instagram I ended up having a conversation with Butcher Baker who I have not spoken to too for ages who was in the throws of writing a fantastic post on how to make Jammie dodgers and had sent me a message. The World as they say works works in mysterious ways so why not slow down and listen to the baking messages you get. What have you been told lately?

Jammie Dodger Cheesecakes

Let me know your synchronicty / coincidence stories – be it life or baking! I truly find it fascinating.

Ingredients
1 packet of Jammie Dodgers (8 biscuits)
1 packet of mini Jammie Dodgers (optional for topping)
272g cream cheese
67g vanilla sugar (or use caster sugar)
1 egg (room temperature)
1/2 tsp vanilla extract (or 1 tsp if not using vanilla sugar)
92g single cream (any cream will work fine)
2 tbsp of strawberry jam (optional as a filling to the cheesecake)

Instructions
1. Preheat oven to 275f / 135 C / 115 fan
2. Pop a jammie dodger upside down (splat faces down!) so you have the jam centre facing downwards in muffin cases and in a muffin tin x 8
3. Beat together cheese and sugar
4. Dizzle in the egg and mix
5. Ad the cream and mix – add in the vanilla extract and give a final mix
6. Pour mixture into the cases on top of hte jammie dodger until each is near the top
7. Warm the jam so it is runny and easier to pour (about 20 seconds in the mircowave)
8. Add a dollop of jam to centre of each cake and swirl
9. Add one further dollop of jam in the centre so they look like a jammy dodger
10. Transfer to the middle shelf of the oven and bake for 11 minutes and then rotate the tin 180 degrees. Bake for a further 11 minutes (approx your oven may vary). There will be some wobble to the cheesecakes but the mixture will not be runny when it is done.
11. Leave cheesecakes to cool in the tin and then transfer (still in the tin) to the fridge overnight for best results. Do not try to admire the splat at the bottom as it will end in disaster just trust it is there (ifd you pushed it down enough) and enjoy the thrill of seeing it tomorrow when you salute the sky with your new Queen of cheesecakes.  If it does not appear then blame it on synchnocity playing with you.
12. Top with cream and a mini dodger if you wish.

Enjoy!

Jammie Dodger Cheesecake

Coming soon: pay day cake 4 is in development and a little clue there is less cake this time. Other than that I have no idea I’m just going to see what happens.

Lemon and Berry Polenta Cake (Gluten Free)


Zesty, lemon sugar syrup the slight crunch of polenta coupled with juicy berries gives a refreshingly different dessert cake.  Serve with oodles more berries and cream and you have yourself a mighty fine pudding. This cake uses fine grained polenta (quick cook) which as an added bonus makes it a gluten-free cake so you get all the taste but without the gluten gunk.  I have not said I love you to a cake yet but this is a surprising contender and definitely on my bake again list.

Four lemons go into the cake and the juice – yes four of them!  So expect a citrus hit which is great as I love lemons but it is not too sour just right in my opinion.  In my tutor group leavers speech I told them ‘If life gives you free lemons – say hey – free lemons!’ OK so they did not get my meaning either but maybe one day they will realise that free lemons = great cake. Nom nom.

I added berries for more flavour and texture.  Yes I admit they were frozen ones as we are not quite in strawberry and blueberry season yet but don’t knock frozen fruit as it tastes better than some of the out of season water filled varieties.

Do you know why I like this cake so much? 

Quite simply it was quick to make, simple, tasted great and when I went to take the photographs it was about to rain as the dark grey clouds were gathering.  This meant instead of spending countless hours getting the pictures right to fulfil the perfectionist streak in me I was challenged to just shoot the images as it was.  I love the pictures  and just like the cake they were no fuss but a great result.  Finally something that required not much effort!

Lemon Berry Polenta Cake

I took this cake as part of a set of gluten-free goodies to a university reunion and it was very happily received so I promised my newly diagnosed coeliac friend that I would do a post on gluten-free baking – more on that to follow.

What surprised me the most about our PGCE gathering (teaching qualification) was that I am the only person still in teaching!  What does that say about the profession I wonder?  Also on a sadder note apparently I am only a quarter of the bubbly person I used to be perhaps that is the result of still being in teaching I wonder.  Cue mid-life crisis….

Recipe (adapted from Doves Farm)

150g soft room temperature butter
150g caster sugar
3 eggs (room temperature)
75g ground almonds
1/s tsp gluten-free baking powder
4 lemons – grated rind and juice
75g Polenta (quick cook fine grain variety)
50g granulated sugar ( for the sugar syrup)
200g berries of your choice

Instructions

1. Preheat oven to 170°C/Fan150°/325°F/Gas 3
2. Grease a 20cm/8”cake tin and line with baking parchment or greaseproof.
3. Beat butter and 150g sugar together until pale and light(about 5 mins).
4. Beat in eggs, one at a time.
5. Mix in the ground almonds and baking powder until fully combined.
6. Stir in all the grated lemon rind and juice of two lemons – reserve the rest for the sugar syrup.
7. Stir in the polenta and then the berries.
8. Spoon mixture into cake tin.
9. Bake for approx 40/45 minutes on the middle shelf
10. Allow to cool in the tin.
11. Add the juice of the remaining 2 lemons into a saucepan with 50g sugar.
12. Boil gently, stirring regularly, for 5 minutes to form a thick syrup.
13. Make holes in the cake with the cake tester or a skewer and pour syrup over the cake
14. Allow to cool before removing from the tin.

Storage

This cake is very moist and will last in an airtight container for up to 3 days.  Generally gluten free cakes do not last as long as regular cakes – so more excuse to get one and eat it!

Enjoy!   Coming up next – 7 tips on gluten free baking and the turkish temptress layer cake (pay day cake 3!)

Hot Chocolate Fudge Sauce (Gluten Free)


So Easter is over and no longer will we have to endure cute bunnies and eggs taking over the blog World.   If you want to use up your left over Easter eggs then try this  recipe for naughty hot chocolate fudge sauce which is perfect accompaniment to an ice-cream sundae and you can use up any left over easter eggs either in the sauce of by scattering them on top.

This sauce so my family tells me is rich, fudgy and as my son says ‘delish’.  It only took 20 minutes to make and would make a great gift coupled with a small bag of chocolate or fudge to give the gift of a Sundae.  A number of friends have told me I should go on Dragon’s Den with this recipe or sell it to Ann Summers for lickable body paint but I think not.  Of course what you do with the sauce in your own home is up to you.

You are probably wondering why I have not tried any of this sundae if it is so delicious?  Well,  milk and I do not see eye to eye.  In a chemical warfare battle between my stomach and ice-cream – the frozen stuff wins and it is just not worth it.  It was so hard to take these photographs and not lick the spoon or the bowl as I love ice-cream but it would have reaped its revenge on me.  Luckily I enjoyed watching my boys and the surrogate one (Ron) lick their spoons with glee so that made up for it.

The sauce will keep in the fridge for a few weeks (or more) if you use a sealed jar (e.g Kilner or Mason). To use the sauce just scoop the sauce you need into a bowl and heat in a pan or in the microwave for about 30 seconds on medium until it comes back to pouring consistency. I have included the jar label files (scroll down) so you can decorate your jars and make them look all pretty. Just print them out and glue them on I only used a glue stick as they are not going to stay on very long. I have included photoshop editing compatibility on the pdf for those who wish to edit and change the wording or colours – my gift to you.

You could also use the sauce on a cake between the layers for a chocolate fudge experience and heat it up and serve it with ice cream mmmmm.

The Geeky Hunt

I set my family an Easter Egg hunt where for each egg found they were given a binary number as I still on a binary kick (read chocolate & binary – trust me it is the best learning combination).  I can’t say they were initially thrilled at the idea as it required effort but no pain no gain I say and after all Mummy had been to Hotel Chocolat and therefore extra effort to gain these gifts were required.  Once they had worked out the decimal from the binary code (one per egg found)  they had to match the number to the letter in the alphabet (e.g 1 = A, 2 = B) then they had to put the letters in the right order to find out the location of their egg.  Ha ha I loved watching them try to figure it out 🙂 and I am so doing it again next year.

Ingredients (Hot Chocolate Fudge Sauce adapted from BBC Good Food)

To make this gluten or wheat free – use Green and Blacks Cocoa or Nestle – or check the manufacturers label. For more tips see my post – 7 tips for gluten free baking.
200g granulated sugar
140g vanilla sugar or use caster sugar and 1 tsp vanilla extract or 1 vanilla pod (seeds)
85g dark muscavado sugar
1/2 tsp espresso powder
100g cocoa (I use green and blacks)
30g cornflour
1 tin (410g) of evaporated milk
250ml water
50g butter cut into small cubes
2 tsp of vanilla extract (add at the end of cooking)

Instructions
1. Place all the ingredients into a large pan over a medium heat and stir constantly until you reach boiling point (approx 10 – 15 mins).
2. Continue cooking for a further 5 mins and the sauce will begin to thicken. Depending on how you like your sauce (thick or slightly runny) take it off the heat when you are happy with the pouring consistency. Add the vanilla essence.
3. If you are not using the sauce straight away you can pour into sterilised jars and add pretty labels.

The PDF labels (I have not done this before so please do not yell at me if this does not work!) I believe all you need to do is click on the link to open the file and then right click to save it (you will need a pdf reader).

PrintablesSml

7 Reasons to Love DIY Granola with Adaptable Recipe


This post will not beat you around the face with yet another recipe for granola as there are millions online and why reinvent the wheel?  What this post does share with you is my own chart that I made which is easy to use to make your own adapatable Granola easily with anything you have to hand.  With this simple formula you will be able to choose your own Granola destiny with the blink of any eye.

Granola recipe

Granola is beautifully packaged clusters of oaty breakfast cereal that shout out at you from the supermarket aisle.  They lure you in with their tantalizing oaty flavours but leave you taking a sharp intake of breath when you see the price attached to it and back on the shelf it goes (maybe next time).

Granola recipe

Top 7 Reasons to Love DIY Granola:

1. It is far cheaper to make your own Granola while you do have to buy quite a few ingredients to start with, you will be able to make far more from it.
2. You are in control of your Granola destiny so if you wnat more of this or that go for it.
3. You can experiement with a dash of this and blob of that – no more best fit granola flavour for you. This also means you can flavour it so the rest of the family avoid it if you’re clever.
4. You can use the granola for many other things like topping muffins, puddings and I used it to make granola bars (post on its way soon).
5. It looks beautiful in a jar and has no powdered bits at the end (like boxed cereals).
6. The house smells fresh and oaty when it is baking.
7. It requires very little effort that it makes you wonder why they charge so much?

Adapting a Granole Recipe
I discovered that once you have the main ingredient ratios for Granola this frees you up to get creative and change the recipe to suit your mood, what is in season or in the cupboard.  From searching 100’s of granola recipes and reading all the comments to see what worked and what did not I made a visual Granola chart summarising it for myself and thought I would share it with you:

Granola Recipe Chart

Sadly my family also seem to have suddenly taken a liking to my Granola and especially the bars I made with it (post to follow) and I think I am going to have to make another batch.  Not that I mind as normally they would not put an oat into their mouths unless it’s baked with golden syrup, butter and sugar.  My son has an adversion to breakfast, anything remotely healthy and baths so at least this recipe solves two of three of those problems.   Which just leaves me to wonder what can I put in it next time that they do not like? Hmmmmm….

Granola recipe

Basic dry ingredients (for those of you who can’t see the chart)

200g combination of dried fruit
100g combination of seed / nuts
450g combination of rolled oats and any other cereal
100g sugar
1 pinch salt

Basic wet ingredients

150 ml syrup / honey – used as the binding agent
2 tbsp oil (non flavoured – sunflower works well)
150 ml fruit juice or Bramley apple sauce works very well – this is also used as the binding agent

Designing your own muesli (just a few ideas)
Pick and Mix Flavourings – vanilla extract, cinnamon, mixed spice, nutmeg etc
Seeds – sesame, pumpkin, poppy, flax etc
Nuts – brazil, pistachio, almond, hazelnut – for best flavour toast them in the oven for a few minutes
Fruit – cranberries, blueberries, cherries, dates, apricots, mango, pineapple,sultanas, coconut etc
Cereals – always used rolled oats, add any other cereal like bran, rice puffs,  etc
Syrups – honey, acacia (lighter taste) golden syrup, maple syrup, agave nectar, brown rice syrup (less sugar rush)
Sugar – brown, normal, muscavado, vanilla sugar or a combination
Treats – chocolate chunks, fudge pieces etc

What I used – Recipe (if you really want one. However it is mianly here so I can remember!)

450g rolled oats
100g sesame seeds
100g sunflower seeds
3 tsp homemade vanilla extract
2 tsp cinnamon
100g flaked almonds
200g dried fruit (add after cooking)
2 tbs sunflower oil
150g Bramley apple sauce
150 ml acacia honey and maple syrup (I used half and half)
100g homemade vanilla sugar
pinch salt

Instructions

1. Preheat the oven to 160/ Gas 3 / 140 fan.
2. Line 2 baking trays (at least a 1 inch side.) with greaseproof paper / baking parchment
3. Mix all the dry ingredients in a large bowl (do not add the fruit – add this after baking)
4. Add all the wet ingredients and stir well to combine fully, pour into trays evenly
5. Bake for 50 mins use a spoon to turn over the granola every 10 minutes to prevent burning
6. You are aiming for a light golden colour to your finished Garnola.
7. Leave to cool, add fruit and pour into a large airtight container or jar.
8. Makes enough for approx 20+ servings and I stored mine in a 1000ml preserving jar (which was full and I had about two portions left over!)

Enjoy the smugness in the morning! x

Leftover Banana, Honeycomb and Chocolate Cake


After rescuing some rather disgusting looking banana’s from my work colleagues I decided to bake this cake as it also fitted the fact I had been a bit of a banana at work – more on that confession later.  I really enjoyed the lemon and blueberry loaf cake so this seemed like the next step.

BananaCloseup

There is nothing better than using up manky bananas that look like they could walk to the bin on their own and then like a magician turning them into something amazing with chocolate.  I like to add honeycomb for a really delicious twist. Banana’s (so Mr Nigel Slater tells us) are at their baking best when they are black as they are full of sugary sweetness so I figured well why not and I am glad I did.   This cake also freezes well.

Being a Banana (The Confession)
I spotted a note randomly left on the side in one of the teaching room’s and being a tidy freak I picked it up .  Nothing special about it – I had a look and the teacher in me noted that the spelling was incorrect with some crossing out (ironic as my spelling is awful online). 

I turned it over to read the other side and now I was rather confused as both sides looked the same.  I turned it over again and thought to myself ‘perhaps they rewrote it because of the spelling?’ and I continued this pattern whilst walking to my next classroom.

As I entered the door of the room I burst out into laughter, you know the real deep right from the pit of your belly type laughter and tears streamed down my face as it suddenly dawned on me how incredibly dumb and a complete and utter silly banana I had just been.

My husband calls me a malteaser as I am brunette but with an inner blonde struggling to get out.  I always make objections to this as I don’t think being blonde makes you any less intelligent but clearly the note in this case was quite right for me.  In my defence if a child had handed it to me then I would have been suspicious straight away but sadly it seems senior moments are most definitely coming my way (early) so watch out it will be hot flushes next!  Sadly I also have to say that my posts are about to become less frequent as this time of year in teaching land is to put it quite frankly a nightmare time of coursework and exam prep hell.  My already filled evenings will be spent extracting and marking coursework until the small hours leaving not a lot of time for baking, photographing, #FF and writing so I am sending love to all my readers and thank-you for your patience I’ll post when I can and yes I can hear all those violins you are playing for me now 🙂 but I do have a collosal coffee inspired macchiato cake planned for medicinal purposes to keep me awake (of course) so do pop back,

Adapted from Nigel Slater – Black Banana Cake (here)

175g Softened butter
140g Golden caster sugar
2 eggs at room temperature
35g Dark soft brown sugar (plus a small handful to sprinkle on top of the cake)
2 Over ripe black bananas
175g Self raising flour
70g Dark chocolate (chopped roughly or 100g if not using honeycomb also)
1 honeycomb bar (crunchie) or I used my own homemade honeycomb which needed using up
70g Milk chocolate (chopped roughly or 75g if not using honeycomb)
1 tsp Vanilla essence (I make my own as it is so easy – click here to find out)

  1. Preheat the oven to 170 / 150 fan or Gas 3
  2. Line a 2lb loaf tin with baking paper or liner
  3. Beat together the butter and sugar until fluffy
  4. Add one egg and mix until combined
  5. Add half the flour and mix until combined
  6. Repeat with the remaining egg and flour
  7. Add vanilla essence, mashed banana and chopped chocolate and fold into the mixture just until combined (do not over mix)
  8. Put mixture in the tin and sprinkle dark brown sugar over the top
  9. Cover loosely with foil and place in the oven (middle shelf )
  10. Bake for 50 mins, remove the foil and then continue to bake
  11. Bake for the remaining 10 minutes or until cake is golden brown and is springy to the touch
  12. Leave in the tin to cool completely
  13. Devour with a steaming mug of hot chocolate to wash it down!

Next post alert!  Baking Addiction Part 2 – Confessions of a Baking Addict (Stage 3)

Not read part 1? – click here for a chuckle

Remedy the lack of baking with toast cups


After a fantastic Christmas today is the first day of normality.  This means in my traditional style a whole day of rearranging cupboards to fit in all the new goodies.  I can’t complain I love getting the goodies and reorganising my cupboards is sadly a part-time occupation of mine that feels me with great control freak satisfaction particularly when my family can’t find anything (tee hee).  I like to think of it as a cupboard hide and seek game that keeps me quietly amused for hours as I listen to the doors open and close and the grumblings of my Husband and Son as they try to find things.  This also ensures my teeneage son speaks to me instead of grunting even if it is only to ask where something is.  Of course they do not spend as much time in the kitchen as me so this game can last for months and when they think they have cracked it I move it all again just to keep them on their toes.

I rolled out of bed rather late this morning and needed something to soak up the one glass of wine too many last night.  I led in bed thinking about what to make us for breakfast when I realised I could make a quick breakfast, use up some leftovers and get to try out some of my new presents.  Suddenly my foggy headache disappeared in an instant and I bounded downstairs with renewed passion and longing for the kitchen that has been bakeless for the past two days. I was so excited I ended up doing a dance with my new silicon muffin tray and pulling out items from the precariously balanced foil wrapped Jenga blocks of food in my fridge (another game I like to play at Christmas).

toastcups1

I had seen these little toast cups on the internet, I had loads of pigs in blankest and cocktail sausage nestling together sleeping in the fridge and now they can be reborn into a quick breakfast.  The original recipe comes from Martha Stewart but here is my quick take on it.  A breakfast for two with my gorgeous hubby.

Ingredients

4 slices of bread
3 eggs
Left over cocktail sausages and pigs in blankets
2 mini tomatoes
Salt and pepper to season

1. Using a large cutter – cut out a circle to fit the muffin tin cup
2. Push the circle of bread into the tin
3. Cut up left overs and scatter in
4. Break 3 eggs into a cup and whisk until yolks are broken
5. Pour in the egg mixture and fill to the top
6. Cut tomatoes in half – place on top
7. Break off left over cheeseboard cheese and sprinkle on the top
8. Season with salt and pepper

New silicone muffin cases christened - thanks Mum

Place in the oven (375 degrees / 160 fan / 175 C ) for approx 15 minutes until the egg is cooked through.

Serve with a big mug of coffee and you’re ready to play cupboard hide and seek.  I loved these little toast cups so much I am going to make the at New Year too.

Enjoy x