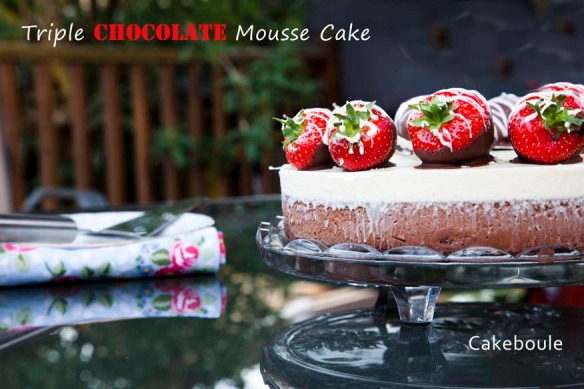
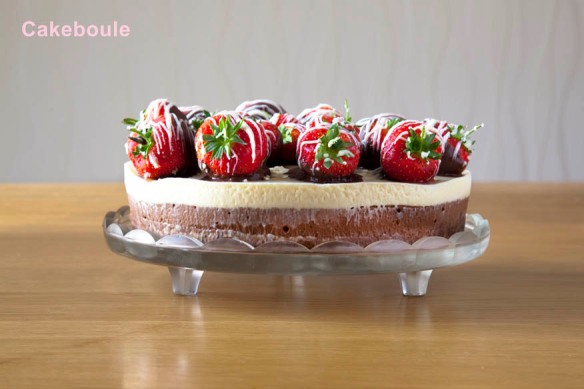
Triple Chocolate Mousse Cake with Chocolate Covered Strawberries


Triple Chocolate Mousse Cake

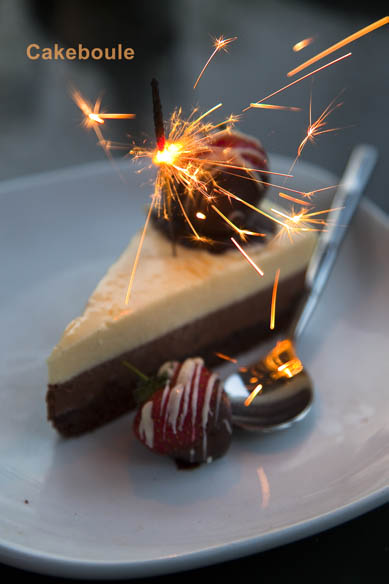
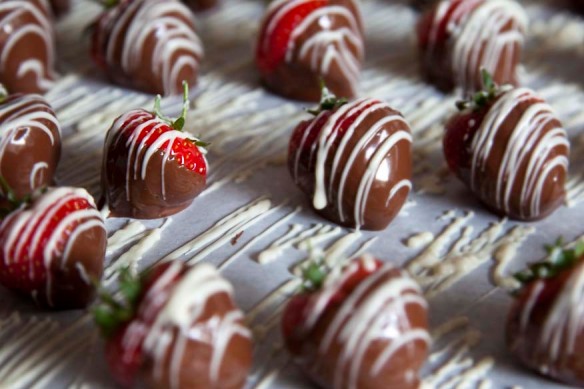
Introducing Pay Day Cake 5 the triple chocolate mousse cake lovingly covered with chocolate covered strawberries.  This is probably not an eat in ‘best company’ cake as I find its destruction is accompanied by a loud drawn out satisfied sigh which you won’t realise you’ve made until you feel the heat of others eyes boring into you from all directions (they’re just jealous). Chocloate covered strawberriesIf you are kind enough to make this triple chocolate mousse cake for a special occasion you will find there are few people who can resist the sweet aroma of this celebration cake. Triple Chocolate Mousse Cake
A garden decorated with sparkly disco balls, candles and freshly made  pink lemonade jar cocktails greeted my Best Friend for her Birthday.  I am now known as the ‘Jar Lady’ which is a step up from the cat lady but only slightly. We had a great evening full of laughs, food and an impromptu random birthday dance that even the village people would have been proud of.

Triple CHoclate Mousse

As it turned dark I choose a song on my MP3 player but it randomly played its own choice of ‘It’s a beautiful day’ by U2 which I didn’t even know I had but it summed up the evening.  This was topped off with fairly lights that are not designed to twinkle but decided they would for ‘one night only’ in time with the beat for the entire song now how bizarre is that! I have no idea why these odd things keep happening but whoever is watching over me (maybe it’s the man in the photo that was taken of me on my recent holiday post) they obviously saw me having the time of my life and decided to add a bit of magic to an evening with friends that I will truly never forget.

You see the more you watch and pay attention to the World the more messages it gives you. Like it’s OK to have forgotten the candles when you find sparklers in the drawer you forgot you had but they were so much better.

Triple Chocolate Mousse

The laws of synchronicity are at work right now as somehow it decided you would stumble upon my little post which means you were destined to be here.  No matter how many years later you find this post share a little bit of mousse magic by passing it on to everyone you know and keep the Universe happy.

P.s the moment I pressed save my computer shut it self down of its own accord – this was to tell me to shut up I think – look Frugal Feeding I made it under 500 words whoo hoo albeit without the recipe 🙂

Day 1 – Bake the Cake layer (as in previous mousse cake post this is the second half of the layer)

Ingredients for Base Genesoise Cake Layer
75g plain flour
50g cocoa (good quality) or replace 50g flour for a plain base.
4 eggs at room temperature
125g caster sugar
30g melted butter (left to cool)

Instructions
1. Grease and lightly flour a 20cm round tin
2. Melt the butter in a pan and leave to cool
3. Beat the eggs and suga at a medium speed for 12 minutes until when you lift the whisk attachment out of the mixture falls in ribbons and pools on top of the mixture without disappearing straight away.
4. Sieve the flour and cocoa over the mixture
5. Fold in gently until combined
6. Drizzle in the butter and fold in – do not over fold or the cake will become tough – so when you think it is is nearly there and there are no huge lumps be brave and put it in the oven.
7. Bake in the oven on the middle shelf for 30 minutes
8. Leave to cool for 10 minutes before removing from tin and placing on a wire rack
9. Add 2 tablespoons of raspberry liqueur (Chrombards, Framboise) to 2 tablespoons of caster sugar – heat gently until the sugar is dissolved. Brush liberally over the cake to moisten it. If you prefer you can use a simple sugar syrup which is equal parts sugar to water and you can add a flavouring or substitute with another spirit.
10. Divide the cake into two layers using a long serrated knife.
11. Wrap the cakes in greaseproof paper once cool and wrap in foil. Either store in an airtight container until you need it or put it in the freezer.

Day 2 – Chocolate Mousse (based on Michael Roux – Desserts)

Ingredients
150g chocolate finely chopped
2 sheets leaf gelatin
50ml milk
1 1/2 tsp of liquid glucose
2 egg yolks
150ml whipping cream
30g icing sugar

Instructions

1. Set a bowl over a saucepan which is filled to one-third with water. To the bowl add the chopped white chocolate. Using a low heat wait until the chocolate is half melted and remove from the heat. The chocolate will melt by itself and this reduces the risk of it burning.
2. Soak the gelatin in cold water for 5 minutes. (optional)
3. Heat the milk in small saucepan until boiling point and then remove from the heat.
Squeeze out the water from the gelatin and add it to the milk. Stir gently until the gelatin has dissolved (optional)
4. In another bowl add the egg yolks, liquid glucose and 3 tbsp of warm water. Mix together until combined.
5. Whip the cream and icing sugar in another bowl until the cream leaves ribbon trails when you take the whisk out of the mixture.
6. Pour the hot milk over the white chocolate and gently mix with a whisk until there are no lumps and is it a smooth consistency.
7. Add the egg mixture to the chocolate and mix gently until combined.
8. Using a spatula fold in the cream gently until fully combined.

Assembly (phase 1)

1. Get your original tin that you baked your cake in – place the cake in the bottom (tip: use the bottom layer of the cake as the top layer will be smaller as cakes shrink as they cook). You can use the bottom layer for another cake.
2. Pour the mousse into the tin.
3. Place the tin in the freezer overnight for best results.

Day 3 – White Chocolate Mousse (based on Michael Roux – Desserts)

As above but replace the dark chocolate with white.
Take the cake from the freezer and pour white mousse mixture onto the cake and return to the freezer overnight or leave in the fridge overnight to set if serving the next day. The cake will last for at least one month in the freezer.

Day 4 – Strawberries & Eating!

1. Make Chocolate covered strawberries by melting 100g of chocolate in a bowl and dip the strawberries liberally into it.  Let the chocolate drip off the excess before placing on a sheet of greaseproof paper to set.  Melt some white chocolate (approx 50g) and drizzle over the top on the strawberries once set.  Either do this with the back of a spoon or  used a mini squeeze bottle.

2. To remove the mousse cake from the tin use a hair dryer or blowtorch to gently heat the tin so that it removes easily. Add the strawberries on top when you are ready to serve or the juices will escape and bleed into the cake.  Slice into portions with a warm knife (cleaning after each slice).

Enjoy!

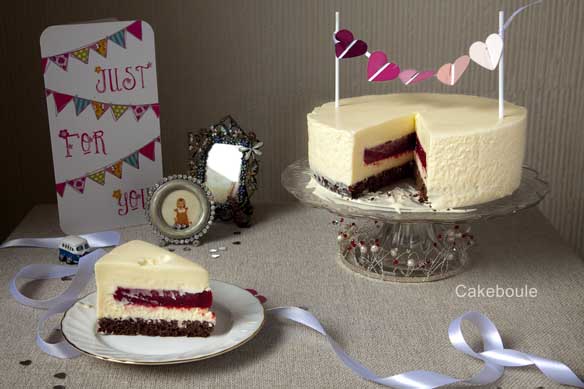
White chocolate mousse cake with a raspberry blast secret centre


White Chocolate Raspberry Mousse Cake

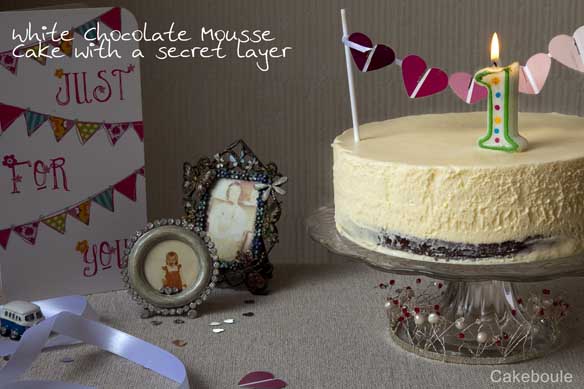
Yes I made it to one whole year of blogging and here is the next pay day cake in celebration – number 4! (you can see the others on my recipe page) Well in reality 6 months half-hearted and 6 months full blogging and what a difference a year makes. This time last year I began by making cake truffles for my friends Birthday and look what I have made 1 year on. Here is the link to my very first post – be nice! I have tried to avoid baking a cake for my blog birthday but I gave in. It had to be something new to me and this is how the white chocolate mousse cake with a hidden raspberry blast was born. The candle on the top was the one I saved from my son’s first birthday cake (ahhhhh). This cake is perfect for the up and coming Jubilee celebrations.

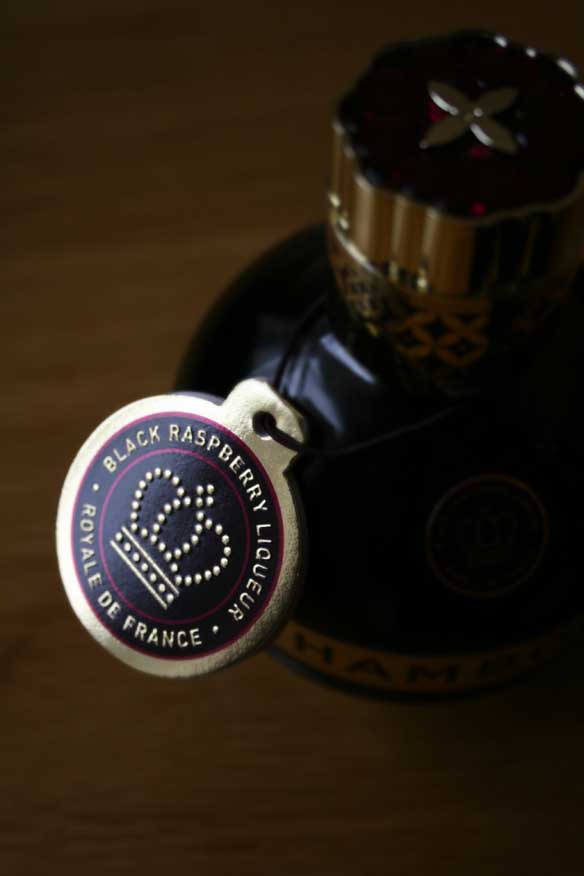
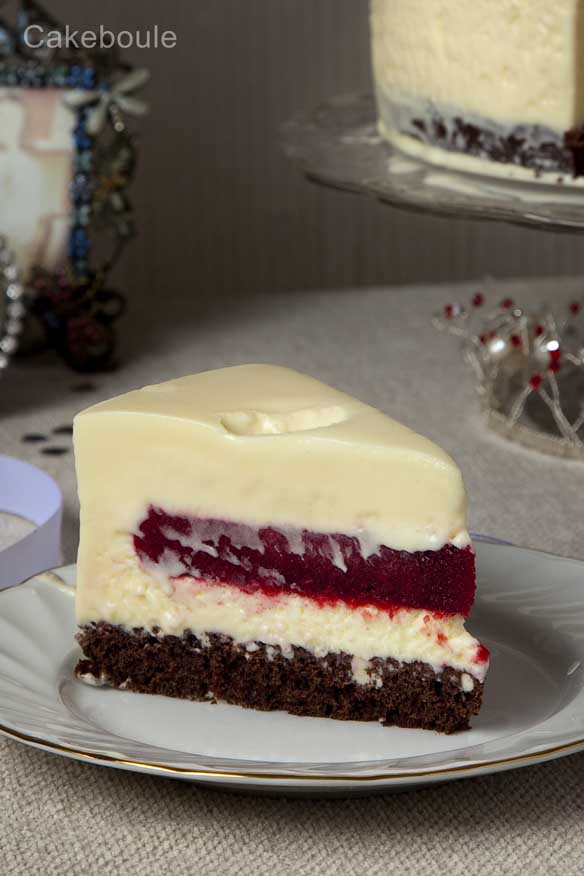
The combination works so well together with the hidden layer of tart and icy raspberries, velvety smooth white chocolate mousse and dark chocolate sponge laced with black raspberry liquor.

Raspberyy Mousse Cake

You see despite its splendor this cake was not actually supposed to be like this I could lie to you but I won’t. The moment I had completed the white chocolate mousse layer I knew that it was not going to work as I had not used enough gelatine in it to allow the mousse to stand proudly on the plate as I had imagined. Not one to beaten I sat for hours pondering how I could rescue it and finally stumbled across a recipe for a frozen mousse cake. Yes! I cried to myself as I realised all I had to do was freeze the cake and serve it partially frozen. The result is a cross between mousse and ice-cream and it works beautifully and you get to keep and enjoy it longer.

White chocolate raspberry mousse cake

You see as I said in my earlier post synchronicity and the universe just work to create what is needed not necessarily what you though you wanted. The little girl in the picture above would have opted for the melting version as she loved ice-cream. That little girl is me and as you can see (see the 1st picture above ) my mouth is always open. When I slid this cake out of the tin I am pretty sure my mouth did the same excited gape.

White chocolate raspberry mousse cake

Compared to other things I have baked this is not too hard and the trick is to do it in stages gradually so it does not feel like a chore. The beauty being that you can make this over the jubilee weekend but is also perfect for any celebration where time before may be short. If you want to serve this as a mousse cake that does not freeze but stands proudly then I have added the optional gelatin requirements for each section. However I like it just as it is and I’ve learnt from it and you can see what else I created with mousse magic very soon!

Have Camper will travel

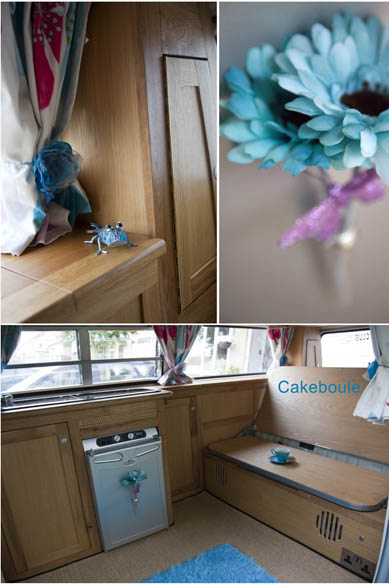
So I am off on the maiden voyage in May our 1979 Moonraker VW campervan for the half term week. Sadly the weather is not going to be as glorious as we have just had think 2 degrees overnight – brrrrr.

VW Campervan Moonraker 1979

Sneak Preview!

Day 1 – Bake the Cake layer

Ingredients for Base Genesoise Cake Layer
75g plain flour
50g cocoa (good quality)
4 eggs at room temperature
125g caster sugar
30g melted butter (left to cool)

Instructions
1. Grease and lightly flour a 20cm round tin
2. Melt the butter in a pan and leave to cool
3. Beat the eggs and sagur at a medium speed for 12 minutes until when you lift the whisk attachment out of the mixture falls in ribbons and pools on top of the mixture without disappearing straight away.
4. Sieve the flour and cocoa over the mixture
5. Fold in gently until combined
6. Drizzle in the butter and fold in – do not over fold or the cake will become tough – so when you think it is is nearly there and there are no huge lumps be brave and put it in the oven.
7. Bake in the oven on the middle shelf for 30 minutes
8. Leave to cool for 10 minutes before removing from tin and placing on a wire rack
9. Add 2 tablespoons of raspberry liqueur ( Chombards, Framboise) to 2 tablespoons of caster sugar – heat gently until the sugar is dissolved. Brush liberally over the cake to moisten it. If you prefer you can use a simple sugar syrup which is equal parts sugar to water and you can adda flavouring or substitute with another spirit.
10. Divide the cake into two layers using a long serrated knife.
11. Wrap the cakes in greaseproof paper once cool and wrap in foil. Either store in an airtight container until you need it or put it in the freezer.

Day 1 – Make the hidden raspberry layer

Ingredients for the Hidden Raspberry Layer
400g raspberries (I used frozen – defrost overnight before you need to use them)
2 sheets gelatin (if wanting it to stay in shape on defrosting)
60g golden vanilla caster sugar
1 tablespoon of raspberry liqueur (optional)

Instructions

1. Line a 6 inch or 18cm baking tin with cling film – making sure you have enough to hang over the sides of the tin fully.
2. Place the raspberries in a food processor and puree.
3. Push the mixture through a fine sieve to prevent the pips from getting in the puree.
4. Soak the gelatin leaves in two separate bowls of cold water (enough to fully immerse each) for five minutes.
5. Put the puree into a small pan and heat gently to 35C (not boiling but warm to touch) and then add the gelatin and stir to dissolve.
6. Add the sugar and stir until it is dissolved.
7. Remove from the heat. Leave to cool for about 20 minutes.
8. Pour the mixture into the lined tin and place in the freezer until the mixture has set (approx 1 hour) then cover over with extra clingfilm and leave overnight or until you want use it.

Day 2 – White Chocolate Mousse (based on Michael Roux – Desserts)

Ingredients
450g White chocolate finely chopped
6 sheets leaf gelatin
150ml milk
4 1/2 tsp of liquid glucose
6 egg yolks
450ml whipping cream
90g icing sugar

Instructions (if not using gelatin then remove these steps)

1. Set a bowl over a saucepan which is filled to one-third with water. To the bowl add the chopped white chocolate. Using a low heat wait until the chocolate is half melted and remove from the heat. The chocolate will melt by itself and this reduces the risk of it burning.
2. Soak the gelatin in cold water for 5 minutes. (optional)
3. Heat the milk in small saucepan until boiling point and then remove from the heat.
Squeeze out the water from the gelatin and add it to the milk. Stir gently until the gelatin has dissolved (optional)
4. In another bowl add the egg yolks, liquid glucose and 3 tbsp of warm water. Mix together until combined.
5. Whip the cream and icing sugar in another bowl until the cream leaves ribbon trails when you take the whisk out of the mixture.
6. Pour the hot milk over the white chocolate and gently mix with a whisk until there are no lumps and is it a smooth consistency.
7. Add the egg mixture to the chocolate and mix gently until combined.
8. Using a spatula fold in the cream gently until fully combined.

Day 2 – Assembly

1. Get your original tin that you baked your cake in – place the cake in the bottom (tip: use the bottom layer of the cake as the top layer will be smaller as cakes shrink as they cook). You can use the bottom layer for another cake.
2. Pour the mousse into the tin.
3. Remove the raspberry layer from the freezer and push down into the mouse mixture until it is about half way down. Place the tin in the freezer overnight for best results.

Day 3 – Eating!

1. To remove the mousse cake from the tin use a hair dryer or blowtorch to gently heat the tin so that it removes easily. You can then either slice into portions with a warm knife (cleaning after each slice) or place in a box for eating later and keep it in the freezer. The cake will keep frozen for at least one month.

Make Some Cake Bunting

To make youself some bunting to go on the top I used paint sample cards from Dulux and used a heart punch but you could also cut out bunting style triangles. I then stapled them onto ribbon and tied them to two lollie sticks. This is also far cheaper than ones you see on various websites. If making for the jubille then choose red, white, and blue colour cards.

Enjoy!

I’m entering this cake as I feel the flags say Jubilee celebrations to me and as you have an extra bank holiday you could make this cake over the weekend and enjoy it on the Monday or Tuesday. The competition is a Blogging Jubilee Baking Competition being run the fabulous Homemade By Fleur. If nothing else you should look at Fleur’s blog as I recently dreamt that we went shopping together (not that we have ever met but I have seen her on TV) and she gave me a signed copy of her new cookbook (not that she has one yet – this is dream after all) so as I said to her – it’s a sign! She is very talented and has had the pleasure of baking with Eric Lanlard in a baking competition that she rightly won . As you know I truly believe in signs so you must see Fleur’s rather stunning new website and check her out before she is famous. This competition has a prize that is sponsored by Appliances online. Wish me luck!

Up next: a drink recipe that will make you fall in love with summer.

Lemon Meringue Roulade


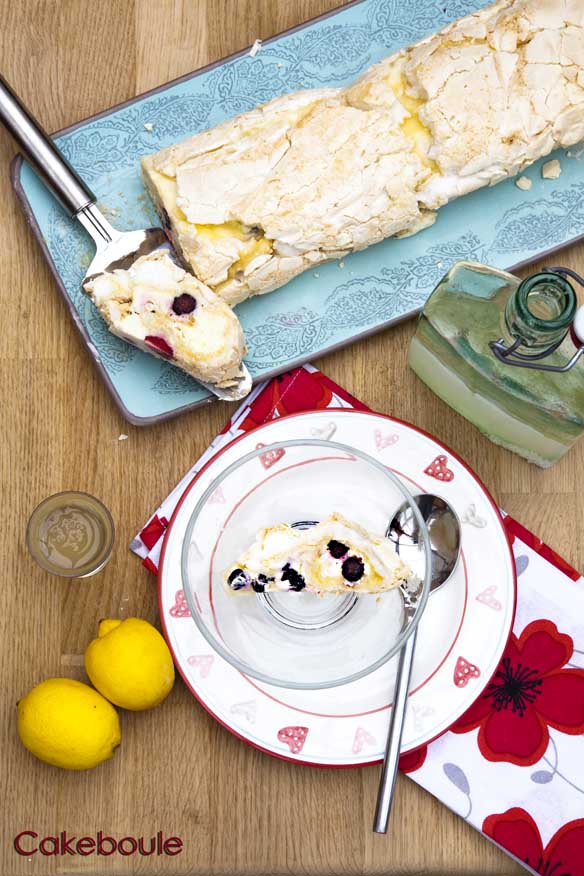
This dessert is not a smack it in your face and make it screw up with the power of unadulterated lemon zest like you get sometimes with a tart au citron or Lemon meringue pie. This dessert is lemon meringue with finesse as it draws you in with clouds of soft sweet meringue, caresses you with the taste of italian sunshine and finishes with tangy limoncello soaked berries. If you use half fat cream it is also good for fitting in those summer short you were avoiding putting on this week.

As Marks and Spencer’s would say this is not just any old meringue this is lemon meringue roulade and quite simply you do not want your portion to end. Don’t be fooled by its cracked exterior and dodgy rolling as you should never judge a dessert purely by its looks or you will miss out.

Avoidance Tactics
Some people go to extraordinary lengths to avoid things, people or events.  Those moments in life where if given the opportunity to cross over to the other side of the street or just ignore it, you grasp the opportunity and break into a sprint even in stiletto heels as long as it is far in the opposite direction.   My Mum’s favourite pudding is Lemon Meringue Pie but the thought of making a pastry tart filled with me with anxiety, gave me pastry related nightmares even though my berry palmiers with macron icecream turned out with gentle puffed layers of butter I still fear it.  As a result out tumbled the A team (A for avoidance) to my rescue.  For once I am proud of my dithering tactics as this turned out better than I hoped, no guilt was felt afterwards and my feet do not have blisters on them.  However this dessert probably took longer in internet searching and planning than if I had just got on with the pie in the first place but that is the downside of avoidance.

Meringue Roulade
Make the lemon mousse and soak the berries in Limoncello (optional) the night before to give them time to chill fully

Lemon Mousse Ingredients (adapted from BBC good food online)
284ml Elmlea double cream (half fat alternative but you can use full fat double cream)
Zest of 1 lemon and juice
60g caster sugar
2 egg whites (room temperature)

Mousse Instructions
1. Add cream, zest, and sugar to a bowl and whisk until it starts to thicken
2. Add lemon juice and whisk again – whisk until thick but not too stiff that you can not add whisked egg whites to the mixture
3. Clean the bowl you wish to whisk the egg whites in with the rind of the lemon (left over from juicing) to ensure it has no grease
4. Whisk the egg whites until soft peak stage (if you go to tip the bowl the mixture will slide around – so don’t put it over your head this time)
5. Fold the egg whites into the lemon mixture until it is combined
6. Pour mousse into a container and chill until ready to use.

Limoncello soaked berries
200g fresh or frozen berries of your choice ( I used Sainsbury’s frozen blueberries and strawberries)
50ml of limoncello (I must post the recipe as I make my own and it is as simple as making vanilla essence and a delight after dessert to cleanse the palette)

1. Add the limoncello to your chosen fruits and leave to soak covered in the fridge overnight whilst your mousse is chilling.
2. When you are ready to make the roulade – strain off the juice into shot glasses and enjoy later – it is so good and a reward for your baking efforts.

Meringue Roulade (taken from Mary Berry Recipe for Raspberry Meringue Roulade – The Ultimate Cake Book)

Roulade Ingredients
5 egg whites (room temperature)
275g caster sugar
1/2 jar of lemon curd for the filling ( I used Sainsburys taste the difference)

Roulade Instructions
1. Preheat oven to 200C / 400F / Gas 6 / 180 Fan.
2. Line a 13×9 inch tin (33×23 cm) which is a swiss roll tin with baking parchment (including up the sides for easy removal).
3. Wipe the bowl you will use to whisk the eggs whites in with a slice of lemon to degrease it and ensure perfect peaks.
4. Pour the eggs whites into the clean bowl and whisk on high speed until the egg whites form very stiff peaks (you can turn the bowl upside down and the eggs will not move an inch).
5. Add caster sugar one teaspoon at a time to the egg mixture whilst still beating and ensure all sugar is combined before adding the next (I count to 5 between spoonfuls).
6. The mixture will be very stiff once all the sugar has been included (so much so the blades of my mixer started to struggle but it is a 1950’s Kenwood Chef).
7. Pour the mixture into the lined tin and use a pallet knife to spread the meringue
8. Put the tin near the top of the oven and bake for 8 mins.
8. Turn down the temperature to 160C/ 325F/ Gas 3/ 140 Fan and bake for a further 15 mins until it lightly golden and the meringue is firm to the touch.
9. Cut a further piece of baking parchment the same size as the tin.
10. Turn out the meringue onto the baking parchment so that it is upside down and then remove the baking parchment. Leave to cool for 10 minutes.

Assembly

1. Smooth the lemon curd onto the roulade.
2. Smooth the mousse over the top and scatter with the berries.
3. Keep the meringue on the baking parchment to make rolling it easier.
4. Start at one of the longest edges of the meringue. Fold the edge of the meringue inwards and begin to roll it up like a swiss roll.
5. It will crack and feel like it will never work but use the baking parchment to help you roll it and be gentle (ish) with your touch get the parchment to do the work.
6. It may not look brilliant at this point and the filling is likely to squirt out but you can lick the work surface later.
7. Once rolled use the baking parchment to transfer it to a plate (it is quite long so you may wish to cut into two depending on your serving plate size). If you wish you can have the joy of removing the baking parchment which is a little like trying to pull out a tablecloth whilst plates are still on it but if it is for family tea – just cut it on the paper and get over the need to be perfect (says the one who did the pulling off of the paper).

Enjoy- love you Mum!