Take a break from the grey and bake


2012 is officially the colour of Grey. Floods and continual grey skies create the perfect reading opportunity for stuck indoors women in their millions to one by one drop like flies and seek comfort in the arms of the infamous Mr Grey. I can’t go anywhere without hearing constantly  ‘I’m spending the night with Christian’, ‘I got the last copy whoop whoop’ and my personal favourite ‘I wrestled the woman in Tesco’s for it and won’    Honestly all this grey has turned my female social media friends into whipping, drooling and silk scarf frenzied sex kittens.  As with all good things Ladies you have to take a break some time or bits start to fall off so walk away from Grey and Greyer, give your racing hearts and imaginations a rest. If you really have a need to tie yourself to things that’s fine just tie yourself to the food mixer or oven door and get it over with. You all have to eat sometime so join me in my top ten round-up of bakes over the year and I hear the naughty chocolate fudge sauce is good if that’s your sort of thing.

Number One – Strawberry Pimms Cake Pop Truffles

Pimms Cake Pops / Truffles

Pimms Cake Pops / Truffles

This is where it all began and I really enjoyed making these and I think at the time that was probably because at the beginning it did not matter if the cake I baked was wonky or imperfect as it got smooshed up with various fillings to create a mouthful of heaven. If you roll cake balls in meringue before dipping them in chocolate you have an Eton mess variation and perfect for when you need something ball shaped that isn’t salty.

Two – The mis-piped naughty meringue snowmen

My piping disaster (keep on reading to see more!)

See these were a bit of a baking disaster and most of you who have spoken to me over the year will have chuckled at these.  I was not the best at piping back then and figured that the little snowmen rather naughty looking tails would go down in the oven.  Hmmm I guess I was wrong with that one however they will star on this year’s Christmas cards!

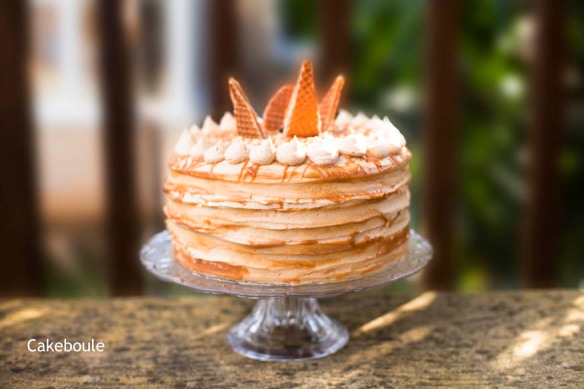
Three – Pay Day Cakes  ‘The Macchiato’

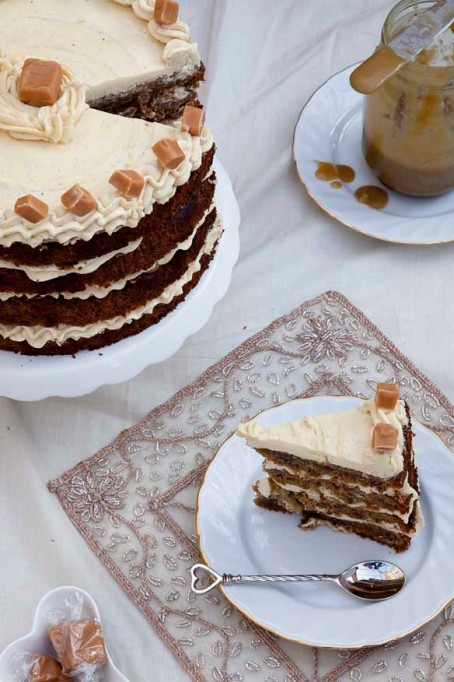
The ‘Pay Day Cake’ idea began in March with the premise that you do not scrimp on ingredients but bake a cake that has four layers in a celebration for each week worked. This one is the Machiatto based on the coffee, vanilla and caramel drink at Starbucks. After this followed Sticky Toffee Pudding Cake, The Turkish Temptress and White Chocolate Mousse cake with a secret berry blast that will keep your admirers wondering how you did it? The final cake so far is triple chocolate mousse cake with chocolate covered strawberries – do I pick the longest names or what? What next a fifty shades of grey cake how would that work?

Sticky Toffee Cake

 FourVanilla Essence (DIY)

Homemade Vanilla Essence

A great gift to you or a baking friend – why not make a few at the same time.

This has to be on the list as it is the one ingredient I use in all of my bakes – simple to make, full of flavour and saves £££ and if you add lemonade to a shot of it you have a vanilla vodka spritzer – love the dual purpose nature! Comes with a humourous tale of baking meltdowns.

FiveMojito inspired Polenta Cake

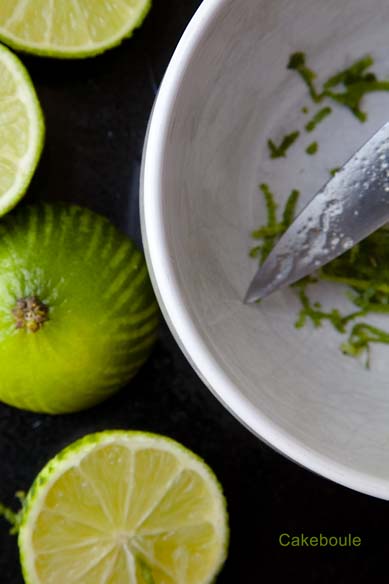
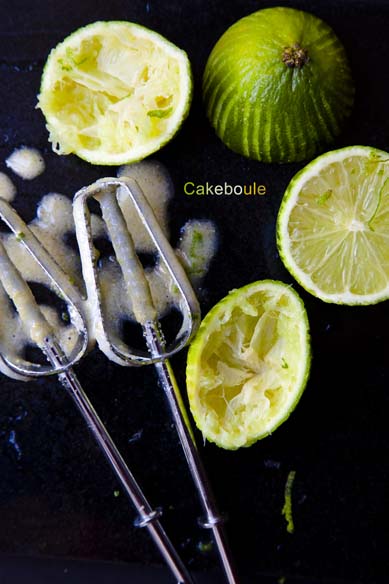
Mojito polenta cake

Polenta cake – this is a dairy and gluten-free option you know you will be safe most places you need to take cake. Moist, tangy, easy to make and very portable with no fussy icing to worry about – bake it and job done and if you like it try the lemon and berry version.

SixJammie Dodger CheesecakesJammie Dodger Cheesecake

Perfect little pick me up with a creamy cheesecake, jamminess and biscuit all rolled into one. You would think a soft biscuit base wouldn’t work but it really does and cute too.  Comes with a tale about synchronicity.

Seven – Raspberry Bakewell Cake

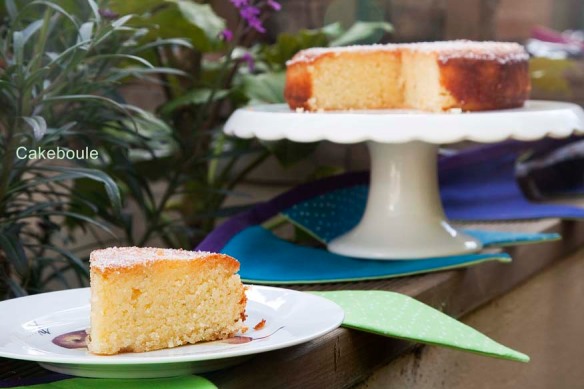
Raspberry Bakewell Cake

Another dairy and gluten free cake (but you would never know) that is just as good as a Bakewell tart but far less hassle. I have a love of simple loaf cakes and my top tip is buy cake liners for your tins to save time from fiddly lining with baking paper. Why not try out Left over Banana, honeycomb and chocolate or Lemon and Blueberry.

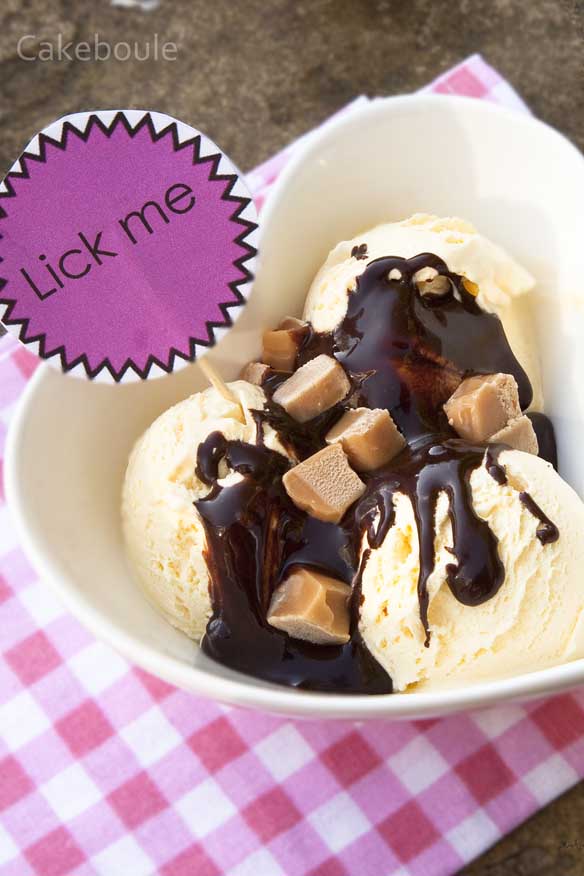
EightNaughty Chocolate Fudge Sauce

Just perfect for pouring over ice-cream sundaes, traybakes, puddings or whatever else takes your fancy but I don’t want to know about it thank you very much. Keeps in a jar in the fridge and then just heat and pour over your choosen dessert or body parts includes cute labels as well so you can give it as a gift but please don’t tie the labels to body parts as that would just be wrong.

Nine – Palmiers, Berries and Macaron Ice-Cream

Juicy berry Palmiers with ice-cream oozing with berries and crushed macarons which is the perfect use for them if they have gone hideously wrong as mine do. Accompanied by a funny story of blackberry picking disasters and walking like John Wayne but without needing Mr Grey to do that for me.

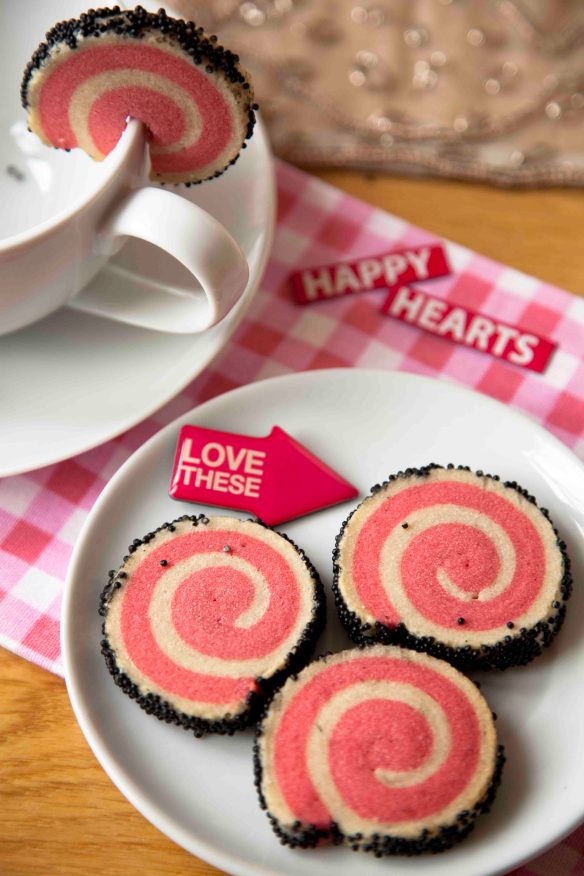
TenSprinkle Spiral Cookies

Made for Valentines day with love and such fun to hang on the side of cups (if you cleverly cut them as soon as you take them out of the oven before they begin to harden. Any colour or flavour would work with these and they freeze well so you can make ahead and bake when needed. I keep a frozen cookie roll in my freezer which also serves as a back up weapon to ward off any intruders. Please don’t get any ideas of putting cookie rolls anywhere they shouldn’t go as that would be a hard one to explain at the NHS walk in centre.

Hope you enjoyed my round-up and here’s to more bakes ahead. As for Mr Gey I’m avoiding you for the moment as my kitchen is my own version of a ‘red room of pain’ where I’m often found weeping in dispair, involunatrily tied up in piping bags or yelling with sheer baked ecstacy all without having read the trilogy.  Apparently there is expected to be a 50 shades baby boom which will lead to some interesting questions for those parents in the next decade.  I can imagine their conversations now, ‘Mum, how was I concieved?’ and the reply ‘Well Your Dad tied me to the Kitchenaid and I spanked him with the beater attachment whilst balancing a cupcake on my head’ oh dear Mr Grey what you got us into?

Thanks to all who have supported me, commented, followed and the extra pounds my close friends and family have endured so far in my little journey. What was your favourite?

Love to all x Up next gooey popcorn bars traybake

Mojito Inspired Polenta Cake (Gluten and Dairy Free)


Mojito Gluten and Dairy Free Polenta Cake

IWhen I baked the lemon and berry polenta cake I promised I would be back to bake another one and here I am. Once again this was not a planned cake but one that just sort of happened. You would never guess this cake is both gluten and dairy free as like my last post of Raspberry Bakewell cake as it is light and moist.

Mojito poelnta cake

Juicy limes meet spiced rum in this gluten and dairy free cake and it’s all mine I tell you. Concoted with the last remenants of spiced rum so that my husband and I could not argue over who got the last tipple and some little limes I randomly ordered (as you do). I choose to miss out the mint in this cake as I’m not a big mint lover. I am sure someone somewhere will tell me that ‘technically it’s not a mojito cake then’. Fair enough, add a sprig of mint for decoration on the top and get over it I say as life is too short! This cake keeps beautifully and the depth of flavour increases over a few days as the rum truly soaks into the moist cake.

Mojito Polenta Cake
Life’s little coincidences

The voice of synchronicity is still going strong last weekend my Husband and my mobile phones both signalled a message at 08.30. Thinking that someone must have sent us both the same message I thought no more of it and went back to sleep. It turned out the messages were both from different people (who do not know each other) and one message was to sadly tell us of a death and the other a birth. A true reminder that life’s never-ending cycle is certainly evident. So I got up and baked this cake and pondered for a while.

Mojito polenta cake

Coincidence Number 2

Whilst still pondering I posted a picture of this cake using instagram. Later that day one of my followers on twitter spotted it and asked me kindly for the recipe for her next Clandestine Cake Club meeting. I thought she may live somewhere in the South so I asked where it was out of curiosity. It turned out that that we both live the same town. I mean what are the odds of that out of all the invisible people on twitter? She also kindly asked me if I would like to go and offered me a lift. So perhaps I am destined to actually go to a cake club after all?

Mojito polenta cake

Whatever conicidences happen ahead and I know they will I’d just like the universere to know that I’m ready, armed with cake and I have a 1950’s Kenwood stand mixer on stand by just waiting to soothe any trouble.

Mojito Polenta Cake

Recipe (adapted from Doves Farm)

120g sunflower oil
150g caster sugar
3 eggs (room temperature)
75g ground almonds
1/s tsp gluten-free baking powder
2 limes – grated rind and juice
75g Polenta (quick cook fine grain variety)
50g granulated sugar ( for the sugar syrup) and a tad more for sprinkling
40ml of spiced rum (20 ml for the cake and 20ml for the sugar syrup)

Instructions

1. Preheat oven to 170°C/Fan150°/325°F/Gas 3
2. Grease a 18cm/7”cake tin and line with baking parchment or greaseproof.
3. Beat oil, eggs and sugar together for 3 mins
4. Mix in the ground almonds and baking powder until fully combined.
5. Stir in all grated lime rind and juice of one lime – reserve the rest for the sugar syrup.
6. Add 20ml of spiced rum
7. Stir in the polenta.
8. Spoon mixture into cake tin.
9. Bake for approx 40/45 minutes on the middle shelf
10. Allow to cool in the tin.
11. Add the juice of the remaining lime into a saucepan with 50g sugar and 20ml of spiced rum.
12. Boil gently, stirring regularly, for 5 minutes to form a thick syrup.
13. Make holes in the cake with the cake tester or a skewer and pour syrup over the cake
14. Allow to cool before removing from the tin. Sprinkle the top of the cake with sugar and finish with a sprig of mint if you wish!

Storage

This cake is very moist and will last in an airtight container for up to 5 days. You might also like my Lemon and berry polenta cake. or wish to read more about gluten free baking.

Props: Rainbow bunting (Folksy £20), Cake stand – Wilkinsons £8 and heart band made with paint cards (free from DIY stores) punched with a heart shaped punch and stapled onto ribbon.

Enjoy!

Turkish Delight Layer Cake (Gluten Free)


A 60th Birthday is the excuse for this month’s pay day cake and this is the 3rd so far in my pay day cake quest.  If you missed the espresso hit ‘Macchiato’ and the moist gluten free ‘Sticky toffee pudding’ layer cake then do take a look.  This cake is for a man who is enchanted by the lure of eastern promise. So it had to be a turkish delight and chocolate cake just like his favourite bar.  I know this is not going to be everyone’s favourite but you can always choose not to use the rose in the buttercream and have a chocolate and vanilla layer cake instead.

Turkisjh Delight Layer Cake

So I set to work with my usual staple of four layers of cake – this time using a moist and dark chocolate cake.  This cake never fails me and I do believe if it is not broke don’t fix it. Ganache however is a whole new ball game for me and it was most defiantly a challenge.

Turkish Delight Layer Cake

A vibrant pink rose flavoured buttercream sandwiched the layers together.  Rich dark ganache held it all snuggly together and turkish delight adorned the top of the cake like glistening jewels.  Ok, I admit I did get glitter happy but it is a birthday cake and all birthday cakes deserve a bit of sparkle I think.  I think Edmund from the ‘Lion, the Witch and the Wardrobe’ would have worn this cake as a crown if the White Witch would have given it to him.

Luckily I did not have to belly dance or go as a sultry lady to give him the cake (phew!).  Like magic the cake vanished so quickly his wife had to rescue a piece for him and hide at the back of the fridge. I let out a huge sigh of relief that not only had I made it, got there in one piece and was devoured.

Rich dark chocolate cake
150g dark chocolate chopped into tiny pieces
200ml milk
450g light brown sugar
150g salted butter at room temperature
4 eggs at room temperature
300g plain flour
3 tsp cocoa powder
1 tsp baking powder
1 tsp bicarbonate of soda

To make gluten-free – substitute the flour for gluten-free plain flour – no need to add xanthum gum as this cake is very moist and does not need it. I have baked this chocolate cake gluten-free on a number of occasions and find it works very well.  I am going to try this with with spelt flour next time.  To find out more about gluten-free baking see my top tips here.

Instructions
1. Preheat the oven to 160 C / 140 fan  / Gas 3
2. Line 2 x 20cm cake tins with greaseproof paper
3. Chop up the chocolate into small chunks and place the chocolate, milk and half the sugar into a saucepan
4. Heat until the chocolate is fully melted and remove from the heat
5. Beat the butter and remaining sugar until light and fluffy ( about five minutes)
6. Add the eggs one at a time (adda spoonful of flour if the mixture curdles)
7. Sift the cocoa , flour , baking powder and bicarb into the mixture
8. Mix on a low-speed until fully combined
9. Pour into the tins and bake on the middle shelf for approx 40 minutes
10. Remove from the oven and leave to cool in the tin.

Rose Buttercream
200g softened butter
200g icing sugar
Few drops (to taste) of rose extract – be sparing it is powerful stuff
Drops of pink food colour (optional)

Instructions

1. Beat the butter and icing sugar together until light and fluffy
2. Add the milk (or for richness use condensed milk)
3. Add a few drops of pink food colouring (optional)
4. Add a few drops of rose extract (use sparingly, mix and taste after each drop I would suggest until you get it how you like it)

Ganache
400g dark chocolate (70% cocoa)
400g single cream
Few drops of glucose (optional but makes the chocolate nice and shiny)

Instructions
1. Chop the chocolate into very small chunks
2. Put the cream into a saucepan and bring slowly to the boil and remove from the heat
3. Pour the cream over the chocolate (or add the chocolate to the pan) and let it have about a minute before stirring it to melt the chocolate
4. Set aside to cool

To Assemble the Cake

Cut each cake into two even layers (I use a tape measure to make sure each layer is evenly sized. I don’t have a cake stand that rotates but I do use a revolving cheese board stand but you could also uses a lazy Susan to do the job. Add a dollop of buttercream to the centre of your stand and add your first layer of cake and press down – this will keep your cake in place while you work.

Assembly
1. Spread buttercream across the bottom layer .
2. Add the next cake layer carefully and repeat until all layers are done
3. Do not refrigerate cake as this will cause the ganache to go off too quickly.
4. Using a large palette knife – spread the chocolate ganche around the cake and top with turkish delight. Ganache I found to be a bit more tricky than buttercream (see below)

Chocolate Ganache
One minute it was too warm so was slipping off the cake in gloops of molten chocolate goo. The next minute it seemed to be staying put, spreading well and it was beautiful and glossy.  Then I turned by back for less than a minute and when I returned the ganache had started to harden and that was it – time up!  Luckily for me I still had a bit of ganache left over which I warmed for a few seconds in the microwave just to gloss over any areas I was not happy with.  I think I need a bit more practise with this!

Enjoy!

Up Next: Jammie Dodger Cheesecakes.

7 tips for Gluten Free Baking (GF)


So you have been nominated to make a cake for a gathering and then someone says to you ‘hey can you make it gluten free?’.  You get sweaty just thinking about it, I mean gluten free – what is that?  You wonder how you are going to create a cake without flour but somehow find yourself nodding at the same time – well it is rude to say no.  If gluten free baking is something you have not done before you know that hours of internet research is ahead of you .  Where do you even start? Well you read on and find out…

Understand what Coeliac is (taken from coeliac website)

“Coeliac disease (pronounced see-liac, spelt celiac disease in other countries) is an autoimmune disease. Gluten, which is found in wheat, barley and rye triggers an immune reaction in people with coeliac disease. This means that eating gluten damages the lining of the small intestine. Other parts of the body may be affected.”

It is very limiting to be on a gluten free diet especially when out socialising as you have no control over what has gone into the food and eveything can potenitally be the gluten devil.  Wheat free is generally a food intolerance but coeliac (gluten free) is an autoimmune disease.  Do not think that a person who is Coeliac (GF) will eat be OK eating a bit of gluten every now that they might be a bit ill but they’ll be alright.  Gluten can have a very damaging effect on their intenstines in the long term and cause complications such as infertility, osteoporosis and bowel cancer.  Once diagnosed like an alcoholic they have to avoid gluten for life as this is the only way to control it and even one bit of gluten can upset the stomach and intenstines for day and out them back to square one.

My Top Gluten Free Bakes

I was recently invited to attend an overdue gathering of friends when I got that request for gluten free cake so I set to work to meet the challenge so nobody felt they were missing out.

1. Firstly I started with toffee crisp bars.  These always work well , requitre little effort and everyone lovesthem.  Do check the ingredients of the toffee and marshmallows (made from corn) you buy. If you wnat to cover them in chocolate you will need a gluten free chocolate. Most chocolate is GF (good ones) but some do use it- Nestle chocolate is GF where as Cadburys has been reclassified as having a very low gluten content. I made the toffee crips as a tray bake in a 20cm tin rather than moulds like below for speed. Final tip on that – use a wet wooden spoon to press it down into the tin!

2. A rather dodgy looking but yummy chocolate cherry cola cupcakes was made by my Son and Husband. Note: Cola and GF flour do not like each other!

3. I made fruit alternative as the choclate base was already covered with a zesty lemon polenta cake with fresh berries to satisfy all tastebuds. Polenta is a GF grain and this is more of a dessert cake with a satisfying texture that I really enjoyed.

4. My naughty hot chocolate fudge sauce is also gluten free and we poured it over vanilla ice cream again watch out fo rice -cream but there are some very gluten free varities and I swear by Swedish Glace which I know Saisnbury does stock as it is delicious. When using cocoa in a recipe as always with gluten free baking be vigilant check as it can contain cereals and starch which are a no no.  I use Green and Blacks 70% Cocoa which is GF. Nestle also offer GF cocoa and hot chocolate powders that you can use and are easy to get.

I can tell you now it is worth the effort as anyone on a strict GF diet will love you forever if you make them cake as some varieties in supermarkets are not always that nice and can be very expensive.  To help you understand more here are some general guides as to what coeliacs can and can’t eat. There are many other recipes out there that involve alternative flours but if you are not following a GF diet here are my top tips to adapt a favourite recipe you already have:

1. Use 1 tsp of xantham gum in cakes stops them from being too crumbly in texture which is notorious in gluten free cakes especially ones that don’t have lot’s of moisture in them e.g victoria sponge.

2. Gluten free cakes can be quite dry so don’t be afraid to add extra moisture. Into a 20cm cake I will normally add an extra 1 – 2 tbs of milk, water or fruit juice (depending on the flavour of cake).

3. Subsitute any ordinary wheat / gluten based flour with a gluten free flour alternative these are available in plain and self-raising. In my own experience Doves farm is my favourite but there are others. You can easily adapt the same recipe you love this way.

4. For fail safe baking and first attempts – go for moister cakes like carrot, coffee or fruit as in my expereience they tend to work better and will not have that gluten free taste twang that you can sometimes get with a vanilla sponge.

5. Check your baking powder is gluten free – I only use this type anyway so that I do not get the wrong one by accident.

6. Icing sugar (by Silver Spoon) is gluten free so you can still use this to make buttercream icing.

7. Watch out for starch (check what sort it is – potato is OK but see tip 7). Corn is OK, wheat must be avoided and oats are ad odd one.  Manufacturers seem to process oat goods in the same spaces as wheat ones therefore cross-contaminating them so my advice is if it it does not clearly state gluten free then don’t use it. If in doubt check the manufacturers website but for the best list of ingredients to avoid click here – once you see the list you will soon start to realise just how limiting a GF diet is and how they sneak naughty gluten into most our food.

Make someone’s day who is GF and bake them a cake.

Hope that helps so you never have to sweat again 🙂

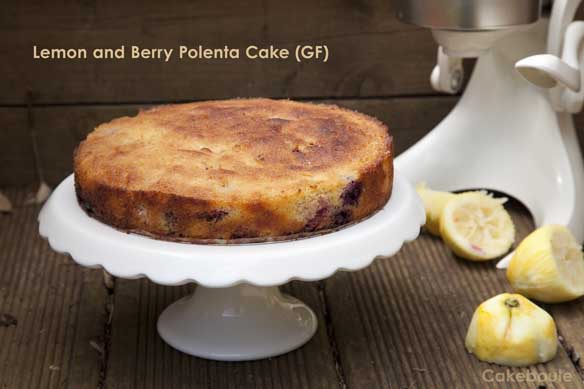
Lemon and Berry Polenta Cake (Gluten Free)


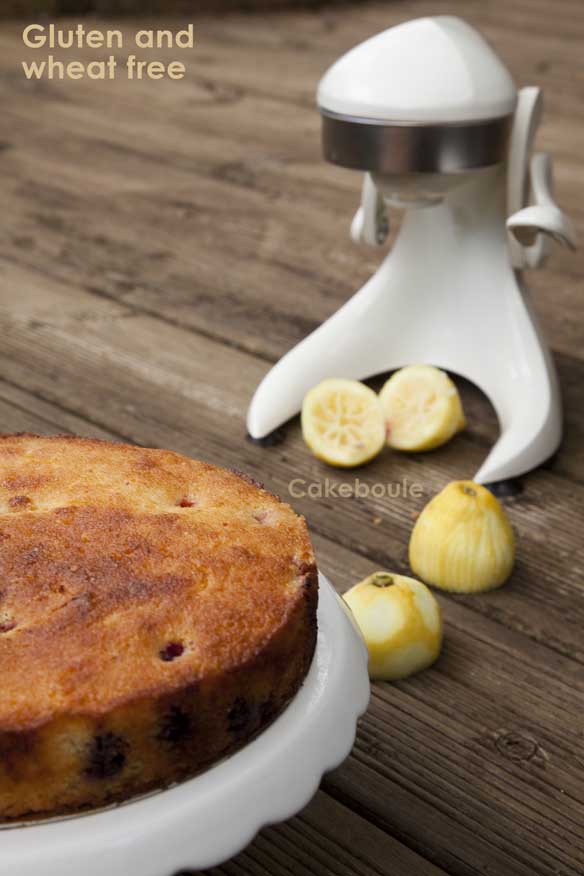
Zesty, lemon sugar syrup the slight crunch of polenta coupled with juicy berries gives a refreshingly different dessert cake.  Serve with oodles more berries and cream and you have yourself a mighty fine pudding. This cake uses fine grained polenta (quick cook) which as an added bonus makes it a gluten-free cake so you get all the taste but without the gluten gunk.  I have not said I love you to a cake yet but this is a surprising contender and definitely on my bake again list.

Four lemons go into the cake and the juice – yes four of them!  So expect a citrus hit which is great as I love lemons but it is not too sour just right in my opinion.  In my tutor group leavers speech I told them ‘If life gives you free lemons – say hey – free lemons!’ OK so they did not get my meaning either but maybe one day they will realise that free lemons = great cake. Nom nom.

I added berries for more flavour and texture.  Yes I admit they were frozen ones as we are not quite in strawberry and blueberry season yet but don’t knock frozen fruit as it tastes better than some of the out of season water filled varieties.

Do you know why I like this cake so much? 

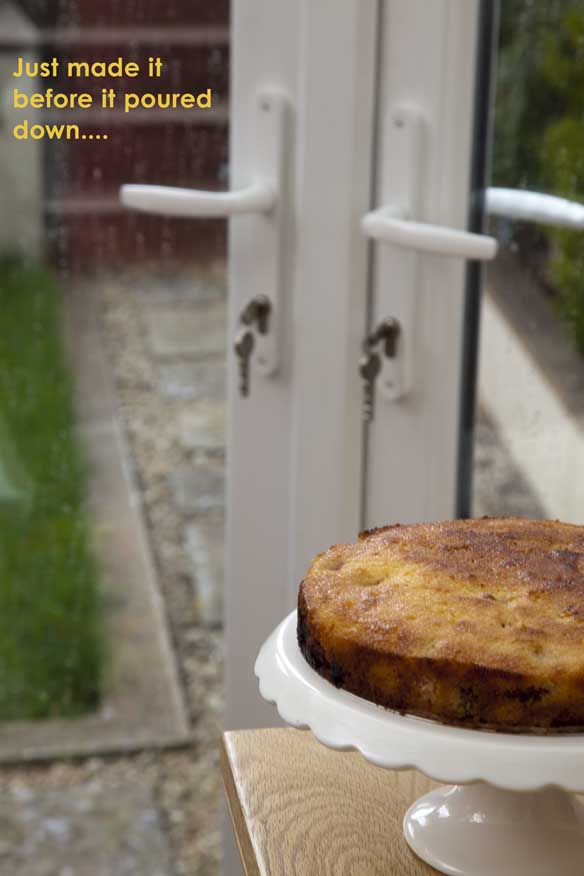
Quite simply it was quick to make, simple, tasted great and when I went to take the photographs it was about to rain as the dark grey clouds were gathering.  This meant instead of spending countless hours getting the pictures right to fulfil the perfectionist streak in me I was challenged to just shoot the images as it was.  I love the pictures  and just like the cake they were no fuss but a great result.  Finally something that required not much effort!

Lemon Berry Polenta Cake

I took this cake as part of a set of gluten-free goodies to a university reunion and it was very happily received so I promised my newly diagnosed coeliac friend that I would do a post on gluten-free baking – more on that to follow.

What surprised me the most about our PGCE gathering (teaching qualification) was that I am the only person still in teaching!  What does that say about the profession I wonder?  Also on a sadder note apparently I am only a quarter of the bubbly person I used to be perhaps that is the result of still being in teaching I wonder.  Cue mid-life crisis….

Recipe (adapted from Doves Farm)

150g soft room temperature butter
150g caster sugar
3 eggs (room temperature)
75g ground almonds
1/s tsp gluten-free baking powder
4 lemons – grated rind and juice
75g Polenta (quick cook fine grain variety)
50g granulated sugar ( for the sugar syrup)
200g berries of your choice

Instructions

1. Preheat oven to 170°C/Fan150°/325°F/Gas 3
2. Grease a 20cm/8”cake tin and line with baking parchment or greaseproof.
3. Beat butter and 150g sugar together until pale and light(about 5 mins).
4. Beat in eggs, one at a time.
5. Mix in the ground almonds and baking powder until fully combined.
6. Stir in all the grated lemon rind and juice of two lemons – reserve the rest for the sugar syrup.
7. Stir in the polenta and then the berries.
8. Spoon mixture into cake tin.
9. Bake for approx 40/45 minutes on the middle shelf
10. Allow to cool in the tin.
11. Add the juice of the remaining 2 lemons into a saucepan with 50g sugar.
12. Boil gently, stirring regularly, for 5 minutes to form a thick syrup.
13. Make holes in the cake with the cake tester or a skewer and pour syrup over the cake
14. Allow to cool before removing from the tin.

Storage

This cake is very moist and will last in an airtight container for up to 3 days.  Generally gluten free cakes do not last as long as regular cakes – so more excuse to get one and eat it!

Enjoy!   Coming up next – 7 tips on gluten free baking and the turkish temptress layer cake (pay day cake 3!)

Hot Chocolate Fudge Sauce (Gluten Free)


So Easter is over and no longer will we have to endure cute bunnies and eggs taking over the blog World.   If you want to use up your left over Easter eggs then try this  recipe for naughty hot chocolate fudge sauce which is perfect accompaniment to an ice-cream sundae and you can use up any left over easter eggs either in the sauce of by scattering them on top.

This sauce so my family tells me is rich, fudgy and as my son says ‘delish’.  It only took 20 minutes to make and would make a great gift coupled with a small bag of chocolate or fudge to give the gift of a Sundae.  A number of friends have told me I should go on Dragon’s Den with this recipe or sell it to Ann Summers for lickable body paint but I think not.  Of course what you do with the sauce in your own home is up to you.

You are probably wondering why I have not tried any of this sundae if it is so delicious?  Well,  milk and I do not see eye to eye.  In a chemical warfare battle between my stomach and ice-cream – the frozen stuff wins and it is just not worth it.  It was so hard to take these photographs and not lick the spoon or the bowl as I love ice-cream but it would have reaped its revenge on me.  Luckily I enjoyed watching my boys and the surrogate one (Ron) lick their spoons with glee so that made up for it.

The sauce will keep in the fridge for a few weeks (or more) if you use a sealed jar (e.g Kilner or Mason). To use the sauce just scoop the sauce you need into a bowl and heat in a pan or in the microwave for about 30 seconds on medium until it comes back to pouring consistency. I have included the jar label files (scroll down) so you can decorate your jars and make them look all pretty. Just print them out and glue them on I only used a glue stick as they are not going to stay on very long. I have included photoshop editing compatibility on the pdf for those who wish to edit and change the wording or colours – my gift to you.

You could also use the sauce on a cake between the layers for a chocolate fudge experience and heat it up and serve it with ice cream mmmmm.

The Geeky Hunt

I set my family an Easter Egg hunt where for each egg found they were given a binary number as I still on a binary kick (read chocolate & binary – trust me it is the best learning combination).  I can’t say they were initially thrilled at the idea as it required effort but no pain no gain I say and after all Mummy had been to Hotel Chocolat and therefore extra effort to gain these gifts were required.  Once they had worked out the decimal from the binary code (one per egg found)  they had to match the number to the letter in the alphabet (e.g 1 = A, 2 = B) then they had to put the letters in the right order to find out the location of their egg.  Ha ha I loved watching them try to figure it out 🙂 and I am so doing it again next year.

Ingredients (Hot Chocolate Fudge Sauce adapted from BBC Good Food)

To make this gluten or wheat free – use Green and Blacks Cocoa or Nestle – or check the manufacturers label. For more tips see my post – 7 tips for gluten free baking.
200g granulated sugar
140g vanilla sugar or use caster sugar and 1 tsp vanilla extract or 1 vanilla pod (seeds)
85g dark muscavado sugar
1/2 tsp espresso powder
100g cocoa (I use green and blacks)
30g cornflour
1 tin (410g) of evaporated milk
250ml water
50g butter cut into small cubes
2 tsp of vanilla extract (add at the end of cooking)

Instructions
1. Place all the ingredients into a large pan over a medium heat and stir constantly until you reach boiling point (approx 10 – 15 mins).
2. Continue cooking for a further 5 mins and the sauce will begin to thicken. Depending on how you like your sauce (thick or slightly runny) take it off the heat when you are happy with the pouring consistency. Add the vanilla essence.
3. If you are not using the sauce straight away you can pour into sterilised jars and add pretty labels.

The PDF labels (I have not done this before so please do not yell at me if this does not work!) I believe all you need to do is click on the link to open the file and then right click to save it (you will need a pdf reader).

PrintablesSml

6 steps to Toffee Crispie Heaven (Gluten Free)


Last week (before I got sick and no these were not the cause!) I needed a quick lunch box filler that would cheer up a dreary Monday and these little cripsy bites definitely hit the sticky toffee spot.  I know we all have done rice cripy cakes but these are by far the best I have found and baking does not always have to be labour intensive.  When I offered them to people at first they just looked intrigued and then nibbled the top followed by:

‘?@??@??” echoes the expletives through the room and then silence as they paused to eye up the next bite with the same zeal found in a jelly baby head biter.

‘@@##?? they’re good!’ the muffled sound that tries to come out through stuck together toffee teeth. Random bits of rice cripsy fly in all directions and I take cover.

‘nom nom nom’ teeth nashing sounds make me wince as I pray they are not going to bite their fingers by accident.

When fingers become disguised
I think this is because I have had one too many finger biting incidents.  This is where my finger takes on a chameleon appearance cunningly camouflaging itself as something tasty but suddenly returning to its normal pink fingerish self but with the addition of pulsating teeth marks.  I scream out ‘oowwwww’ and shake my hand around desperately as if it will shake the teeth marks out and then I blow on it event though it’s not burnt>  Yes I know it is not going to make it better but it at least I am in control again and not the stupid ‘bit my own finger idiot’.  I wonder if this is why there is a lone wandering hand in the Addams Family as someone got a bit over zealous with a toffee crisp and bit the entire thing off either that or I have been scarred for life by my Dad’s favourite tea time program of which I can still hum the theme tune (thanks Dad as I know you are reading this x).

These treat size bites remind me of toffee crisp bars we used to get years ago and I loved them but nobody seems to do them anymore but now I can have them anytime I want (mwoahhhh ha ha ha – sorry been stuck in bed for days bit excited to be finally up).

These use only 6 ingredients and take six little steps to make and who knew wine glasses could come in in so handy for measuring!  All you need is baking love: butter, rice crispies / pops,  marshmallows, toffee and milk and then you are in chewy toffee heaven. They are moist, sticky and full of marshmallowy toffee which loves to attach its self to your teeth but this my family tells me is an added bonus as it allows them to savour the taste again later without gettng caught eating in class – personally I think one more tablespoon of milk would sort that out.

This is now one of my firm favourites for lunch boxes or anytime I need to get sworn at or dodge rice cripie missiles followed by silence.  I dipped the base in melted Toblerone and drizzled the top with chocolate.  You don’t need expensive ingredients I used the basic / value range of everything except the Toblerone (leftover from Christmas) so these really are a frugal baking thrill.

I found the original recipe here from the Nigella website posted by Lindz and adapted it only slightly:  If you do want to make them gluten free do check the ingredients on your toffees and marshmallows and use nestle chocolate instead as this is gluten free.

Ingredients

250g Toffees (Sainsbury’s Basics)
50g Butter (room temperature)
3 tbsp of milk
1 tbsp of golden syrup
115g Marshmallows
175g Rice Crispies or similar cereal

Instructions

1. Brush your desired tin or mould with baking spray or oil and wipe with a kitchen towel to make sure it is not too oily.  If you use silicone moulds always brush them lightly with cake release spray and then wipe off the excess with a kitchen towel even for cakes, choclates etc then your crispy treats will fly out of the moulds unlike one born every minute.
2. Add toffee, golden syrup, butter and milk into a saucepan and heat gently.  Stir the mixture as it heats until all the ingredients have melted.
3. Add marshmallows and stir until they have melted.

4. Add the cereal to the pan and make sure it is all well coated with the toffee mixture

5. Pour quickly into the tin or mould and level (it will stick to everything in my experience leaving wispy marshmallow strands everywhere)

6. Leave to set (about an hour) and drizzle with what ever chocolate you fancy but they are just as nice without too. Cut into sizes required and eat (one is not enough) they will keep for about 5 days if they get that long in an air tight container.

Ultimate Gourmet Vanilla and Honeycomb Cheesecake


Vanilla and honeycomb cheesecake with an oreo layer drizzled with toffee fudge sauce wrapped in chocolate - come to Mummy.

This cheesecake was a creation of mine one Saturday afternoon as I was so excited to finally get my new moulds in the post (click here for where I brought mine).  I wanted to create better than sex individual cheesecakes crammed full of creamy baked cheesecake, crunchy shards of honeycom with a hidden velvety dark rich Oreo biscuit crumb layer and of course the whole thing had to be cased inside chocolate so that no plate or spoon would be needed for upcoming party gatherings (or in front of the telly!).  If you omit the biscuit layer you also have a gluten free dessert (useful as my Mum is coeliac). 

That afternoon my take on a portable posh cheesecake dessert did take a little bit of effort but it is was so worth every second spent.  When my husband I tested these I said to him ‘I only want a spoonful’ ( I am a complete control freak) and he nodded returnig his gaze to the TV as usual.  The next time he looked the entire cheesecake had disappeared and I was sat innocently licking my fingers and if I was a cat I would be purring  I hadn’t even realised I had ate it all until I got a disgusted look from him – oops! The only thing in  my mind that made it better was that technically it was his portion that meant the calories were his too (bonus).
 
 
I drizzled toffee fudge sauce (shop brought I am afraid – Sainsburys) over the top and garnished with chocolate shavings for the photographs.

If you have made it this far without licking your screen – well done!  I guess you want to know how it was created?  Are you sure – take another look….

 Cheesecake
1 x baked cheesecake (I used Jamie Oliver’s recipe and omitted the biscuit base)
1 x silicon mould (I also made other shapes using different moulds)
 
For biscuit layer
70g  / 6 Oreo biscuits or use bourbon (biscuits not alcohol) if on a budget  ( you can eat the rest with a good cup of coffee)
15g (approx) melted butter
 
For coating
200g melted chocolate (I used milk but you could use plain or white)
Honeycomb approx 30g (or a crunchie bar with bits taken off for testing its quality)
 
Honeycomb Tips

Stop cooking when it gets to this colour!

I used Lorraine Pascale’s recipe for the honeycomb although I would not cook it for as long as she says I would use about 4 mins next time see the picure opposite for the ideal colour.  Final tip for bloggers don’t try to take a picture of honeycomb with flash when it is mixed with the bicarb as it kills it which is an amazing sight as what was once going upwards suddenly has the life sucked from it and it changes to a dark brown which means you have to make it again. Nobody tells you that in the baking books but then there are only a few sad people around like me that take pictures of their baking.  If you do make your own honeycomb it will store for a few weeks in an airtight container and can be sprinkled over ice cream or I added some to Rocky Road for a cake sale which was a divine addition and it never made it to the sale as it sold out before.
 
Instructions
1. Leave the baked cheesecake overnight to chill in the fridge (resisit tempatation to poke it).
2. Bash the honeycomb into pieces in a bag with a rolling pin (great stress reliever).
3. Melt 140g of the chocolate ( you will need approx 1/3 for the base)
4. Brush melted chocolate on the inside of the moulds until they are covered fully with chocolate  – examine them under the light as there should be no holes (or the cheesecake will ooze out later).
5. Sprinkle some of the honeycomb in the bottom of the mould and drizzle over a bit of chocolate to seal it in.


6. Put mould in freezer or fridge for approx 5 – 10 mins until the chocolate has set
8. In a bowl add approx 14 tbsp (ish) of baked cheesecake then add honeycomb shards (leaving some to sprinkle at the base) and mix together to combine.
9. Melt the butter for the biscuit layer in the microwave or in a saucepan.
10.  Use a food processor to blitz the biscuits until they are a breadcrumb consistency (or you can bash them in a bag).
11. Add the melted butter to the biscuits and stir to combine (it should be like wet sand that is black – think Weston Super Mud Mare)
12.  Time to layer the fillings.  Add 1 generous tsp of cheesecake and pat it down gently (having a deja vu moment)  to level it out with the end of a damp wooden spoon (measurements are only rough as it will depend on the size of the mold you use) aim to have filled it 1/3 of the way with cheesecake.  Follow this by 1 generous tsp of biscuit mixture (pat it down) and 1 tsp of cheesecake (yes you guessed it – pat it down) leaving room for about 3 mm of chocolate to seal the base.  At this stage you could add a little bit of toffee fudge sauce but then the easy to eat portable cheesecake will become a finger licking and caramel dribbling down your chin experience.


13. Sprinkle some honeycomb shards to each mould before melting the rest of the chocolate and with a spoon pour in about 3mm of chocolate on the bottom taking care to ensure the chocolate covers the entire base of the mold – don’t worry if you go over and around the mould as you can break off these bits and eat them later.
  
14.  Place the moulds in the fridge to set the chocolate and once the chocolate is set (approx 15 mins) you can pop each one out carefully onto a plate and serve. Personally I put mine in the freezer so I can use them at Christmas and New Year and once frozen I placed them in a tupperware box to keep them from being knocked.  I went round the edges with a knife to neaten them as well. 
15. To defrost take them out of the freezer and place in the fridge as this helps stop the chocolate from cracking from too quick a temperature change do this a few hours before they are needed.  If desperate or for emergency purposes break the tupperware open and eat them straight from the freezer as they are like a cheesecake ice-cream (yum) just make sure to wipe that chin of tell tale signs.


You can create endless variations and I also made some raspberry cheesecake truffles (post to follow) and some chocolate covered cheesecake hearts (post to follow) for a certain day in February as I am all for plan ahead.  Finally eat any left overs (as if you needed to be told that) and put your feet up knowing that this posh portable dessert is just sat there smugly in the freezer waiting to come to Mummy
 
Enjoy x


Toffee fudge meringue

Image


20111028-172418.jpg

Meringue always reminds me of what we would have for my dads birthday each year as he does not really like cake (I know the horror of it!) and his birthday is on Christmas Eve and you know all you are going to get over the next 3 weeks is Christmas cake, Stollen and mince pies so he prefers to have something different.   Meringues are like little pillowy, chewy clouds of air and sugar that melt in your mouth.  This is my first attempt at meringue and I can say I was very pleased with the results. 

They do not take long to make at all if you use a mixer (I  dread to think how long they would take to beat by hand).   I even did the bowl over my head test and the meringue mixture stayed in – thankfully!


Ingredients

4 egg whites
4oz caster sugar
4oz vanilla natural caster sugar ( I use vanilla sugar see my post for more information)
100ml double cream
Toffee Fudge sauce (I used Sainsbury’s)

Instructions

  1. Preheat oven to 130c / gas ½  / 250f or 100c fan oven.
  2. Line 3 baking trays
  3. Place egg whites in a stand mixer or non metallic bowl
  4. Whisk on high speed until the mixture is forming peaks (but not really stiff that they do not move – there will still be some movement in your bowl.  Now would not be a good time to hold it over your head!)
  5. Add sugar 1 tbsp at a time to the egg mixture whilst still mixing on high speed.
  6. Once all the sugar has been added to your mixture it should be forming stiff peaks and is glossy. Now you should be able to turn your bowl upside down and no mixture should come out – put it over your head if you are brave enough!)
  7. Put the meringue mixture into a piping bag with a round 1cm nozzle
  8. Pipe blobs onto lined baking trays to the size you need . I used approx 5cm round.
  9. If you really want perfectly sized ones draw circles on the underside of your greaseproof paper using a plastic milk top or other round object to the size  you want them (no you can’t use dinner plates).
  10. Place in the middle of the oven for 40 mins until they can be lifted off the baking paper easily.
  11. Leave the meringues in the oven to cool if you like mallowy and chewy.  If you don’t like chewy take them out of the oven and leave to cool on the side.

 To serve

  1. Pair up similar sized meringues
  2. Whip 100ml double cream until thick.
    Pipe  cream onto the side of one meringue using a star nozzle
  3. Drizzle toffee fudge sauce over the top (Sainsburys – I take no credit) 
  4. Sandwich a similar sized meringue on the top. Serve and enjoy! 

 Tip: They will start to absorb the moisture from the cream after a few hours so make, serve and eat for best results.

Recipe for Wheat Free Rich Chocolate Cake (pops. balls, truffles, boules)


This is the recipe we used for the wheat free chocolate cake boules base . This orginally came from Peggy Porshen’s book Cake Chic (buy it here). We adapted it as we wanted to make a wheat / free version. This does use normal chocolate which for someone suffering from Coeliac disease may find unsuitable as the manufacturers can not guarantee this chocolate is gluten free. However as long as you use a good quality chocolate this does not usually have any gluten added to it – biut do always cheack the ingredients list. The cake is very moist which is excellent as some wheat free cakes including shop brought ones can be very dry and does not actually taske gluten free! It also freezes very well – which is perfect if you only have one person in the house following a gluten free diet – they can take a slice out of the freezer and within 20 mins it should be defrosted.

Ingredients

150g dark chocolate (we used a 70% cocoa)

200ml milk

450g brown sugar ( we used light muscavado)

150g salted butter softened

4 eggs lightly beaten

300g plain gluten free flour

3 tbsp cocoa powder

1 tsp baking powder (gluten free)

1 tsp bicarbonate of soda

1 x tsp Xanthum gum (this is used as a binder to help prevent the cake form becoming dry which happens with most gluten free baking)

Instructions:

Preheat oven to 160 C (or 150 if using a fan oven like we are)

Line your baking tin – we used about a 20×13 inch

Put chocolate , milk and half the sugar in a saucepan and bring to the boil until all is melted

Beat butter and remaining sugar

Slowly add the eggs

Add sifted flour, cocoa powder and baking powder and bicarbonate of soda to the mixture whilst beating

Start to add the hot mixture slowly into the batter

Once combined – pour into baking tin and place in the oven until cooked (approx 45 mins for us)

Leave to cool then cut into 4 sections

Making Cake Boules

Each section will make approx 12 cake boules – you can freeze the rest until it is needed – saving you precious time in the future.

Break the cooled cake into pieces until it resembles breadcrubs – we use the food processor to do this but hands can work just as well.