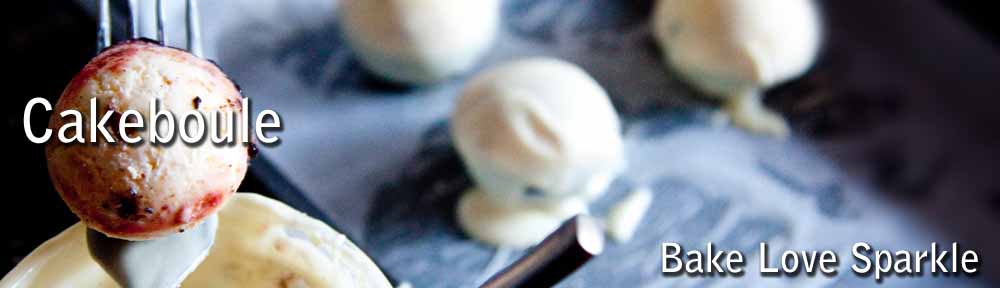
Vanilla and honeycomb cheesecake with an oreo layer drizzled with toffee fudge sauce wrapped in chocolate - come to Mummy.
This cheesecake was a creation of mine one Saturday afternoon as I was so excited to finally get my new moulds in the post (click here for where I brought mine). I wanted to create better than sex individual cheesecakes crammed full of creamy baked cheesecake, crunchy shards of honeycom with a hidden velvety dark rich Oreo biscuit crumb layer and of course the whole thing had to be cased inside chocolate so that no plate or spoon would be needed for upcoming party gatherings (or in front of the telly!). If you omit the biscuit layer you also have a gluten free dessert (useful as my Mum is coeliac).

That afternoon my take on a portable posh cheesecake dessert did take a little bit of effort but it is was so worth every second spent. When my husband I tested these I said to him ‘I only want a spoonful’ ( I am a complete control freak) and he nodded returnig his gaze to the TV as usual. The next time he looked the entire cheesecake had disappeared and I was sat innocently licking my fingers and if I was a cat I would be purring I hadn’t even realised I had ate it all until I got a disgusted look from him – oops! The only thing in my mind that made it better was that technically it was his portion that meant the calories were his too (bonus).
I drizzled toffee fudge sauce (shop brought I am afraid – Sainsburys) over the top and garnished with chocolate shavings for the photographs.
If you have made it this far without licking your screen – well done! I guess you want to know how it was created? Are you sure – take another look….
Cheesecake
1 x baked cheesecake (I used Jamie Oliver’s
recipe and omitted the biscuit base)
1 x silicon mould (I also made other shapes using different moulds)
For biscuit layer
70g / 6 Oreo biscuits or use bourbon (biscuits not alcohol) if on a budget ( you can eat the rest with a good cup of coffee)
15g (approx) melted butter
For coating
200g melted chocolate (I used milk but you could use plain or white)
Honeycomb approx 30g (or a crunchie bar with bits taken off for testing its quality)
Honeycomb Tips

Stop cooking when it gets to this colour!
I used Lorraine Pascale’s
recipe for the honeycomb although I would not cook it for as long as she says I would use about 4 mins next time see the picure opposite for the ideal colour. Final tip for bloggers don’t try to take a picture of honeycomb with flash when it is mixed with the bicarb as it kills it which is an amazing sight as what was once going upwards suddenly has the life sucked from it and it changes to a dark brown which means you have to make it again. Nobody tells you that in the baking books but then there are only a few sad people around like me that take pictures of their baking. If you do make your own honeycomb it will store for a few weeks in an airtight container and can be sprinkled over ice cream or I added some to Rocky Road for a cake sale which was a divine addition and it never made it to the sale as it sold out before.
Instructions
1. Leave the baked cheesecake overnight to chill in the fridge (resisit tempatation to poke it).
2. Bash the honeycomb into pieces in a bag with a rolling pin (great stress reliever).
3. Melt 140g of the chocolate ( you will need approx 1/3 for the base)
4. Brush melted chocolate on the inside of the moulds until they are covered fully with chocolate – examine them under the light as there should be no holes (or the cheesecake will ooze out later).
5. Sprinkle some of the honeycomb in the bottom of the mould and drizzle over a bit of chocolate to seal it in.
6. Put mould in freezer or fridge for approx 5 – 10 mins until the chocolate has set
8. In a bowl add approx 14 tbsp (ish) of baked cheesecake then add honeycomb shards (leaving some to sprinkle at the base) and mix together to combine.
9. Melt the butter for the biscuit layer in the microwave or in a saucepan.
10. Use a food processor to blitz the biscuits until they are a breadcrumb consistency (or you can bash them in a bag).
11. Add the melted butter to the biscuits and stir to combine (it should be like wet sand that is black – think Weston Super Mud Mare)
12. Time to layer the fillings. Add 1 generous tsp of cheesecake and pat it down gently (having a deja vu
moment) to level it out with the end of a damp wooden spoon (measurements are only rough as it will depend on the size of the mold you use) aim to have filled it 1/3 of the way with cheesecake. Follow this by 1 generous tsp of biscuit mixture (pat it down) and 1 tsp of cheesecake (yes you guessed it – pat it down) leaving room for about 3 mm of chocolate to seal the base. At this stage you could add a little bit of toffee fudge sauce but then the easy to eat portable cheesecake will become a finger licking and caramel dribbling down your chin experience.
13. Sprinkle some honeycomb shards to each mould before melting the rest of the chocolate and with a spoon pour in about 3mm of chocolate on the bottom taking care to ensure the chocolate covers the entire base of the mold – don’t worry if you go over and around the mould as you can break off these bits and eat them later.
14. Place the moulds in the fridge to set the chocolate and once the chocolate is set (approx 15 mins) you can pop each one out carefully onto a plate and serve. Personally I put mine in the freezer so I can use them at Christmas and New Year and once frozen I placed them in a tupperware box to keep them from being knocked. I went round the edges with a knife to neaten them as well.
15. To defrost take them out of the freezer and place in the fridge as this helps stop the chocolate from cracking from too quick a temperature change do this a few hours before they are needed. If desperate or for emergency purposes break the tupperware open and eat them straight from the freezer as they are like a cheesecake ice-cream (yum) just make sure to wipe that chin of tell tale signs.
You can create endless variations and I also made some raspberry cheesecake truffles (post to follow) and some chocolate covered cheesecake hearts (post to follow) for a certain day in February as I am all for plan ahead. Finally eat any left overs (as if you needed to be told that) and put your feet up knowing that this posh portable dessert is just sat there smugly in the freezer waiting to come to Mummy
Enjoy x